


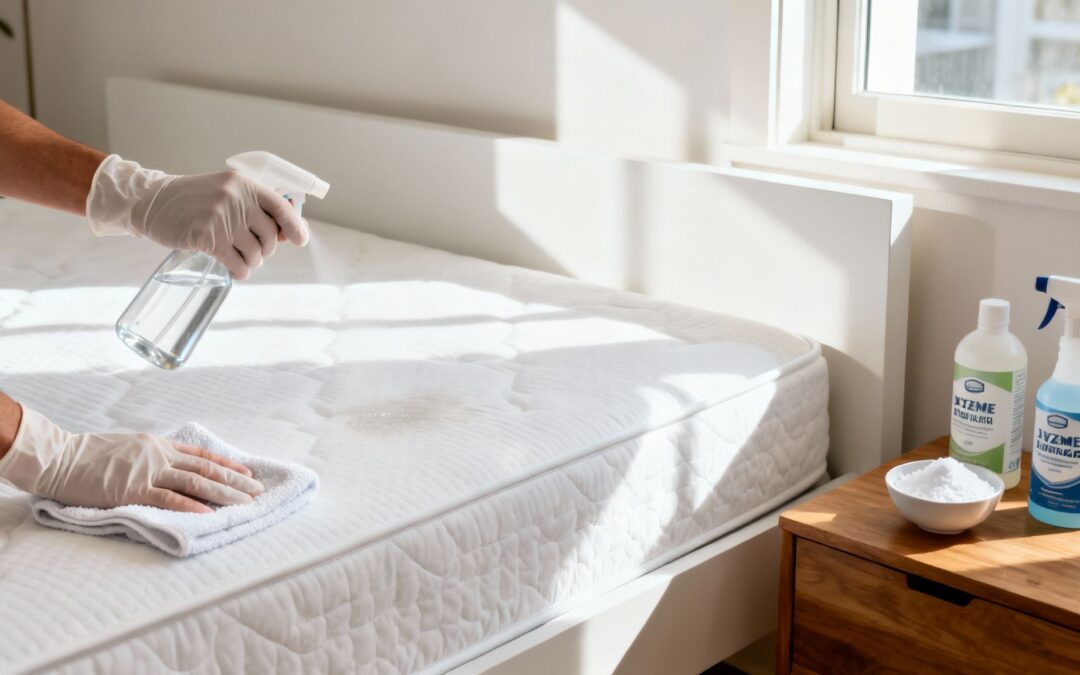
That sinking feeling when you discover a wet spot on the mattress is all too familiar. Whether it’s from a child’s nighttime accident, a pet’s mistake, or an adult incontinence issue, those first few moments are critical. Right now, the goal isn't a deep clean—it's damage control. Acting fast will stop the urine from setting in and becoming a permanent stain and odour problem.
Whatever you do, resist the urge to scrub. Frantically rubbing the spot only pushes the liquid deeper into the mattress layers, making your job ten times harder down the track. Your first move should always be about containing the mess.
Quick Guide Cleaning Fresh vs Dried Urine Stains
Knowing whether you're dealing with a fresh accident or an old, set-in stain changes your game plan entirely. Fresh stains are all about immediate absorption, while dried ones need a more targeted approach to break down the uric acid crystals left behind.
Here’s a quick comparison to help you figure out where to start:
| Action Step | Fresh Urine Stain (Act Immediately) | Dried Urine Stain (Requires Deeper Cleaning) |
|---|---|---|
| Initial Action | Blot with a dry cloth or paper towels to soak up excess liquid. | Identify the stain's location and size. Check for odour. |
| Immediate Need | Absorption is the top priority. | Breaking down set-in uric acid crystals. |
| Key Tools | Dry towels, bicarb soda, vinegar solution. | Enzyme cleaner, vacuum, bicarb soda. |
| Main Goal | Prevent the urine from soaking deeper into the mattress. | Dissolve the stain and neutralise the lingering odour. |
This table shows that your first response is everything. For fresh stains, quick blotting makes all the difference, while older stains require you to switch gears and focus on treatment first.
Blot, Don’t Rub
Grab a handful of paper towels or a clean, dry cloth and press it firmly onto the wet area. This blotting technique is your best friend because it lifts the urine out of the fabric instead of spreading it around.
You’ll probably need to do this a few times with fresh towels, applying firm pressure each time. The more liquid you can absorb right now, the easier the stain and odour removal will be later.
Key Takeaway: Your only job in the first 60 seconds is absorption. The less moisture you leave behind for the cleaning solution to deal with, the better your chances of a full recovery. Avoid any scrubbing motion at all costs.
Your Initial Supplies Checklist
Before you start treating the stain, quickly gather these essentials. Having everything ready to go turns a moment of panic into a methodical plan.
- Dry Cloths or Paper Towels: You'll need plenty for blotting.
- A Spray Bottle: This helps apply your cleaning solution evenly without completely soaking the mattress.
- White Vinegar and Water: A simple but powerful DIY solution that helps break down the uric acid and disinfects the area.
- Bicarb Soda (Baking Soda): A natural deodoriser that’s fantastic for drawing out any leftover moisture.
This handy flowchart helps visualise the first steps, showing whether to start with immediate blotting for a fresh stain or move to inspection for a dried one.
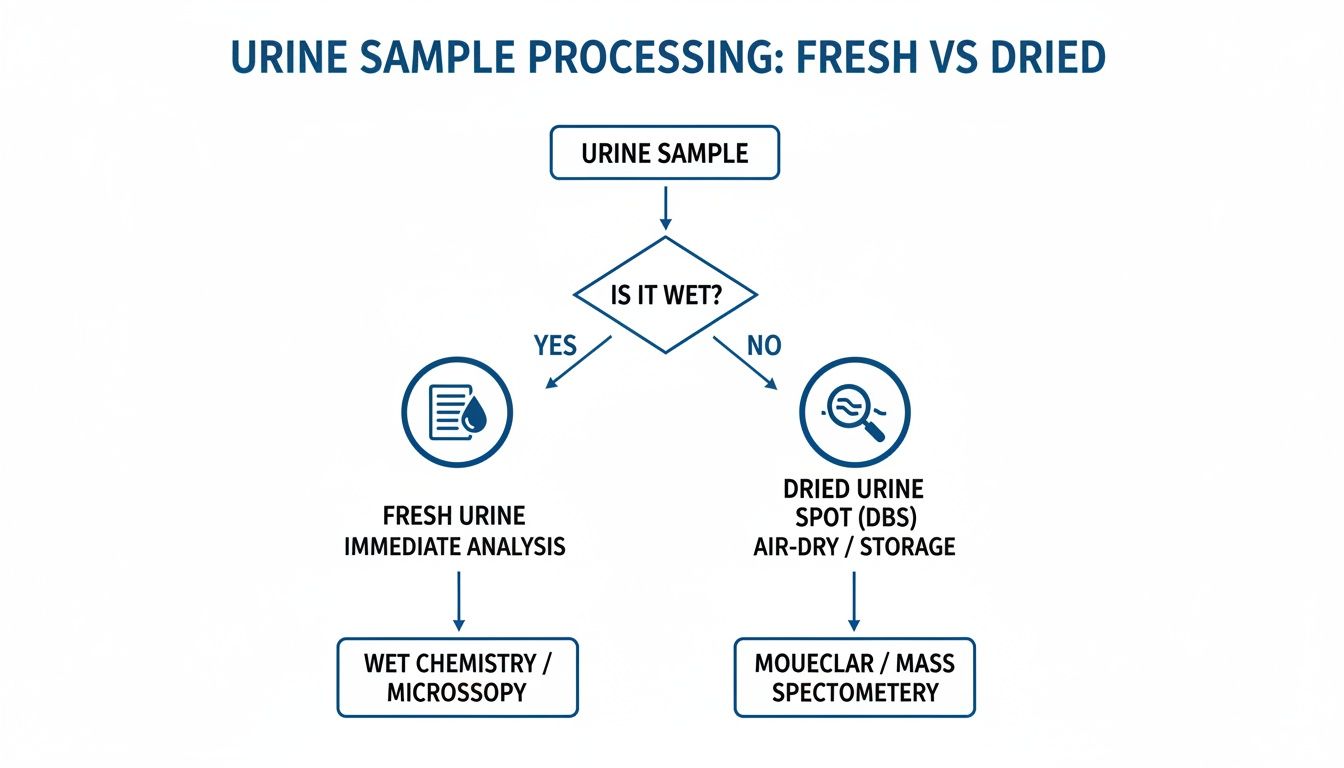
As you can see, the path for wet urine starts with blotting, which highlights just how urgent absorption is. If the stain is already dry, your approach shifts to assessing the damage before you start applying any cleaning treatments.
Building Your DIY Mattress Cleaning Toolkit
When you’re faced with a wet mattress, having the right supplies on hand is the difference between panic and a clear plan of action. Knowing how to clean mattress urine effectively starts with a well-stocked toolkit. This isn't just a shopping list; it’s your arsenal, where each item has a specific job in the battle against stains and odours.
Before you reach for any old household cleaner, it’s vital to understand what you’re up against. That lingering smell from urine comes from uric acid crystals, which don’t dissolve in water. This is exactly why simply dabbing the area with a wet cloth never seems to solve the problem for good. Your toolkit needs items that can actually break down these stubborn crystals.
The Essential Cleaning Agents
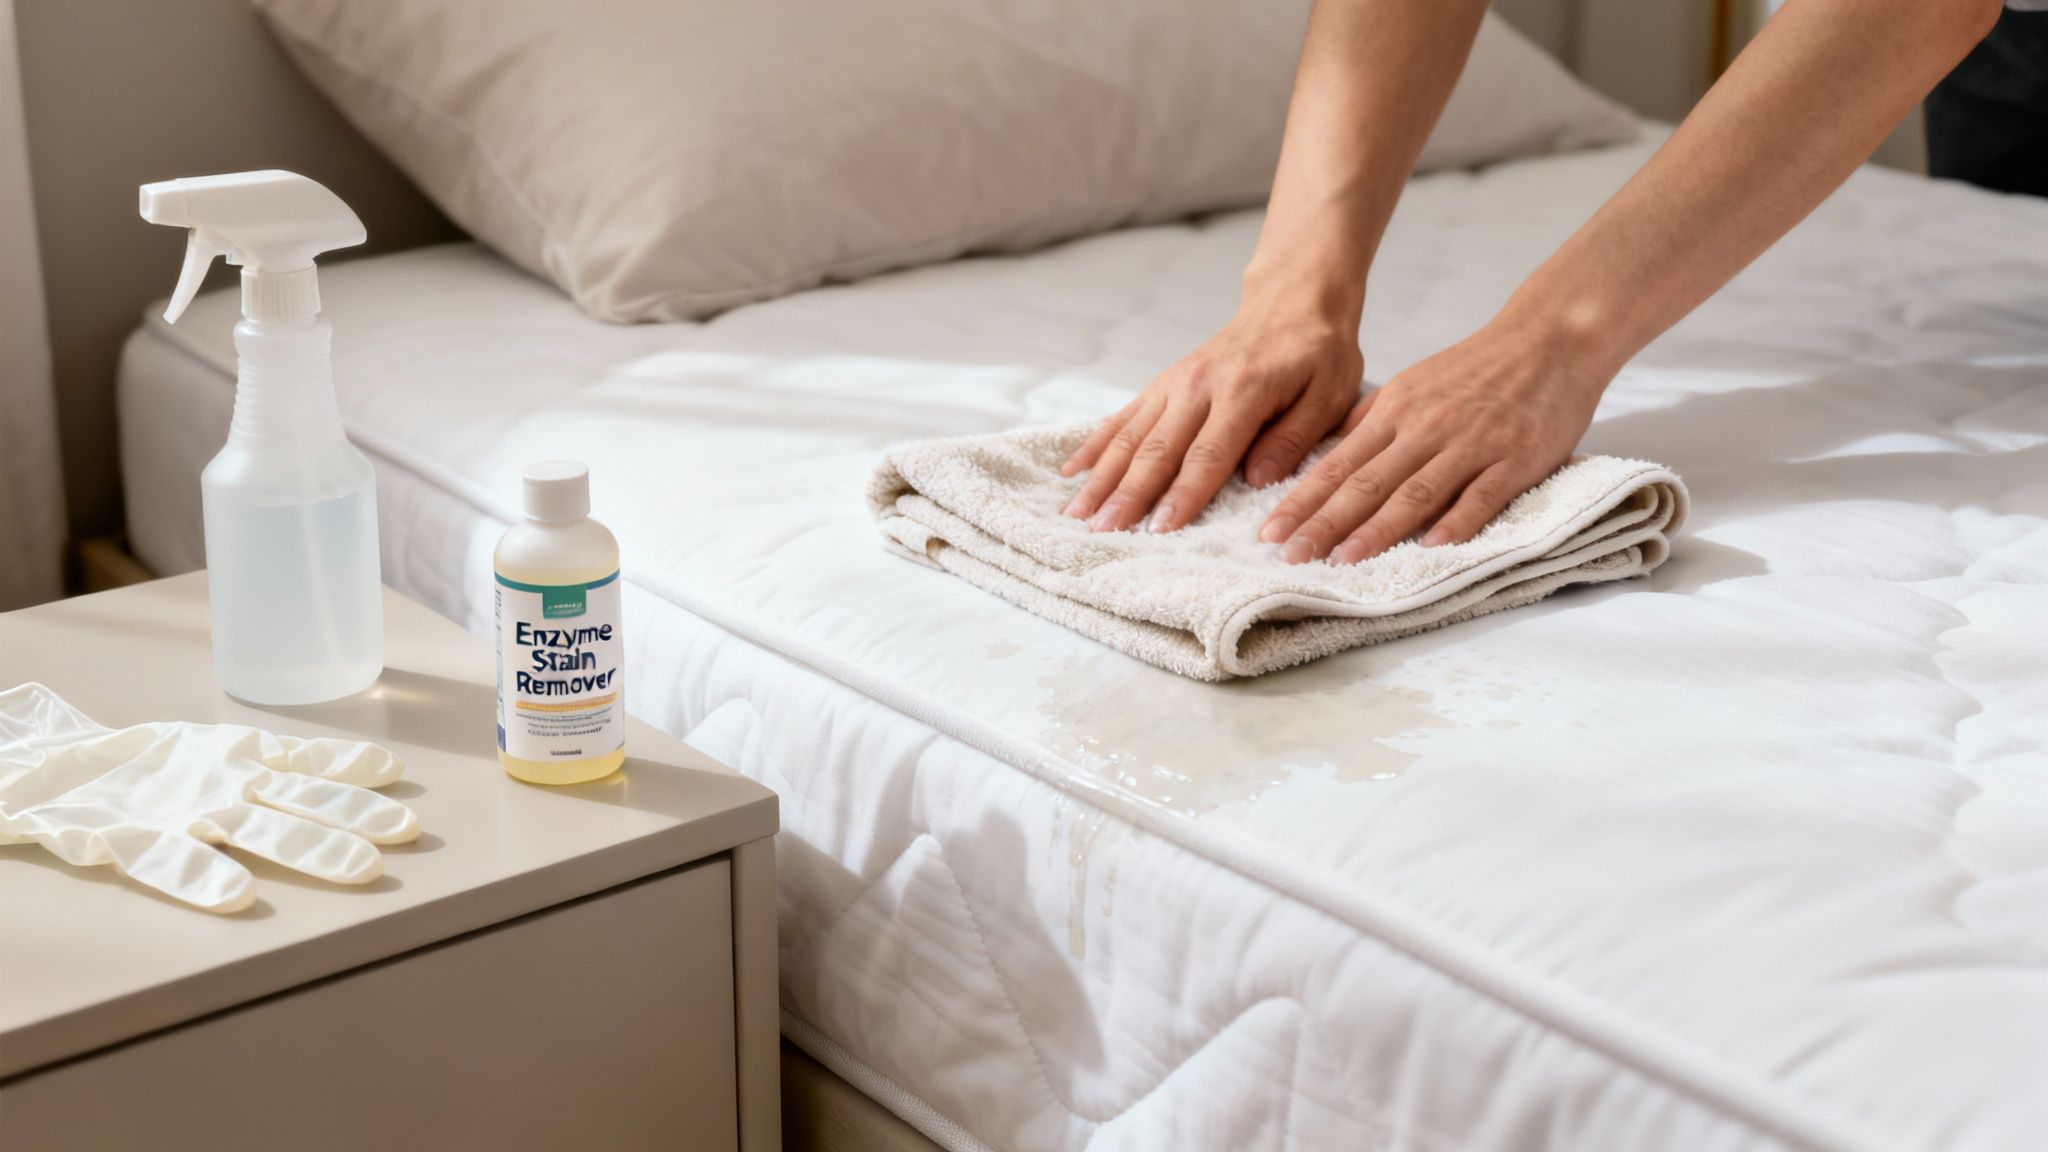
The core of your toolkit is a handful of powerful agents—some from your pantry and one specialised formula. Each one plays a distinct role in taking apart the components of urine.
- Enzymatic Cleaner: This is your most powerful weapon, hands down. These cleaners contain specific enzymes that act as catalysts to break down the proteins and uric acid in urine. They effectively dismantle the source of both the stain and the odour.
- White Vinegar: The acetic acid in vinegar helps to disinfect and break down the alkaline salts in fresh urine. It’s a fantastic first line of defence, especially if you catch the accident right away.
- Bicarb Soda (Baking Soda): A true multi-tasker. Bicarb soda is highly absorbent and a natural deodoriser, making it perfect for drawing out any residual moisture and neutralising smells after the initial clean.
An enzyme cleaner is completely non-negotiable for pet urine. Cat and dog urine is far more concentrated than human urine, containing extra proteins and compounds. An enzymatic formula is the only thing that will fully break down these molecules and prevent your pet from re-marking the same spot.
Your Application and Removal Tools
Having the right cleaners is only half the battle. You also need the right tools to apply them correctly and remove the mess without causing more damage. Your goal is to treat the stain without overwetting the mattress, which can create a whole new set of mould and mildew problems.
Get these items together before you start:
- Clean, Dry Cloths: Microfibre cloths are ideal because they’re super absorbent and won't leave lint behind. You’ll need several for blotting and applying solutions.
- An Empty Spray Bottle: This lets you apply your vinegar solution evenly and lightly, preventing you from saturating the mattress.
- A Vacuum Cleaner with a Hose Attachment: This is essential for the final step—removing the dried bicarb soda and any loosened stain particles from the mattress fabric.
- Gloves (Optional but Recommended): A pair of disposable gloves can make the process much more hygienic, especially if you're dealing with a heavy mess.
DIY Solutions vs Commercial Cleaners
So, is a homemade solution really as effective as something from the store? The answer honestly depends on the situation.
A simple mixture of equal parts white vinegar and water in your spray bottle is remarkably effective for fresh human urine accidents. It’s cheap, you probably already have it, and it does a great job of neutralising the initial odour.
However, for older, set-in stains or any pet urine accident, a commercial enzymatic cleaner is the superior choice. DIY solutions often struggle to fully break down the complex uric acid crystals once they’ve had time to bond with the mattress fibres.
Think of it this way: the vinegar solution is like a first aid kit for a minor scrape—perfect for immediate, simple issues. An enzymatic cleaner is like a targeted antibiotic, designed to eliminate a specific, persistent problem right at the source. For the best results, it’s wise to have both in your cleaning cupboard.
Removing Urine Stains and Odours for Good

Alright, you've got your supplies ready. Now it's time to actually tackle that stain and the smell that comes with it. This is where a methodical approach really pays off, because we're going deeper than just a surface wipe-down.
Our goal is twofold: lift the visible stain and completely neutralise the uric acid crystals that create that lingering, unpleasant odour. Just spraying an air freshener is a temporary fix that will fail you every time, often leaving behind a weird chemical-urine cocktail.
Attacking Fresh Stains with an Enzymatic Cleaner
If the accident just happened, an enzymatic cleaner is your best friend. These cleaners aren't just masking the problem; they release specialised enzymes that literally break down the proteins and uric acid in urine. They dismantle the stain and odour molecules on a biological level.
The secret to making these work is patience. This isn't a quick spray-and-wipe job.
- Lightly Spray the Area: Hold the bottle about 15-20 centimetres from the mattress and give the stain a light, even spray. You want it damp, not soaking wet.
- Ensure Full Coverage: Go a little beyond the visible edge of the stain. Urine tends to spread underneath the fabric where you can't see it.
- Let It Dwell: This is the most important part. Leave the cleaner to sit for at least 15-30 minutes, or whatever the product label says. This "dwell time" gives the enzymes a chance to activate and get to work.
- Blot Away Excess: Once the time is up, grab a clean, dry cloth and gently blot the area. You're just absorbing the loosened residue and extra cleaner. Whatever you do, don't scrub.
Conquering Dried Stains with Bicarb Soda Paste
Dealing with an old, dried stain is a different ball game. The urine has already crystallised deep inside the mattress fibres, so we need to rehydrate it and draw it out. A simple bicarb soda paste is fantastic for this.
Mix bicarb soda with just enough water to create a thick paste. Think toothpaste consistency—thick enough to spread without being runny.
- Apply the Paste: Use a spoon or a gloved hand to spread a generous layer of the paste right over the dried stain.
- Let It Work: Leave the paste to sit for several hours. Overnight is even better if you can manage it. As the paste dries, it will pull the urine residue up from the mattress fibres and soak up the odour.
- Vacuum Thoroughly: Once the paste is completely dry and crumbly, use your vacuum's hose attachment to suck up all the bicarb soda. Go over the spot a few times to make sure you get all the powder.
Pro Tip: For a really stubborn old stain, try lightly misting the area with your vinegar and water solution before you apply the bicarb soda paste. This helps reactivate the uric acid crystals, making them easier for the paste to pull out.
The Final Assault on Lingering Odours
Sometimes, even after the stain is gone, a faint smell remains. That’s a sign that some uric acid crystals got left behind. Don't get discouraged; it's a common issue, and we can definitely knock it out.
This final phase of how to clean mattress urine is all about deodorisation. One of the best strategies involves using enzyme cleaners and making sure the mattress is bone dry, which is critical for stopping odours from coming back. You can find more great tips on removing urine smells and stains on the Sleep Republic blog.
Here are two powerful techniques for that last deodorising step.
Harnessing Vinegar's Deodorising Power
White vinegar is a brilliant natural deodoriser. Its acetic acid gets to work neutralising the alkaline ammonia in any leftover urine traces.
Fill a spray bottle with a 50/50 mix of white vinegar and water. Lightly mist the entire area you’ve been working on. You don't need to saturate it—a fine mist is perfect.
Let the vinegar solution air dry completely. Yes, it will smell like vinegar for a bit, but that smell will disappear as it dries, taking the urine odour along with it.
The Power of Airflow and Sunlight
Never underestimate the sanitising power of fresh air and sunlight. If possible, move your mattress to a well-ventilated room or place it near an open window. Good airflow is essential for whisking away any last odour molecules.
Sunlight is also a natural disinfectant. Its UV rays help kill off lingering bacteria and neutralise smells. If you can safely get your mattress into a sunny spot for a few hours, it can make a huge difference.
Important Safety Note on Sunlight
| Mattress Type | Sunlight Exposure Guidance |
|---|---|
| Innerspring/Hybrid | Can generally handle a few hours of direct sunlight without any issues. |
| Memory Foam/Latex | Avoid direct sunlight. UV rays can degrade the foam, causing it to discolour and become brittle. A bright, airy room out of direct sunbeams is best. |
By following these targeted steps, you’re doing more than just cleaning the surface—you're restoring your mattress from the inside out. The combination of enzymatic cleaners, absorbent pastes, and natural deodorisers is a robust defence against even the worst accidents. Just remember, patience is key. Giving each solution enough time to work is the real secret to a clean, fresh, and odour-free result.
What About Pet Accidents and Special Mattress Types?
When a furry family member is the culprit, the cleanup game changes entirely. Pet urine, especially from cats, is a whole different beast compared to human urine. It’s far more concentrated, packed with potent compounds like pheromones and high levels of uric acid. This is exactly why it leaves behind that aggressive, lingering smell that seems to survive all your cleaning efforts.
Your usual vinegar and bicarb soda mix probably won’t cut it this time. To truly defeat pet urine, you need to attack the problem at a molecular level. This is where a good, pet-specific enzymatic cleaner becomes your best friend.
Why Pet Urine Needs a Stronger Approach
That powerful smell isn't just unpleasant; it's a territorial marker for your pet, practically inviting them back to the same spot. If you don't obliterate those odour-causing molecules, their sensitive nose will pick up the scent long after you think it's gone, creating a frustrating cycle of repeat accidents.
A standard cleaner often just masks the smell for a little while. An enzymatic cleaner, on the other hand, unleashes specific proteins that literally latch onto and break down the uric acid crystals and bacteria in the urine. They don't just cover the smell—they destroy its source. When you're dealing with pet accidents, this isn't just a recommendation; it's a non-negotiable.
If your cat is suddenly having accidents outside the litter box, it's really important to rule out a medical issue. Conditions like Feline Lower Urinary Tract Disease (FLUTD) can cause this behaviour, so a chat with your vet is always the best first step.
Cleaning Different Mattress Materials
The type of mattress you own will drastically change how you should clean it. Some materials are incredibly sensitive to moisture and chemicals, and one wrong move could lead to permanent damage or even void your warranty. Knowing what you're working with is half the battle.
Here’s what you need to know for the most common mattress types:
- Memory Foam: This is the most delicate of all. Memory foam is like a giant, dense sponge. Any excess liquid will get trapped deep inside, becoming a perfect breeding ground for mould and causing the foam structure to break down. Never, ever saturate a memory foam mattress. Use solutions sparingly with a fine mist and blot, blot, blot.
- Latex: Natural latex is a bit more durable than memory foam, but it still hates being soaked. Use minimal liquid and steer clear of harsh chemical cleaners, as they can cause the latex to degrade over time. Stick to gentle enzymatic cleaners or a diluted vinegar solution.
- Innerspring: Your traditional mattress is generally more forgiving. You can be a bit more robust when spot-cleaning the fabric top layer. However, you still want to avoid letting liquid seep deep down to the springs and padding, as this can lead to rust and mildew.
- Hybrid: As a mix of foam layers and innersprings, hybrids demand a careful touch. Treat the top foam layers with the same caution you'd use for memory foam—less is definitely more when it comes to moisture.
A Cautious Guide for Memory Foam Mattresses
Because memory foam is so ridiculously absorbent, learning how to clean mattress urine from it is all about a "less is more" approach. The single biggest mistake you can make is getting it too wet.
- Blot Like Your Life Depends On It: The second you find the spot, grab dry cloths and start absorbing. Press down firmly to wick moisture up and out of the foam.
- Mist, Don't Pour: Put your enzymatic cleaner in a spray bottle and apply only a very fine mist to the surface. Do not pour any liquid directly onto the stain.
- Let it Work, Then Blot Again: Allow the cleaner to sit for about 10-15 minutes to do its job. Then, grab a fresh, dry cloth and blot the area again to soak up the cleaner and the dissolved urine.
- Dry, Dry, and Dry Some More: This step is absolutely critical. Aim fans at the spot or use a hairdryer on its coolest setting to dry the area completely. A lingering damp spot on memory foam is an open invitation for mould.
For any pet owner, having the right products and knowing the right techniques makes all the difference. By using cleaners designed to dismantle urine molecules, you can properly neutralise smells and lift stains. And by respecting your mattress material, you can solve the accident without creating an even bigger problem.
Drying Your Mattress and Preventing Future Accidents
You've done the hard work of treating the stain and killing the odour, but don't rush the final step. A mattress that’s still damp on the inside is a perfect breeding ground for mould and mildew, which can ruin your bed and impact your health. Getting it completely dry ensures all that effort wasn't wasted.
The biggest mistake I see people make is thinking that if the surface feels dry, the job is done. Moisture can stay trapped deep inside the foam and padding for hours—sometimes even days. Patience is key here to guarantee you're left with a truly dry, healthy place to sleep.
Effective Drying Techniques
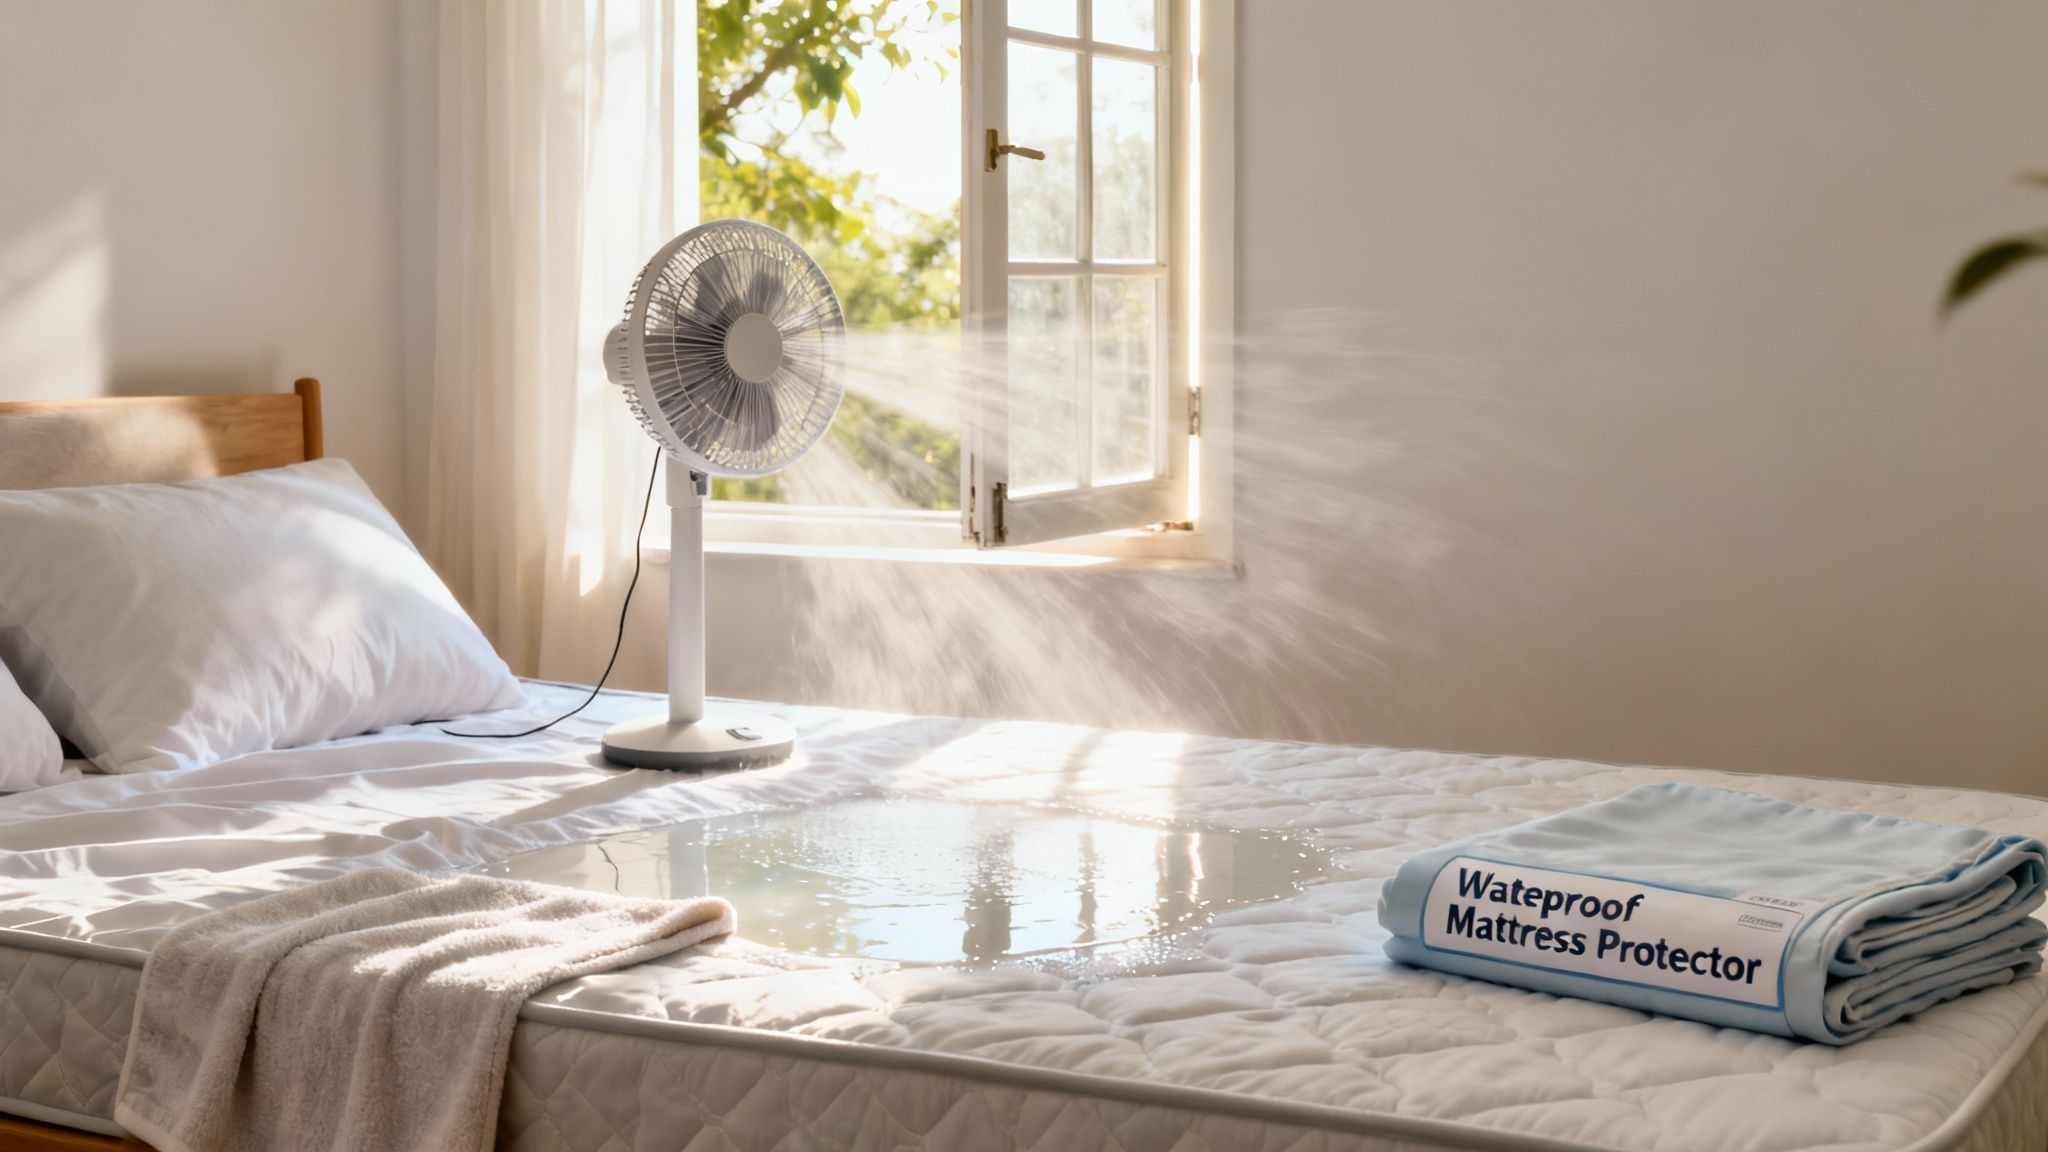
Resist the urge to throw your sheets back on too soon. To dry your mattress properly and safely, it's all about one thing: airflow. The more air you can get circulating over and around the damp spot, the quicker that trapped moisture will evaporate.
Here are a few practical ways to get it done:
- Create a Cross-Breeze: If you can, open windows on opposite sides of the room to get the air moving naturally.
- Bring in the Fans: This is my go-to method. Point one or two fans directly across the treated area. It's the single most effective way to speed things up.
- Use a Hairdryer (Carefully): In a pinch, a hairdryer can help. But you must use it on the coolest setting and keep it moving constantly. Too much heat in one spot can easily damage the mattress fabric or underlying foam.
A common pitfall is only checking the surface for dampness. Here’s a better way: press a clean, dry towel firmly into the treated area for a good 30 seconds. If it comes away with even a hint of moisture, your mattress needs more time.
Preventing the Next Accident
Once your mattress is clean and bone-dry, your next thought should be about prevention. Let's be honest, going through this deep-cleaning process is a real chore. The best way to handle future accidents is to stop them from ever reaching the mattress in the first place.
This is where a high-quality waterproof mattress protector becomes an absolute non-negotiable. Forget the crinkly, plastic-like sheets you might remember from years ago. Modern protectors are soft, breathable, and completely silent. You won't even know it's there—until you need it.
A good protector forms an impenetrable barrier against all liquids, whether it’s urine, sweat, or a spilled drink. It’s a simple, one-off investment that can save you a huge headache and the cost of a new mattress down the line. If you're looking for proactive ways to manage pet incontinence, protective gear like washable dog diapers can also be a lifesaver.
Ultimately, investing in a protector is about buying peace of mind. When the next accident happens, you can simply strip the bedding and the protector, throw them in the wash, and know your mattress is still perfectly pristine underneath. It turns a potential disaster into a minor laundry task—a trade-off anyone would gladly take.
When to Call a Professional Mattress Cleaner
Even with the best at-home methods, there are moments when you just have to call in reinforcements. Knowing when to step back isn’t admitting defeat; it’s a smart move to protect your investment and make sure your bed is genuinely hygienic.
Sometimes, the scale of the accident is simply too much for household solutions. If a large amount of urine has managed to soak right through multiple layers of the mattress, you’re running a serious risk of trapping moisture deep inside. That’s a perfect recipe for mould and bacteria.
Key Signs You Need a Professional
Recognising the limits of what you can do at home is crucial. If you’ve done your best and are still facing one of these red flags, it’s probably time to pick up the phone.
- Deep Saturation: The urine has clearly penetrated far beyond the top comfort layer. This is pretty common with large accidents that weren’t discovered straight away.
- Mould or Mildew Concerns: You notice a musty smell or even see some dark spots starting to form after your cleaning attempt. This is a dead giveaway that moisture is trapped deep inside, where a surface clean just can’t reach.
- Delicate or Speciality Mattresses: High-end memory foam, organic materials, or plush pillow-tops can be permanently ruined by the wrong cleaning methods. Professionals are trained to handle these materials without causing damage.
- Stubborn, Lingering Odours: You’ve cleaned the spot multiple times, but that faint, sharp ammonia smell keeps coming back once the mattress is dry.
The biggest advantage the pros have is their equipment. They use powerful hot water extraction machines that inject a cleaning solution deep into the mattress fibres, then immediately suck all the dirty water—along with the urine and bacteria—straight back out.
This process removes far more moisture and contaminants than blotting ever could, which dramatically cuts down the drying time and helps prevent any mould from taking hold.
For really tough jobs, specialised urine removal services use targeted techniques to fully restore mattresses that might otherwise seem like a lost cause. You can learn more about how professionals in Brisbane tackle urine removal with their industry-grade solutions. Handing a difficult job over to an expert ensures a much deeper, more sanitary clean, protecting both your mattress and your family’s health.
Common Questions About Cleaning Urine From a Mattress
Even after you've successfully cleaned up the mess, a few questions might still be lingering. Let's tackle some of the most common ones to give you complete confidence in your cleaning process.
Can I Use Bleach on a Mattress Stain?
Absolutely not. Bleach is far too harsh for the delicate fabrics and foams used in mattresses today. It can cause permanent yellowing, weaken the fibres, and the fumes can be toxic to breathe in while you sleep.
It's tempting to reach for a powerful chemical, but you'll do more harm than good. Always stick to the methods we've outlined, like enzymatic cleaners or the vinegar and bicarb soda trick.
How Long Does a Mattress Take to Fully Dry?
Drying time can vary quite a bit, usually taking anywhere from 8 to 24 hours. How long it takes really depends on a few things: how much liquid you used to clean, the mattress material itself, and how well-ventilated the room is. A dense memory foam mattress, for example, will hold onto moisture for much longer than a traditional innerspring.
Never, ever remake the bed until you are 100% certain the mattress is dry deep down. A good way to check is to press a clean, dry towel firmly onto the spot. If it picks up any hint of moisture, it needs more time.
Is Bicarb Soda Enough to Remove the Smell on Its Own?
Bicarb soda is a fantastic deodoriser and moisture absorber, but for urine, it often isn’t enough on its own. It does a great job of neutralising odours on the surface but can't break down the stubborn uric acid crystals that have soaked deep into the mattress fibres.
Think of it as the final step, not the first. For a permanent solution, it works best after an enzymatic cleaner or a vinegar solution has tackled the real source of the smell.
When DIY methods just aren't cutting it for deep-set stains or you're worried about delicate materials, don't risk damaging your mattress. The experts at Right Price Carpet Cleaning use powerful, truck-mounted steam cleaning equipment to safely extract stains and odours from deep within the mattress layers, ensuring a truly hygienic clean. Get your instant quote online today at https://rightpricecarpetcleaning.com.au.
Recent Comments