


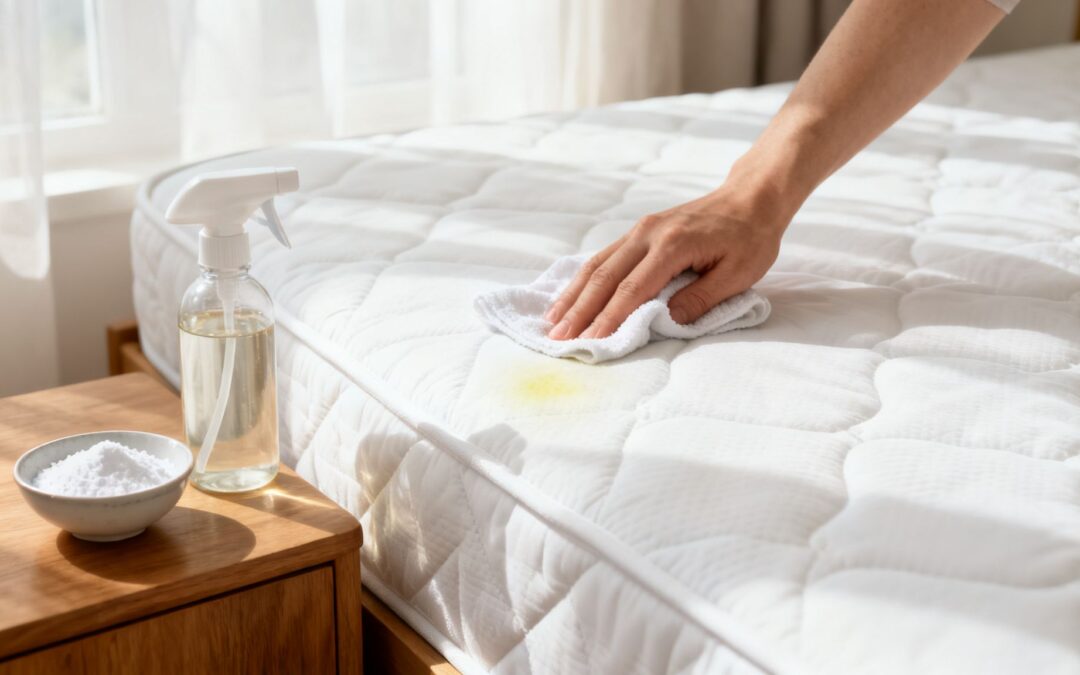
When you find a urine stain on a mattress, your first move is everything. The goal? Immediately blot the fresh stain using a clean, dry cloth or paper towels. You need to absorb as much of that liquid as you possibly can, right away. Whatever you do, do not scrub. A quick response prevents the urine from seeping deep into the mattress layers, which makes the whole cleanup job a lot easier and more successful in the long run.
What to Do Immediately After a Urine Accident
That moment you discover a wet spot on the mattress can feel like a mini-disaster, but fast action can stop a long-term problem in its tracks. The first 30-60 minutes after an accident happens is what I like to call the 'golden hour' for stain removal.
During this window, the liquid hasn't had time to fully penetrate the foam or fibres. Critically, the uric acid hasn't yet crystallised—that's the stuff that causes those stubborn, lingering smells that seem impossible to get rid of later on.
To make it simple, here's a quick reference guide for what to do in those crucial first 30 minutes.
Immediate Action Plan for Fresh Urine Stains
| Timeframe | Action Required | Why It's Important |
|---|---|---|
| 0-5 Minutes | Strip bedding immediately and blot the stain with dry towels. | Stops the urine from spreading and soaking deeper into the mattress core. |
| 5-15 Minutes | Press firmly with fresh towels until no more moisture transfers. | Absorbs the maximum amount of liquid before it has a chance to set. |
| 15-30 Minutes | Sprinkle a thick layer of bi-carb soda over the damp area. | Draws out remaining moisture and starts neutralising odours on contact. |
Acting within this timeframe is your best defence against a permanent stain and a smell that just won't quit.
The Blot and Absorb Technique
Right now, your only job is absorption, not cleaning. Grab some clean, dry towels—microfibre cloths are fantastic for this—and press down firmly on the wet area. The idea is to lift the moisture out, not push it further in.
Avoid any kind of scrubbing or circular wiping motions. That friction will just embed the stain into the mattress fabric and could even damage the fibres themselves.
Once you’ve blotted up as much as you can, it's time to bring in a secret weapon for extra absorption. Generously sprinkle bi-carb soda over the entire damp patch. It works as a brilliant natural absorbent and deodoriser, drawing out the last bits of moisture while tackling the smell from the get-go.
Adjusting for Your Mattress Type
Not all mattresses are the same, and the material absolutely dictates how you should handle this first step. Different materials react differently to moisture.
- Memory Foam and Latex: These materials are dense and act like a giant sponge. Use gentle but firm pressure when you’re blotting. Later on, be extremely careful not to oversaturate them with any cleaning solution, as they can take forever to dry properly, creating a risk of mould.
- Innerspring and Hybrid: A traditional spring mattress usually has thicker fabric layers on top, so you can be a bit more firm with your blotting. The main thing here is to stop the liquid from seeping down into the deeper padding and getting into the spring structure itself.
Key Takeaway: Resist the powerful urge to scrub. Your number one priority is always to blot and absorb. Pushing the liquid deeper into the mattress is the single biggest mistake you can make in these initial moments, and it will turn a manageable spot into a much bigger cleaning headache.
Using Household Items to Clean Mattress Stains
Before you rush out to buy a specialty cleaner, take a look in your kitchen pantry. You’d be surprised how often common household items are all you need to tackle a fresh urine stain. They’re effective, eco-friendly, and perfectly safe for most mattresses when you use them the right way. These simple solutions are your first line of defence.
The trick is using the right tool for the job. Urine is made up of urea, urochrome, and uric acid. While plenty of cleaners can handle the first two, it’s the uric acid crystals that cause those stubborn, lingering smells. Breaking them down requires a specific approach.
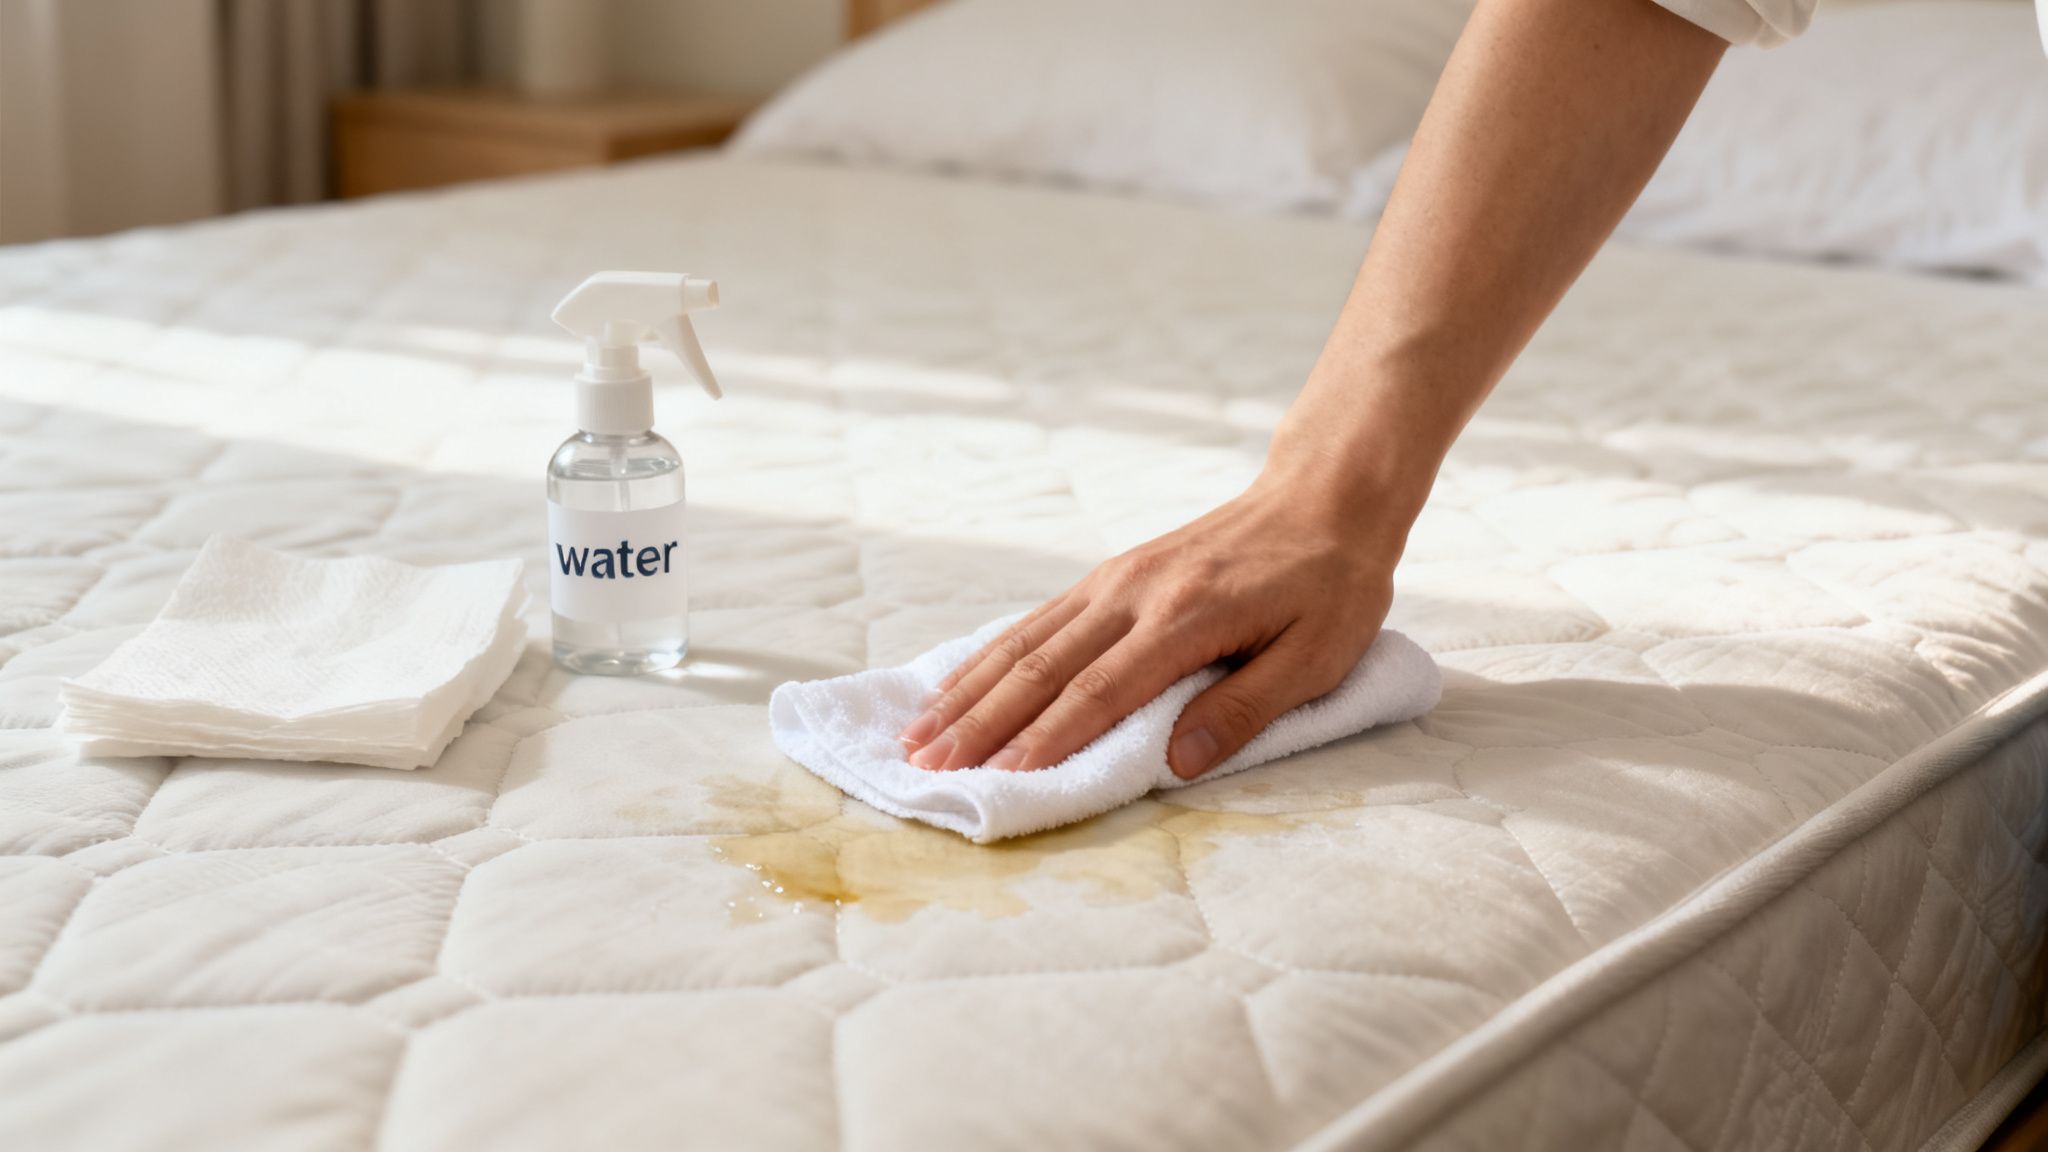
The Classic Vinegar and Water Solution
A simple mix of white vinegar and water is the go-to for countless cleaning tasks, and for good reason. Vinegar is a mild acid, which is great for neutralising the alkaline nature of fresh urine and helps dissolve the initial stain components.
Here’s how to make it:
- Mix equal parts white vinegar and cool water in a clean spray bottle.
- Lightly mist the solution over the affected area of the mattress.
- Be careful not to soak the fabric—you're aiming for damp, not saturated.
- Let the solution sit for about 5-10 minutes to do its work.
Once it’s had a moment to work, gently blot the spot again with a clean, dry cloth to lift the excess moisture. While this is great for fresh stains, it’s important to have realistic expectations. In Australia, where bedwetting affects roughly 15-20% of children aged 5-7, many parents try this method first. However, consumer tests show vinegar solutions often only neutralise 60-70% of odours temporarily because they don't fully break down the underlying uric acid crystals. You can find out more by reading these mattress cleaning insights from CHOICE.
Applying a Baking Soda Paste
Baking soda (or bi-carb soda) is a true powerhouse for both cleaning and deodorising. After you’ve treated the stain with a liquid, baking soda is your next critical step. Its main job is to draw out any remaining moisture and absorb those lingering acidic odours.
For a more targeted attack on a damp stain, you can whip up a thick paste.
- Combine three parts baking soda with one part water.
- Spread the paste directly over the entire stained area.
- As the paste dries, it will literally pull the moisture and odour out of the mattress fibres.
Let the paste dry completely, which might take a few hours. Once it's hard and crusty, just vacuum it all up using your hose attachment.
Pro Tip: Never mix cleaning agents without knowing how they’ll react. A common—and very dangerous—mistake is mixing bleach with ammonia (which is found in urine), creating toxic chloramine gas. Stick to safe, proven combinations like the ones mentioned here.
The Gentle Hydrogen Peroxide Method
For slightly tougher or yellowish stains that vinegar couldn’t quite lift, a gentle hydrogen peroxide solution can be incredibly effective. Just use it with a bit of caution, especially on darker fabrics, as it has mild bleaching properties.
Create a mix of 240ml of 3% hydrogen peroxide, three tablespoons of baking soda, and a couple of drops of liquid dish soap. Swirl it gently in a spray bottle to mix—don't shake it. Spray it over the stain, let it dry completely until a residue forms, and then vacuum it all up.
How to Tackle Old and Stubborn Urine Stains
Discovering an old, set-in urine stain on your mattress is a completely different ball game than dealing with a fresh one. It's a much bigger challenge.
Once urine dries, the water evaporates, but it leaves behind highly concentrated uric acid crystals. These stubborn crystals are the real source of that sharp, lingering odour that seems to reappear out of nowhere, especially on humid days.
This is why standard household cleaners often let you down. They might clean the visible surface stain, but they do nothing to break down these resilient crystals. A simple surface clean might look like it worked at first, only for the smell to come roaring back a week later.
To truly get rid of old urine stains and their accompanying smell, you need a different strategy—one that attacks the problem right at its molecular source.
The Power of Enzymatic Cleaners
When you're up against an aged stain, an enzymatic cleaner is your single most powerful ally. Forget regular detergents; these cleaners are packed with specific enzymes, which are natural proteins designed to act as catalysts and break down other organic molecules.
Essentially, they "digest" the uric acid crystals, along with the other proteins and unwanted stuff found in urine. They convert it all into simple, odourless components like carbon dioxide and water. This is the only way you can permanently get rid of the stain and the smell for good.
This is especially critical for pet owners. Accidents happen, and pet urine stains affect a staggering 62% of Australian dog-owning households. The problem is, standard cleaners often remove only 40% of the uric acid from an absorbent mattress. The crystals simply reform once the surface dries.
In contrast, professional bio-enzymatic treatments are formulated for 100% crystallisation breakdown, which prevents that horrible odour from returning in 92% of cases. You can learn more about how these professional-grade treatments work on the PetLab Australia website.
The flowchart below gives you a quick visual guide for deciding between a simple DIY fix for a fresh stain and a more heavy-duty approach for those stubborn, set-in ones.
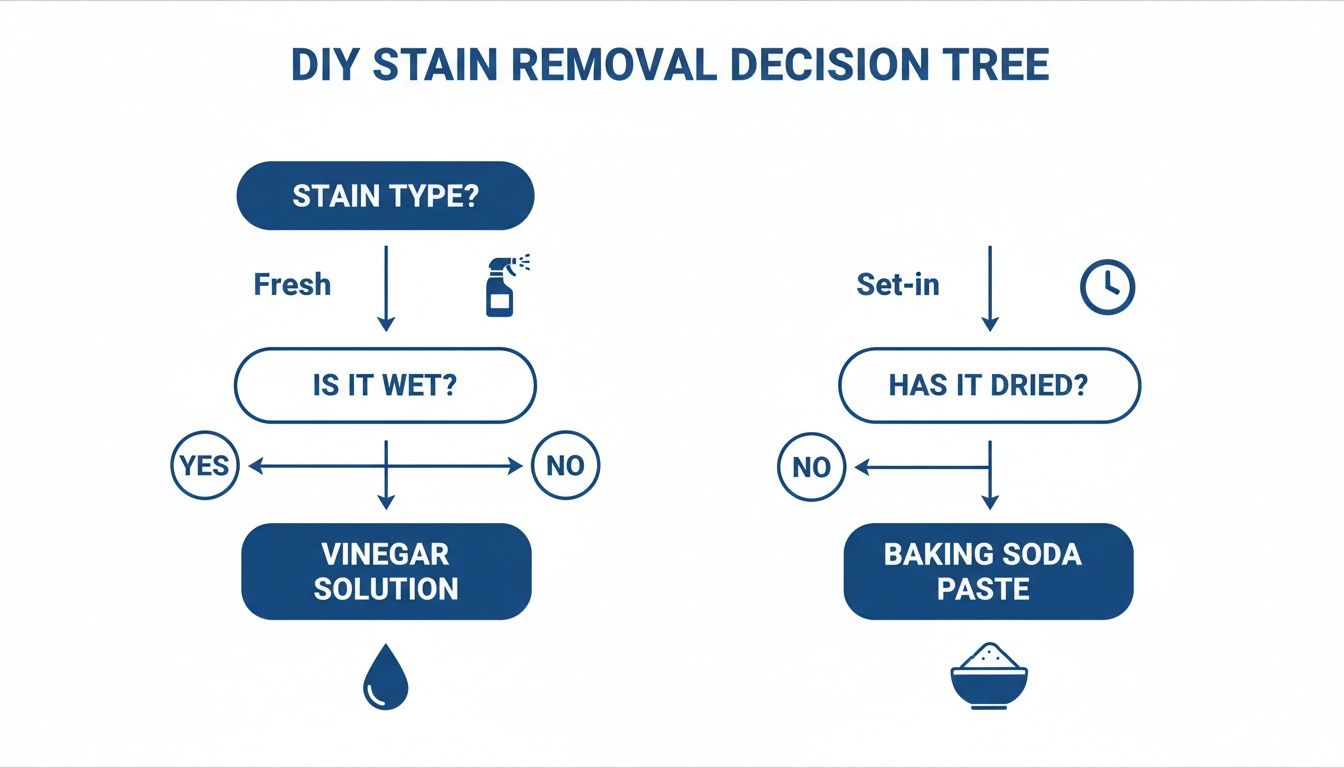
As the infographic shows, while fresh stains can often be handled with vinegar, set-in stains need the absorbing power of baking soda as a first step before you bring in the big guns.
DIY Cleaning vs Professional Enzymatic Treatment
When you’re staring down a stubborn, set-in stain, it’s easy to wonder whether a pantry solution is enough or if it’s time for something more powerful. Both DIY methods and professional-grade enzymatic treatments have their place, but their results can differ dramatically, especially with older, deeper stains that have had time to crystallise.
Here's a quick comparison to help you decide which approach is right for your situation.
| Feature | DIY Methods (Vinegar/Baking Soda) | Professional Enzymatic Treatment |
|---|---|---|
| Effectiveness | Best for fresh stains; may only mask odours on older stains. | Highly effective at breaking down uric acid crystals in set-in stains. |
| Odour Removal | Temporarily neutralises smells; odour can return in humidity. | Permanently eliminates odours by destroying the source at a molecular level. |
| Cost | Very low; uses common household items. | Higher upfront cost for a specialised product. |
| Application Time | Quick to apply, but may require multiple treatments. | Requires a longer "dwell time" (several hours) but is usually a one-shot deal. |
| Long-Term Results | Mixed. Often fails to prevent the return of deep-set smells. | Excellent. Prevents odour recurrence in over 90% of cases. |
| Stain Penetration | Surface-level cleaning. Does not penetrate deep into mattress foam. | Designed to soak deep into the mattress to match the original urine path. |
While a vinegar and baking soda paste is a fantastic first-aid tool for fresh accidents, it simply can’t compete with the science behind a quality enzymatic cleaner for old stains. If you want to be certain the stain and smell are gone for good, investing in a proper enzymatic treatment is always the better bet.
How to Use an Enzymatic Cleaner Correctly
Here’s a common mistake: just spraying an enzymatic cleaner on the stain and wiping it away. That won’t work. These products need time and the right environment to do their job. Think of it as giving the enzymes a proper meal—they can't eat if their food is dry.
Here’s how to get it right, especially for the toughest stains:
- Prep the Area: First, lightly dampen the old stain with a cloth and some cool water. This simple step helps to "wake up" and reactivate the uric acid crystals, making them an easier target for the enzymes to find and attack.
- Apply Generously: Now, spray the enzymatic cleaner liberally all over the stain. You need to make sure it penetrates just as deeply as the original urine did. Don't be shy here; you should cover the entire stain plus a small margin around the edges.
- Let It Dwell: This is the most critical step. Cover the treated area with a bit of plastic wrap or a damp towel to keep it moist. Enzymes stop working the moment they dry out. Keeping the area damp allows them to work for several hours, or even overnight, giving them plenty of time to completely break down the stain.
- Blot and Air Dry: After the recommended dwell time has passed (always check the product label), remove the covering. Blot the area thoroughly with clean, dry towels to soak up as much of the excess liquid as possible. Then, just let the mattress air dry completely. A fan can help speed this up.
Key Insight: The secret to making enzymatic cleaners work isn't scrubbing; it's patience and moisture. You have to give the enzymes the time and the damp environment they need to fully digest the organic matter. Rushing this process is the number one reason these treatments fail.
Drying Your Mattress to Prevent Mould and Mildew
You've successfully tackled the urine stain, which is a massive win. But hold on—the job isn't quite finished. Leaving any moisture behind is a recipe for disaster, creating the perfect breeding ground for musty-smelling mould and mildew.
Properly drying your mattress is just as crucial as the cleaning itself. The goal is to get every last drop of moisture out, not just from the surface, but from deep within the foam and padding. A mattress that feels dry to the touch can be deceiving; dampness can stay trapped inside for days, quietly causing problems.
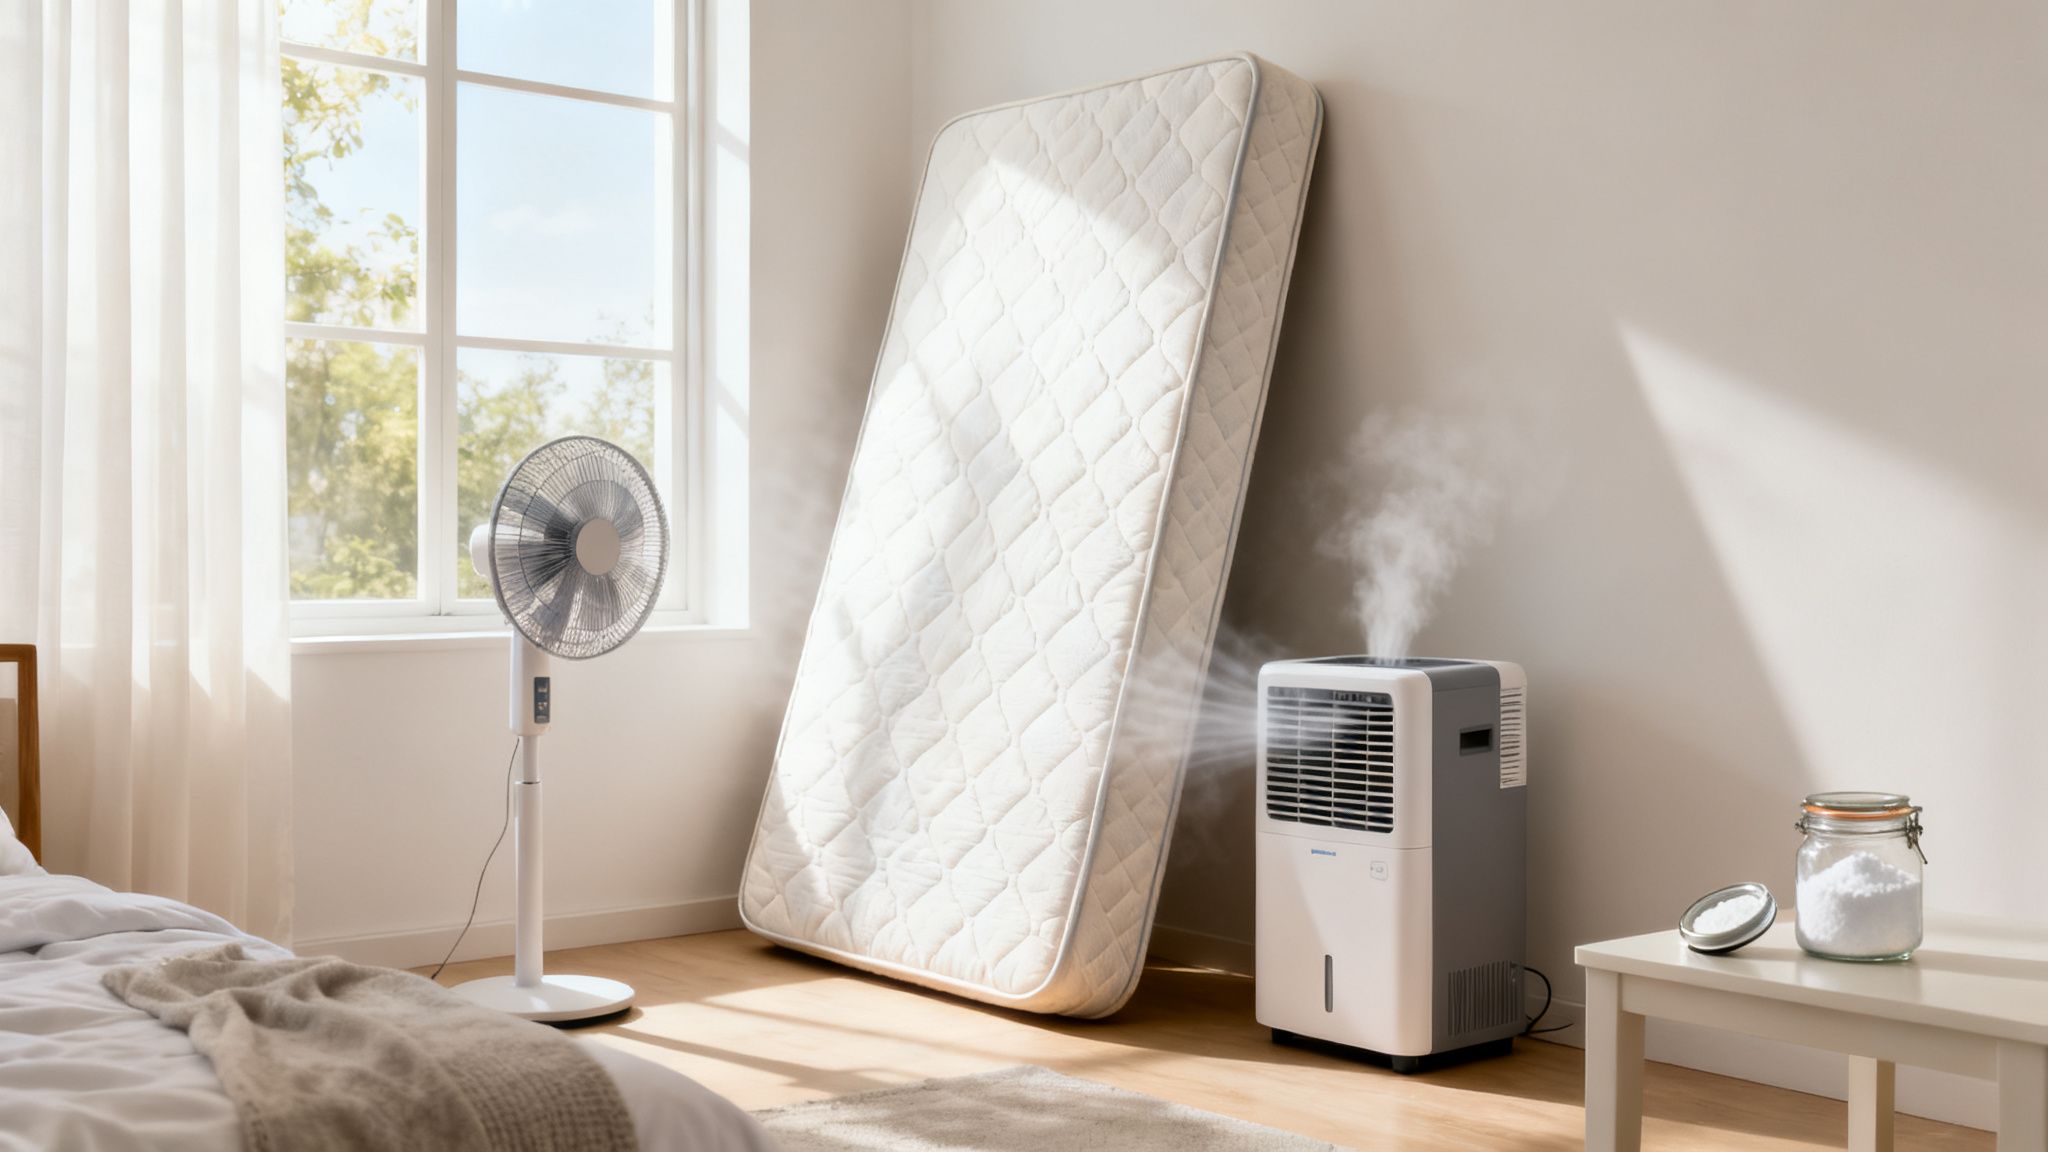
Creating the Ideal Drying Environment
To get your mattress bone-dry, you need to maximise airflow. Start by stripping off all the bedding. If you can manage it, prop the mattress up on its side so air can circulate all around it. This is far more effective than leaving it lying flat on the bed base.
Next, get the air in the room moving.
- Open the Windows: If the weather's on your side, opening a few windows creates a natural cross-breeze that will help wick moisture away.
- Turn on Fans: Aim one or more electric fans directly at the damp patch. Constant airflow is your absolute best friend here.
- Use a Dehumidifier: If you live in a humid climate or the mattress is stubbornly damp, a dehumidifier is a game-changer. It will actively pull moisture from the air and the mattress, speeding up the drying time significantly.
Expert Tip: Steer clear of direct heat sources like a hairdryer or space heater. Intense heat can easily damage mattress materials, especially memory foam. Worse, it can "cook" any remaining proteins from the stain into the fibres, setting them permanently. Patience and airflow are the safest and most effective tools in your arsenal.
Sunlight: A Double-Edged Sword
Taking your mattress outside on a sunny, breezy day can be a fantastic way to dry it. The sun's UV rays are a natural sanitiser and can help kill off any lingering bacteria. But you have to be careful with this method.
Too much direct, harsh sunlight can damage and discolour the mattress fabric and even cause foam materials to break down over time. If you do take it outside, limit its sunbathing time to just a few hours and try to avoid the intense midday sun. Even with a thorough drying, mould or mildew can sometimes linger; for more on this, you might find a guide on how to remove mildew helpful.
Final Deodorising for a Fresh Finish
Once you are 100% certain the mattress is completely dry, there's one last step to leave it smelling fresh and clean. Grab the bi-carb soda again and sprinkle a generous layer over the entire treated area.
Let it sit for at least a few hours—or even overnight if you have the time. This final layer will absorb any faint, lingering odours that might have surfaced while it was drying. When it's done its job, vacuum it all up thoroughly with your upholstery attachment. Now your mattress is not only clean but also completely dry and fresh, ready for a great night's sleep.
When a DIY Fix Is Not Enough
You’ve blotted, sprayed, and deodorised, but sometimes your best efforts just don’t cut it. While DIY methods are fantastic for fresh, minor accidents, there are certain situations where they simply fall short. Knowing when to wave the white flag and call in a professional isn’t admitting defeat; it’s making a smart decision to save your mattress and your sanity.
Deciding to hire an expert often comes down to a few key factors. If the urine has completely saturated a large area, penetrated deep into the core, or if the stain is months old, home remedies just aren't going to have the power to solve the problem properly. These deep-set stains require specialised equipment to get the job done right.
Signs It's Time to Call the Professionals
Think about your specific situation. A small spot-clean is one thing, but a major saturation event is another. You should seriously consider professional help if any of these scenarios sound familiar.
- Heavy Saturation: When a significant amount of liquid has soaked right through multiple layers of the mattress, blotting and spraying from the surface won’t reach the core. This is especially true for thick pillow-top or memory foam mattresses that absorb liquid like a giant sponge.
- Recurring Odours: If you notice that unpleasant smell returning, particularly on humid days, it’s a clear sign that uric acid crystals are still lurking deep within the mattress fibres. DIY solutions often can't fully break these down.
- Delicate or Speciality Materials: Mattresses made from materials like organic latex, wool, or advanced memory foam can be damaged by the wrong cleaning solutions or excessive moisture. Professionals know exactly which methods are safe for your specific mattress type.
- Very Old, Dark Stains: Stains that have been there for months or even years are incredibly stubborn. The proteins have had ample time to bond with the fibres, making them nearly impossible to lift without commercial-grade equipment and powerful solutions.
The Technology Behind a Professional Clean
So, what do professionals do that’s so different? The answer lies in powerful technology like hot water extraction, often performed with a truck-mounted steam cleaning system. This isn't just about spraying and scrubbing; it’s a deep, restorative process.
The machine injects a high-pressure stream of hot water and a specialised cleaning solution deep into the mattress. This process dissolves and dislodges those stubborn uric acid crystals, along with bacteria and allergens. Almost at the same time, a powerful vacuum extracts the dirty water, pulling all the contaminants out with it. This is how they remove what home methods simply can't reach.
Urine residues can foster 80% more dust mites and allergens, which may contribute to asthma flares in 1 in 10 Victorian children. While a DIY approach might lift 65% of a visible stain, professional steam systems can achieve 99.5% stain and odour removal and a 96% reduction in allergens, dramatically improving your bedroom's air quality. You can learn more about the impact of professional mattress cleaning on health at ConfidenceClub.com.au.
Key Takeaway: Calling a professional isn't just about removing a stain; it’s about hygienically deep cleaning your mattress. It's the best way to eliminate hidden bacteria and allergens, ensuring your bed is safe and fresh for years to come.
Your Top Mattress Cleaning Questions Answered
Even with the best cleaning guide, there are always a few lingering questions. When you're dealing with something as important as your mattress, it's completely normal to want a bit more clarity. We've gathered some of the most common queries we hear to give you clear, expert answers and help you get the job done with confidence.
Can I Use Bleach on a Urine Stain?
In a word: no. You should never use bleach to clean a mattress.
It might feel like the ultimate weapon against a tough stain, but bleach is far too harsh for mattress fabrics. It can permanently discolour and weaken the fibres, causing irreversible damage, especially to materials like memory foam.
More importantly, bleach creates a dangerous chemical reaction when it mixes with the ammonia in urine. This reaction produces toxic chloramine gas, which is harmful to breathe in and can cause serious respiratory irritation. It's just not worth the risk. Stick to safer, proven cleaners like vinegar, bi-carb soda, or a proper enzymatic formula.
How Long Does a Mattress Take to Dry?
Drying time can vary dramatically, and this is where a lot of people get caught out. A light spot-clean on a breezy day might be dry in 4-6 hours, but a more deeply treated area can easily take 12-24 hours—or even longer—to dry properly.
The biggest factors are how deep the liquid soaked in, the type of mattress you have, and how much air is circulating in the room.
It is absolutely crucial that the mattress is 100% dry before you even think about putting sheets back on. Even a little bit of trapped moisture is the perfect breeding ground for mould and mildew. Using fans or a dehumidifier can seriously speed up the process and give you a much healthier result.
Key Insight: A mattress that feels dry to the touch on the surface can still be damp deep down. Always err on the side of caution and give it more time than you think it needs. This is the single best way to stop that musty, damp smell from showing up weeks later.
Will Cleaning a Urine Stain Void My Warranty?
There’s a very good chance it will, yes. Most mattress warranties have clauses that are immediately voided by any kind of liquid damage or staining.
When you apply cleaning solutions—even just water—the manufacturer can interpret that as liquid saturation, putting your warranty at risk.
Before you start tackling a big stain, it's always a smart move to dig out your warranty documents and have a read. To stay on the safe side, use the smallest amount of liquid you can get away with and focus on blotting, not pouring.
For future peace of mind and to prevent this problem from happening again, it's worth looking into how to find a good mattress protector. If you're dealing with a major stain, hiring an insured professional is often the safest bet to protect your investment.
When a stain is just too deep or you want to ensure your mattress is hygienically cleaned without risking your warranty, it's time to call in the experts. The team at Right Price Carpet Cleaning uses powerful, truck-mounted steam cleaning technology to safely remove stains and odours from deep within your mattress. Get your instant quote and book online today
Recent Comments