


Let's be honest, dirty grout can make even the most beautiful tiles look tired and grubby. Thankfully, getting them back to their sparkling best is often easier than you think. A bit of elbow grease with either a homemade paste or a good commercial cleaner is usually all it takes to scrub away the grime, rinse it clean, and completely revitalise your floors. It's not just about looks, either—it's a big win for home hygiene.
Why Clean Grout Is a Non-Negotiable for Your Home
Dull, discoloured grout lines aren't just an eyesore; they're a genuine hygiene headache. Grout is porous by nature, which means it’s the perfect hideout for mould, mildew, and bacteria—especially in damp spots like kitchens and bathrooms. When you let that grime build up, it doesn't just get harder to clean; it can start affecting your home's air quality.
Think of regular cleaning as preventative maintenance for your floors. Here in Australia, tiles are a go-to flooring choice, so keeping grout looking fresh is a common household battle. In fact, you'd be surprised how many renovations are sparked by nothing more than stained grout—it just goes to show how much it impacts the feel of a room. Keeping it well-maintained not only looks a million times better but can also extend the lifespan of your tiled floors by 25-30%. If you're interested, you can explore more details on the Australian tile market and its trends.
The Benefits of a Deep Grout Clean
Beyond just making things look pretty, giving your grout a proper deep clean has some real, practical perks that make for a healthier and more valuable home.
- Improved Hygiene: Getting rid of trapped bacteria, mould, and allergens makes your floors a much safer place, especially for kids and pets who are always close to the ground.
- Enhanced Appearance: It’s amazing what a difference it makes. Bright, clean grout lines make the whole floor look newer and more vibrant, giving the entire room an instant lift.
- Easier Long-Term Maintenance: Once you've done the hard work of a deep clean and sealed the grout, day-to-day upkeep becomes a breeze. Stains won't have a chance to set in, saving you a lot of scrubbing down the line.
This guide is all about giving you actionable strategies to transform your floors. We're skipping the fluff and getting straight to practical steps, whether you're a fan of simple homemade solutions or prefer the power of a commercial product. Consider this your complete briefing before we roll up our sleeves and get started.
Right, let’s get you set up for success before you even think about scrubbing. Jumping straight into cleaning without any prep work is a surefire way to turn a straightforward job into a frustrating, muddy mess.
Think of this part as preparing your canvas. A little effort now ensures your cleaning solution works on the actual grout, not just the surface grime, and gets you that professional-looking finish you’re after.
Clear the Floor and Get the Grit Out
First things first, get everything off the floor. Then, you need to remove all that loose dirt, dust, and general debris that’ll turn into a sludge the second you add water.
Give the entire area a thorough sweep. Follow that up with a good vacuum, paying extra attention to the grout lines themselves. Your vacuum’s crevice tool is your best friend here—it's perfect for sucking out any stubborn bits of grit that have lodged themselves deep in the grout.
Protect Your Surroundings
Once the floor is clear, your next move is to protect everything else in the room. Cleaning solutions, especially the stronger commercial ones, have a knack for splashing where you don't want them. This can easily damage or discolour your cabinetry, skirting boards, and appliances.
A few minutes spent applying painter's tape along the base of these surfaces is time well spent. If you want to be extra safe, lay down some plastic sheeting or a few old towels. This simple barrier prevents accidental stains and saves you from a second, unplanned cleanup job later on.
Gather Your Grout Cleaning Toolkit
There’s nothing worse than getting halfway through a job only to realise you’re missing a crucial tool. Before you mix up any solutions, get all your gear together and within arm's reach. It keeps the whole process moving smoothly.
Here’s a quick checklist to make sure you’re ready to go:
- Scrub Brushes: A proper grout brush with stiff nylon bristles is your best bet. For really fine lines or getting into tight corners, an old toothbrush works surprisingly well.
- Buckets: You’ll want at least two. One for your cleaning solution and another filled with clean, warm water for rinsing.
- Sponges or Microfibre Cloths: You'll need these for wiping away the dirty cleaning solution and grime after you've done the hard work of scrubbing.
- Safety Gear: Always, always wear rubber gloves to protect your hands. If you’re using stronger chemical cleaners, safety glasses and a mask are non-negotiable. You don't want to deal with splashes or harsh fumes.
Good ventilation is absolutely critical, especially when you're working with anything stronger than baking soda. Open up the windows and doors, and maybe even get a fan going to keep fresh air circulating. It’s a small step that makes a huge difference for your health while you clean floor tile grout.
Finding the Right Grout Cleaning Solution
Choosing how to clean your floor tile grout isn’t about finding one single "best" method. It's about matching the right solution to your specific problem. The mild discolouration in a low-traffic hallway, for instance, needs a completely different approach than the stubborn mildew setting up shop in your shower.
Your options generally fall into two camps: gentle, homemade natural cleaners or more powerful commercial formulas designed for heavy lifting.
Natural and Homemade Grout Cleaners
The DIY approach is often the perfect starting point for routine maintenance and light staining. These solutions use common household ingredients, making them budget-friendly, readily available, and great for tackling minor stains before they become deeply set.
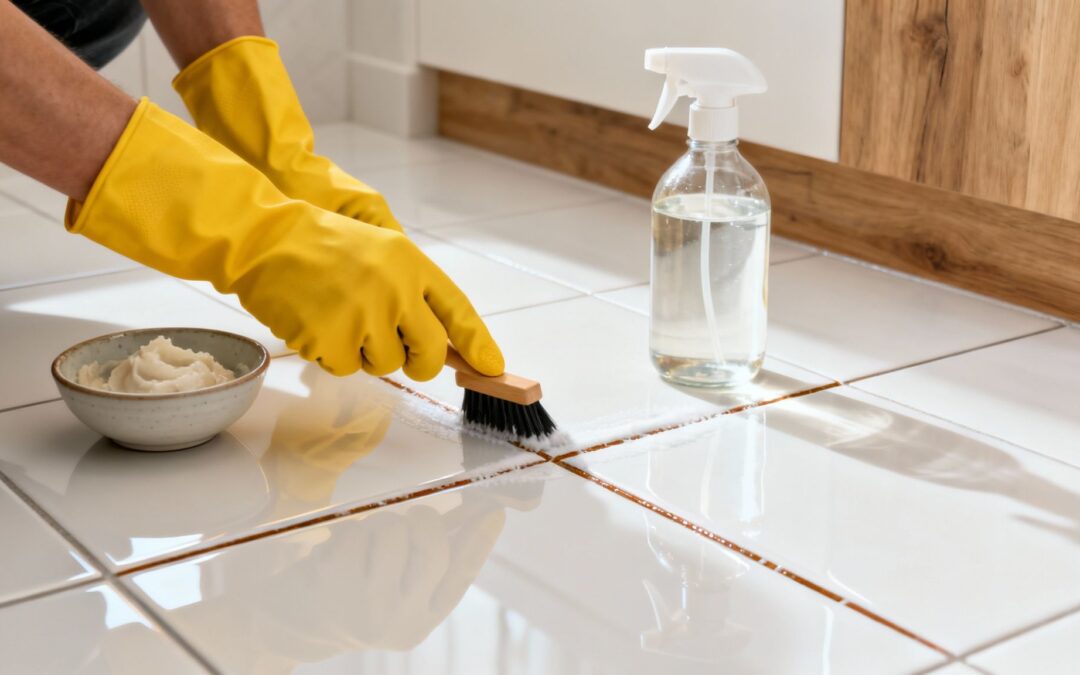
- Baking Soda and Water Paste: This is your go-to for gentle, effective cleaning. Just mix baking soda with enough water to form a thick paste. Slap it on the grout, let it sit for about 10 minutes, then give it a good scrub with a stiff brush and rinse clean. Easy.
- Hydrogen Peroxide and Baking Soda: For tougher spots, this combination offers a bit more punch. The fizzing action you get when you combine them helps lift dirt from the porous grout surface, while the hydrogen peroxide naturally bleaches stains and kills mould spores.
- White Vinegar Spray (With Caution): A 50/50 mix of white vinegar and warm water can cut through grime, but you need to use it carefully. Vinegar is acidic and can eat away at unsealed or damaged grout over time. A critical safety note: Never mix vinegar with bleach, as this combination creates toxic chlorine gas.
Before you jump in, a bit of prep goes a long way. This flowchart breaks down the simple but essential steps to take before you even think about scrubbing.
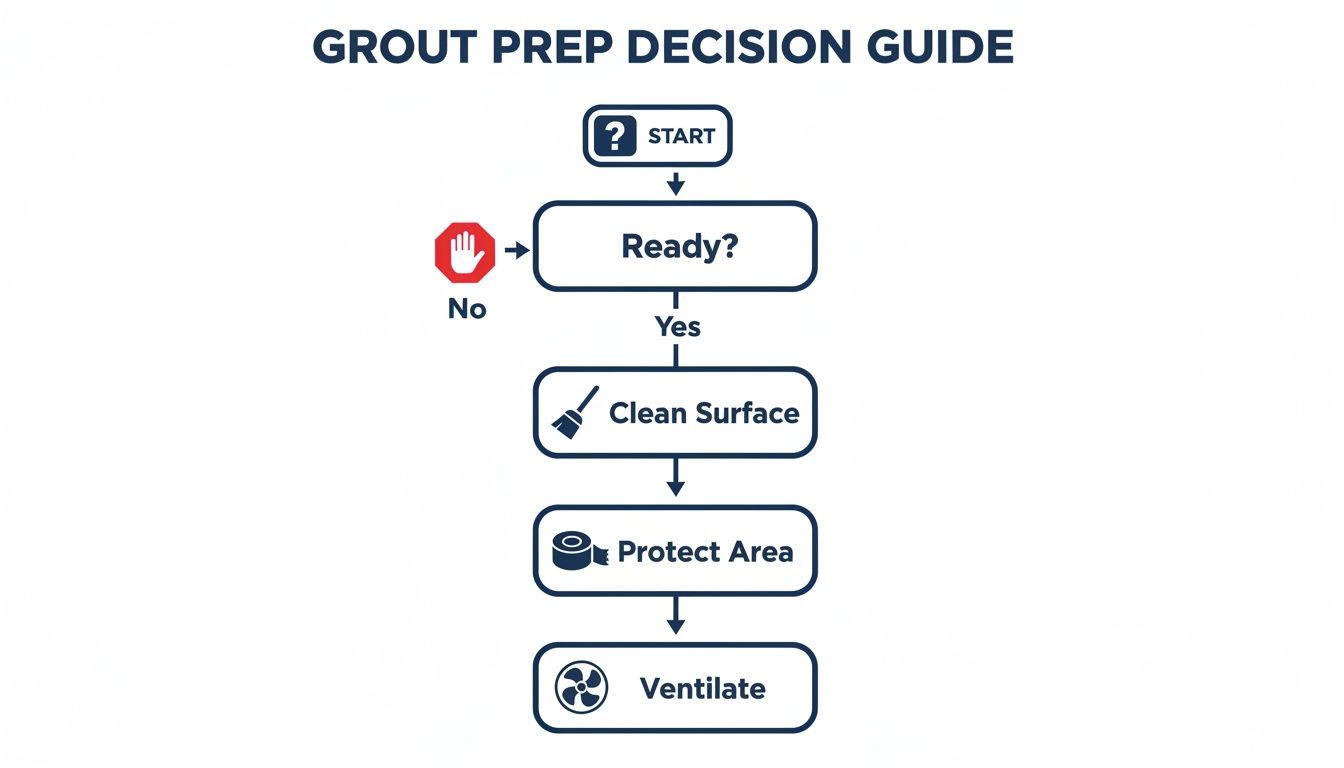
As you can see, getting the area ready is just as important as the cleaning itself. A little setup ensures a safe and efficient process from the very start.
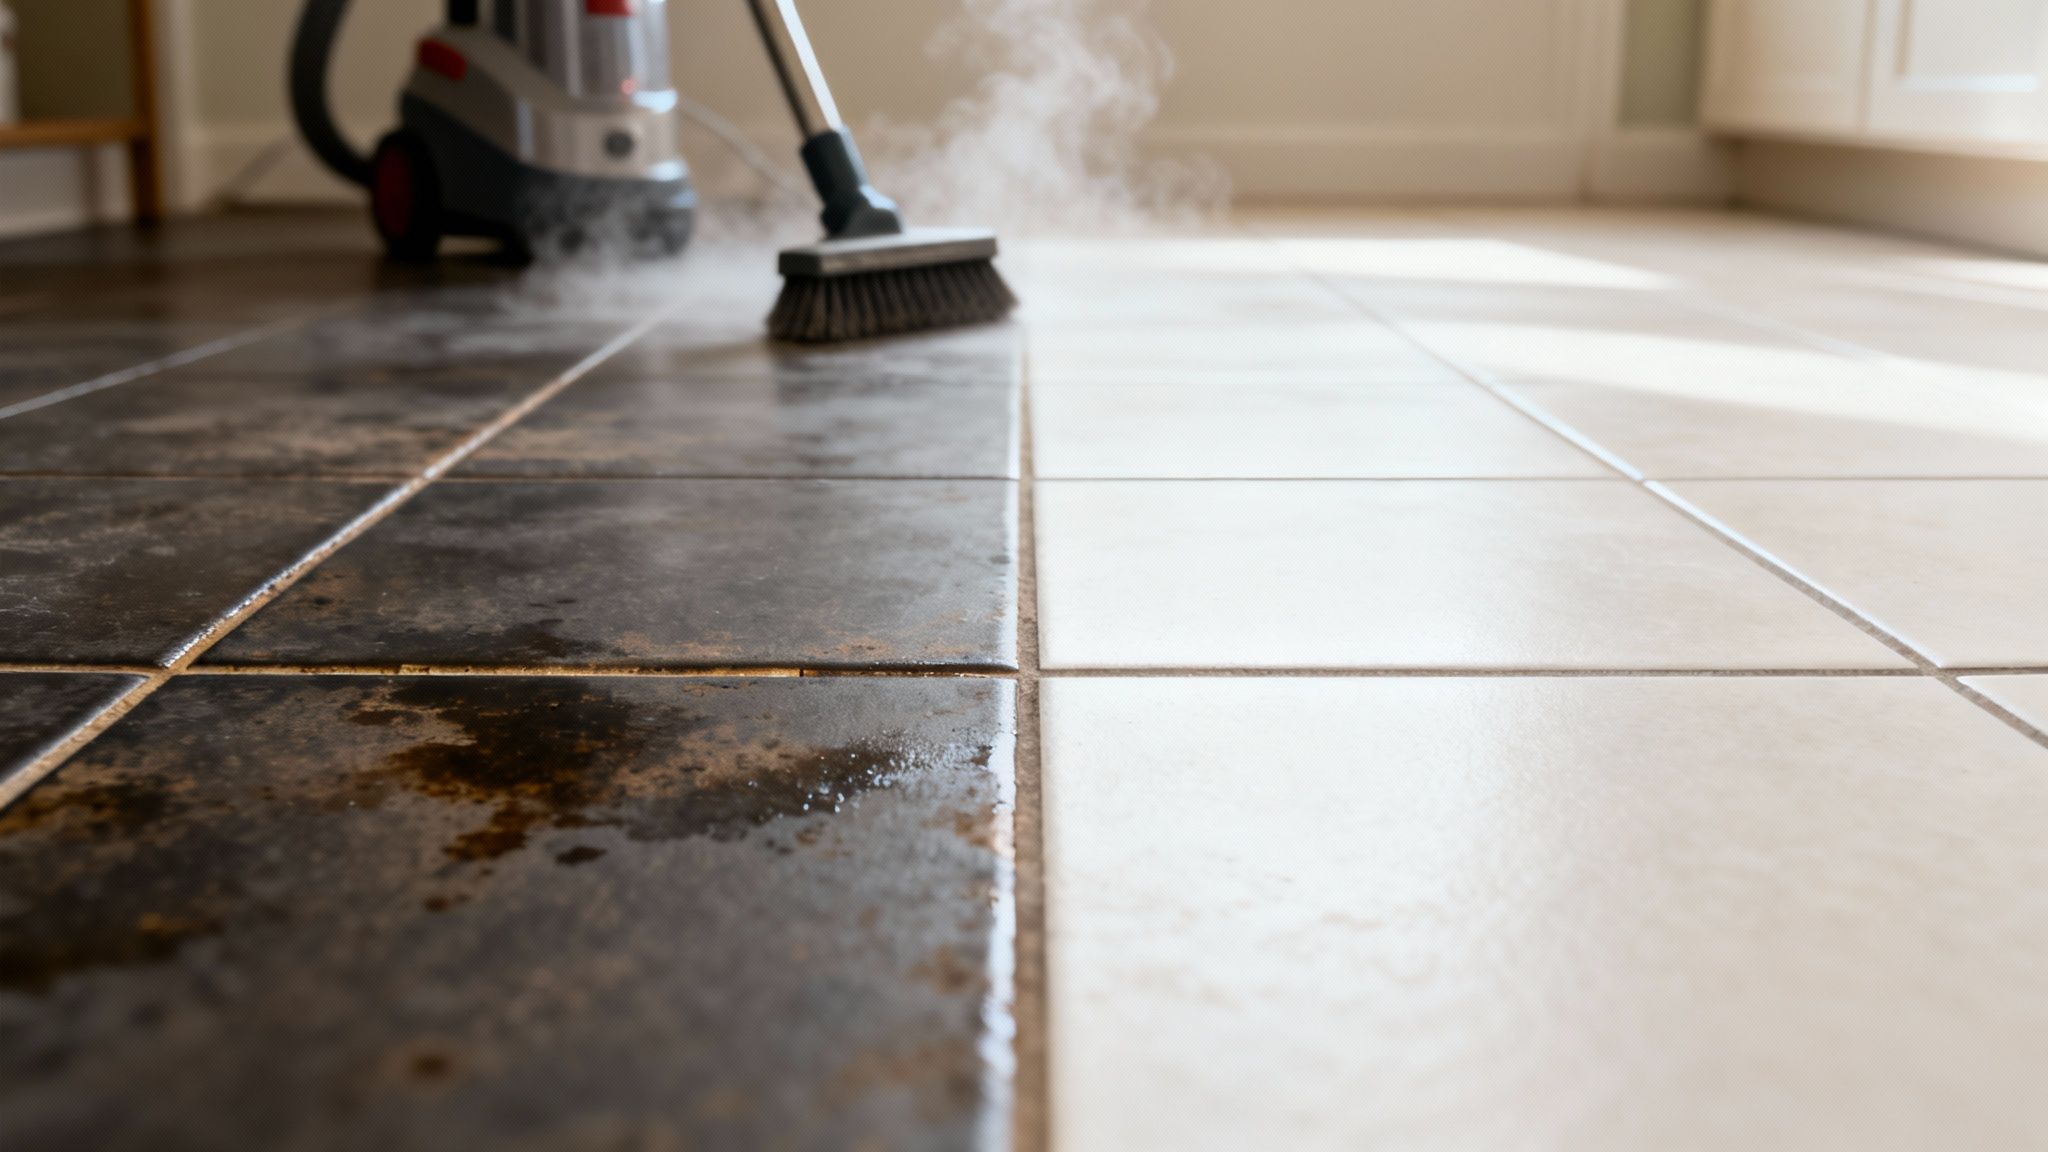
Commercial Cleaners for Tougher Jobs
Sometimes, homemade solutions just don't cut it. When you're up against heavy-duty grime, mould, or deep-set stains, it’s time to bring in the big guns: commercial grout cleaners.
These products are specifically formulated to power through the tough stuff. The Australian tile grout market recently stood at USD 32.90 million, with DIY kits selling over 250,000 units nationwide in a single year, so at-home solutions are clearly popular. But with professional services in Victoria growing by 24%, it's obvious that many homeowners eventually turn to experts when things get serious. Trends also show that 48% of consumers are now opting for low-VOC cleaners for a healthier home.
Here are a few types you'll find on the shelf:
- Oxygen Bleach Powders: A much safer alternative to harsh chlorine bleach. Products like Oxiclean are mixed with water and use the power of oxygen to whiten grout without the toxic fumes.
- Alkaline Cleaners: These are essentially degreasers, perfect for dissolving the oily, greasy messes you find in kitchen grout.
- pH-Neutral Cleaners: If you have natural stone or just want the safest option for regular cleaning, this is it. These cleaners won't damage your tile or the sealer. It's also worth looking into the advantages of non-soapy citrus cleaning solutions, as they clean effectively without leaving behind a sticky residue that just attracts more dirt.
DIY vs Commercial Grout Cleaners A Quick Comparison
Deciding between a pantry staple and a store-bought product can be tricky. This table breaks down the key differences to help you figure out what your grout really needs.
| Cleaning Method | Best For | Pros | Cons |
|---|---|---|---|
| Baking Soda Paste | Light, everyday grime and routine cleaning. | Inexpensive, non-toxic, readily available. | May require significant scrubbing for tougher stains. |
| Vinegar Solution | Soap scum and mineral deposits. | Effective degreaser, affordable. | Acidic; can damage unsealed or old grout. |
| Oxygen Bleach | Whitening discoloured grout and killing mould. | Safer than chlorine bleach, effective stain remover. | Can be more expensive than DIY options. |
| Alkaline Cleaners | Greasy kitchen messes and oily residue. | Powerful on grease and grime. | Can be harsh; requires good ventilation and gloves. |
| pH-Neutral Cleaners | Regular maintenance on sensitive surfaces like natural stone. | Very safe for all tile types and sealants. | Less effective on deep-set stains. |
Ultimately, the best choice comes down to the state of your grout and your comfort level with different ingredients. For daily upkeep, a simple baking soda paste is often enough. But for that deep, restorative clean, a specialised commercial product might be exactly what you need to bring your grout back to life.
Tackling Stubborn Grout Stains and Discolouration
So, your standard cleaning paste has met its match. You’ve scrubbed and sprayed, but some stains are just laughing at your efforts. When you’re facing down those persistent marks, it’s time to move beyond a general clean and launch a more targeted attack.
For most of us, the biggest battles are fought against specific enemies like rust, mould, and grease. These aren't just sitting on the surface; they’ve worked their way deep into the porous grout, and they need a specialised approach to be evicted.
Dealing with Common Culprits
Let's break down how to handle the usual suspects. But before you try any of these methods, remember the golden rule: always spot-test in a hidden area first. You want to make sure your solution won’t discolour your tile or damage the grout itself.
- Rust Stains: Often left behind by hard water or the legs of metal furniture, these orange-brown marks can be incredibly stubborn. A simple paste of lemon juice and salt can be surprisingly effective. Slap it on, let it sit for an hour, then give it a gentle scrub. If the stain is more deeply ingrained, a commercial rust remover is your best bet.
- Mould and Mildew: That familiar, unwelcome sight in bathrooms and damp corners. Mix up a paste with oxygen bleach powder and a little water. Apply it directly to the mouldy lines, let it bubble and do its thing for about 15-20 minutes, then scrub it away and rinse. It’s a much safer alternative to harsh chlorine bleach.
- Kitchen Grease: Greasy grout near the stovetop is a magnet for grime. An alkaline cleaner (basically, a degreaser) is what you need here. Spray it on, give it a few minutes to emulsify the grease, then get in there with a stiff brush and wipe the gunk away with hot water.
Advanced Stain Removal Techniques
For those stains that have soaked deep into the grout, you’ll need to step up your game. An oil-based stain from a kitchen spill, for instance, isn’t going to budge with simple scrubbing.
This is where a poultice comes in handy. Think of it as a thick paste made from an absorbent powder (like baking soda or diatomaceous earth) mixed with a cleaning solvent. You spread it over the stain, cover it with plastic wrap taped down at the edges, and leave it for 24-48 hours. As the solvent evaporates, it pulls the deep-set stain up into the powder, which you can then just scrape away.
When to Refresh Instead of Scrub
Let's be honest, sometimes you reach a point where more scrubbing is just a waste of time and energy. If the grout is permanently stained or discoloured no matter what you throw at it, it’s time for a cosmetic fix.
Grout pens or colourants are fantastic for this. They’re essentially a specialised paint designed to cover the old, tired grout, giving you crisp, uniform lines without the hassle of re-grouting. It’s a smart, cost-effective way to get that brand-new look when cleaning alone just can't cut it anymore.
Sealing Your Grout to Keep It Clean Longer
You’ve put in the hard work, and your grout lines are finally back to their sparkling, original glory. Don't let that effort go to waste. Now comes the most important step: protecting that pristine finish so it lasts.
Sealing your grout is the secret to keeping it clean for longer. Think of it as insurance for all that scrubbing you just did. Without a sealer, grout is basically a tiny, porous sponge, soaking up spills, dirty mop water, and grime. This simple, preventative step creates an invisible barrier that will save you countless hours of cleaning down the track.
Choosing the Right Grout Sealer
Not all grout sealers are created equal. They generally fall into two main categories, and picking the right one is crucial for getting the durable protection your floors need.
- Penetrating Sealers: This is your best bet for floor grout, hands down. These formulas soak right into the porous structure of the grout and chemically bond with it, creating a barrier from the inside out. The best part? It’s completely invisible and won’t change the look or texture of your grout.
- Membrane-Forming Sealers: These create a film or coating over the top of the grout, almost like a layer of paint. While they have their place on shower walls, they’re not a great choice for floors. Foot traffic wears them away unevenly, which can leave your grout looking patchy and worse for wear.
For almost any floor tile situation, a high-quality penetrating sealer is the way to go for long-lasting, invisible protection.
How to Apply Grout Sealer Correctly
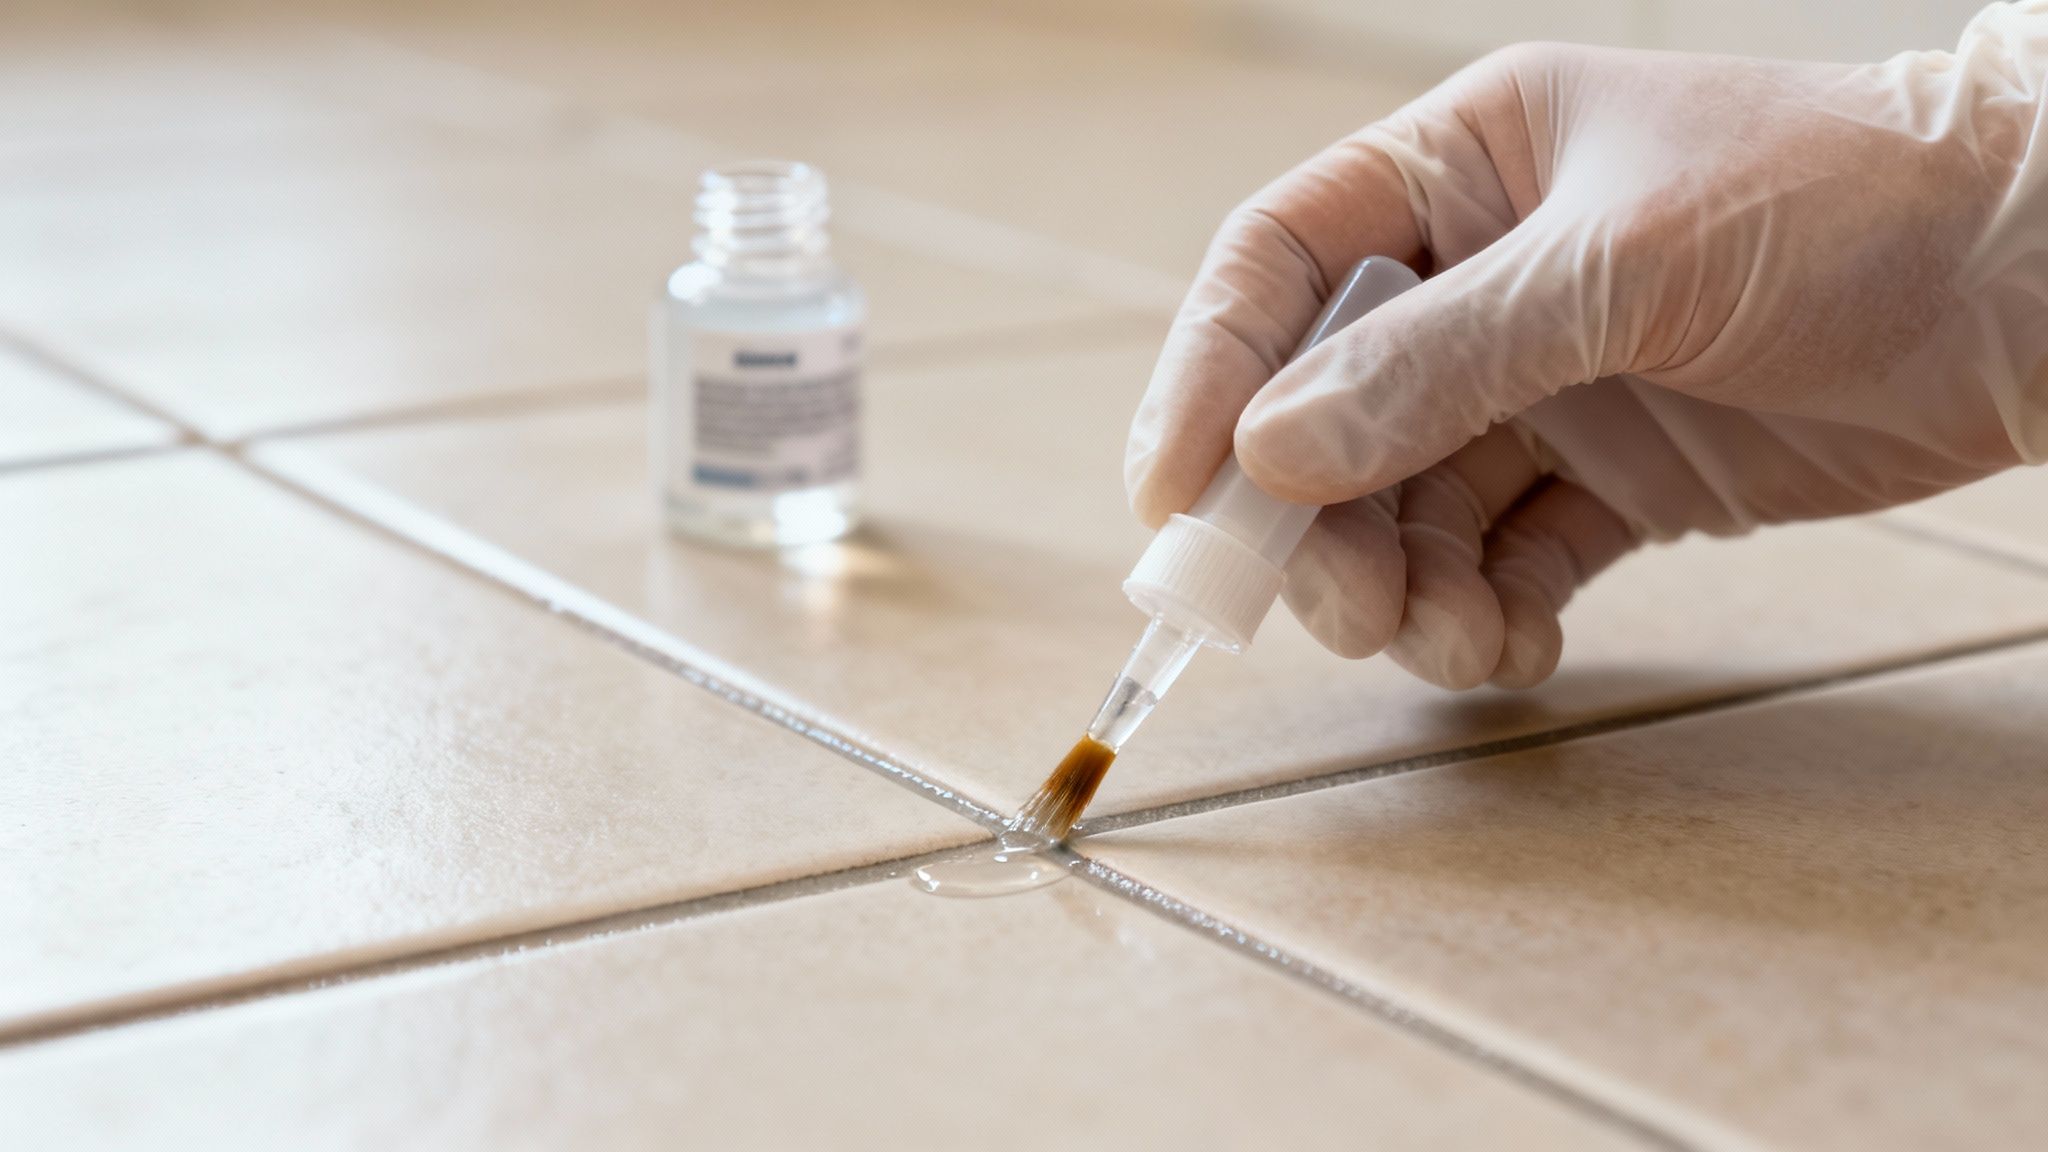
Applying sealer isn’t difficult, but it does call for a bit of patience and a steady hand. First thing's first: make sure your grout is completely dry before you even think about starting. Wait at least 24-48 hours after cleaning to ensure all the moisture has evaporated.
Grab a small applicator brush or a sealer bottle with a roller tip. Carefully apply a thin, even coat directly onto the grout lines, doing your best to keep it off the tile itself.
Keep a clean, dry cloth handy to immediately wipe away any excess sealer that gets on the tile surface. If you let it dry on the tile, it can leave a frustratingly hazy residue that’s a pain to remove later.
Don’t rush it. Working in small, manageable sections is the key here. It ensures you get total coverage and can wipe up drips before they have a chance to set. This is the kind of attention to detail that makes the final job look truly professional.
Once you’ve applied the sealer, it needs time to cure properly. This can take anywhere from 24 to 72 hours, so check the product instructions and make sure no one walks on the area or gets it wet during this time. For a more detailed walkthrough, you can find expert guides on how to perfectly seal your tile grout.
To keep that protective barrier strong, plan to re-seal high-traffic areas every 1-2 years.
Even with the best intentions and a whole lot of elbow grease, there are times when DIY methods just won't cut it.
Knowing when to step back and call in a professional isn't about admitting defeat. It's actually a smart move that saves you time, prevents potential damage, and delivers a level of clean that’s often impossible to achieve on your own.
Recognising the signs that you’re out of your depth is the most important part. If you've tried multiple cleaning solutions and the stains are stubbornly refusing to budge, it’s a clear signal that the grime is deeply embedded within the porous grout.
Likewise, if your grout is cracking, crumbling, or showing any signs of damage, continuing to scrub could just make things worse. A professional can properly assess whether it just needs a deep clean or requires a full repair.
Signs You Need an Expert
Sometimes, the sheer scale of the job is the deciding factor. Facing a massive expanse of tiled flooring can be an incredibly overwhelming task for one person. But other times, it comes down to specific problems that home remedies can't fix.
- Stubborn, Deep-Set Stains: Stains that have penetrated deep into the grout, like oil, dye, or long-term rust, often require specialised equipment and chemicals that aren't available over the counter.
- Widespread Mould or Mildew: If you have a serious, recurring mould issue, professionals have the right commercial-grade biocides and tools to eliminate it safely and effectively, getting to the root of the problem.
- Damaged or Eroding Grout: Cracked, loose, or missing grout needs repair, not just cleaning. A professional tile service can often handle both at the same time, ensuring the structural integrity of your floor.
Calling in an expert is really about achieving a superior, longer-lasting result. Here in Melbourne, reputable services use high-pressure hot water extraction and industrial-grade solutions that safely blast away years of built-up grime without damaging your tiles or the surrounding areas.
There’s a reason this industry is so robust. In Australia, the tile and grout cleaning sector generated AUD 180 million, with a massive 68% of homeowners citing grout staining as their number one flooring concern. Professional services boast a 90% satisfaction rate and can even enhance property values by 5-7%. You can dig into more insights on the grout cleaning services market via statsandresearch.com.
Ultimately, delegating the job ensures your floors are not just clean, but properly restored and protected for the future.
Common Questions About Cleaning Grout
Even when you feel ready to go, a few questions always come up once you get down on your hands and knees. Here are some quick, practical answers to the things homeowners in Melbourne ask us most often.
How Often Should I Actually Deep Clean My Grout?
For busy spots like kitchens and the main family bathroom, giving your grout a deep clean every six months is a pretty solid rule of thumb. In places that don't see as much action, like a guest bathroom, an annual scrub-down should be more than enough to keep it looking fresh.
Of course, that schedule goes out the window if you spot discolouration or mildew starting to creep in. It's always best to tackle that stuff right away instead of waiting. A bit of quick action now saves you a much bigger headache later.
A quick reminder: deep cleaning isn't the same as daily upkeep. The single best thing you can do for your grout is to wipe up spills the moment they happen. It makes those big cleaning sessions worlds easier.
Is It Okay to Use Bleach on Grout?
Look, while standard chlorine bleach is a beast when it comes to killing germs, it really should be your absolute last resort for grout. Why? It’s incredibly harsh and can actually eat away at the grout over time, making it even more porous and prone to future stains. Plus, the fumes are no joke, especially in a small, poorly ventilated bathroom.
If you need some serious whitening power, grab an oxygen bleach powder instead. It does a brilliant job of brightening and cleaning without the corrosive damage, making it a much safer choice for the long-term health of your floors.
Why Did My Grout Turn Yellow After I Cleaned It?
This one is frustratingly common, but the answer is usually simple: you probably didn't rinse well enough. When you leave a little cleaning solution behind, it dries into a sticky film that attracts dirt like a magnet, eventually turning into that dingy, yellowish layer.
To dodge this, make sure you rinse the area with a sponge and clean, warm water at least twice after scrubbing. It might add five extra minutes to the job, but it’s the key to getting those crisp, sparkling lines you were aiming for.
Ready to skip the scrubbing and get a professional result? The team at Right Price Carpet Cleaning offers expert tile and grout cleaning across Melbourne, using powerful steam extraction to lift years of grime. Get your instant quote online today!
Recent Comments