


The thought of DIY carpet cleaning is definitely appealing—who doesn't want a fresher home for a fraction of the cost? But the reality is often a lot more complicated. Those common rental machines you see at the supermarket sometimes create more problems than they solve, because they just don't have the power for a truly deep clean.
The Hidden Realities of DIY Carpet Cleaning
It’s easy to get drawn in by the idea of saving a bit of cash with a weekend rental. The problem is, many homeowners dive into a DIY project expecting professional-level results, only to end up with new, and sometimes costly, issues.
The Problem with Rental Machines
Let's be blunt: most rental units simply can't hold a candle to professional equipment. They run on far less suction power, heat, and water pressure. This massive difference is the root cause of the most common DIY carpet cleaning fails.
A classic example is over-saturation. When a machine doesn't have enough grunt to pull all the water and cleaning solution back out, your carpet's underlay gets completely waterlogged. This stretches the drying time from a few hours to a few days. Even worse, it creates the perfect damp, dark breeding ground for mould and mildew, leaving your home with a musty smell and potential health risks.
The biggest mistake we see is people thinking more soap means a better clean. Rental machines really struggle to rinse away heavy detergents, leaving behind a sticky residue that acts like a dirt magnet. Your carpet will actually get dirty again faster than before.
Why Stains Keep Coming Back
Have you ever cleaned a stain, felt that sense of victory, only to watch it mysteriously creep back a few days later? That frustrating experience has a name: "wicking."
When a spill soaks deep into the carpet padding, a surface clean might get rid of what you can see. But as the carpet dries, the leftover stain that’s still lurking deep within the fibres and padding gets wicked right back up to the surface.
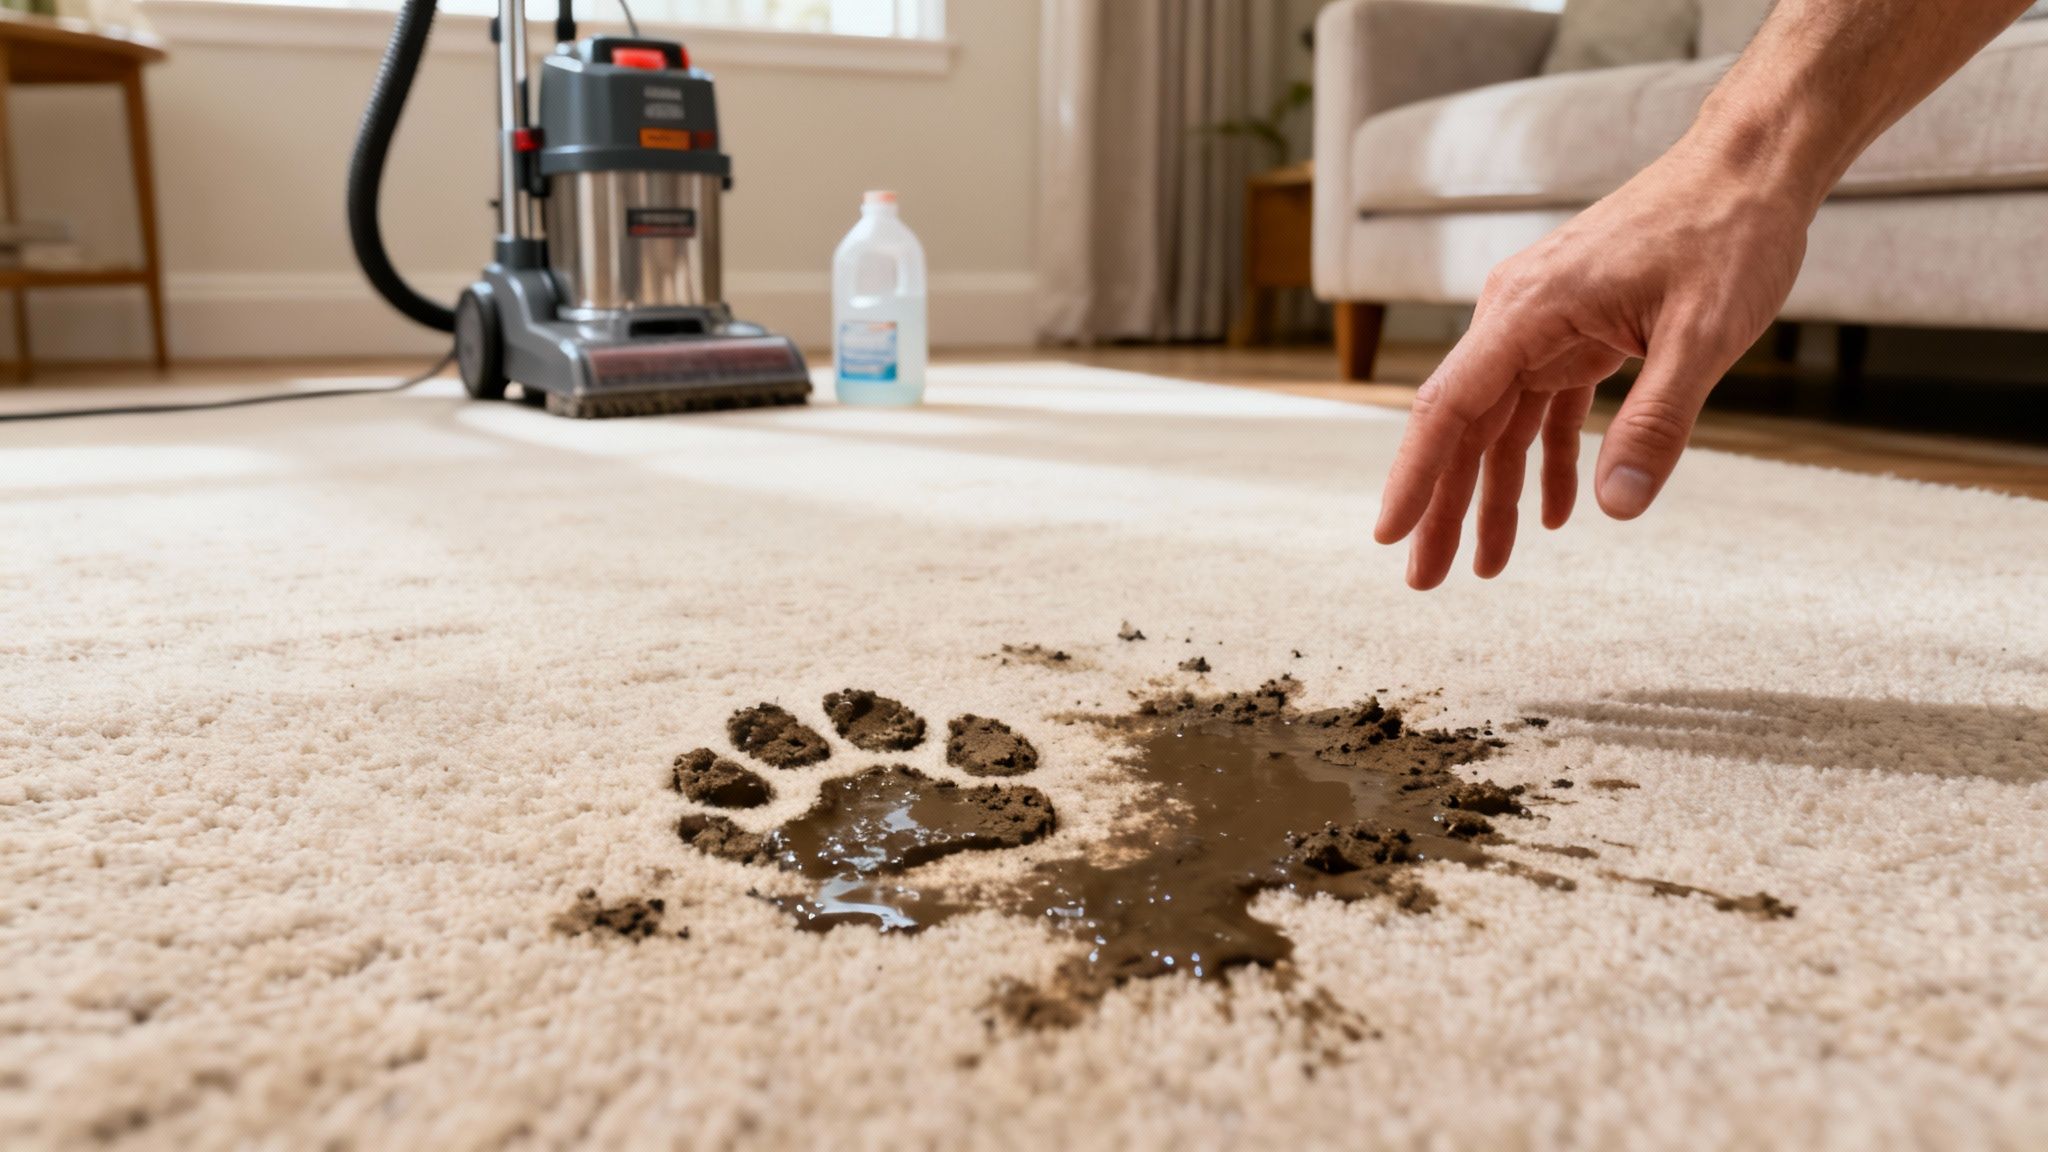
This is a huge issue with things like pet accidents or big spills. A DIY approach often just pushes the mess deeper into the carpet's base, making it impossible to remove fully without professional-grade extraction power. That muddy paw print might look simple, but rubbing at it with a weak machine can end up embedding the dirt for good.
Understanding the Financial Risks
While saving money is usually the main motivation for going the DIY route, the hidden costs can stack up fast. In Australia, where the carpet cleaning industry is valued at a whopping $611.5 million, it's no surprise many households are trying to cut back.
The issue is that rented steam cleaners often leave carpets soaked, which can lead to that nasty mould growth and even damage the carpet fibres themselves. For homes buzzing with kids and pets, common DIY solutions like vinegar mixes just won't cut it on tough stains, and you could even risk voiding your carpet's warranty or making allergens worse. You can get more details about the Australian carpet cleaning industry trends to see why professional care is often the smarter investment.
Ultimately, knowing about these hidden realities helps you go into your project with your eyes open. It's not just about getting things clean; it's about protecting one of your home's biggest investments.
Setting the Stage for a Flawless Clean
It’s tempting to jump straight into the wet cleaning, but without the right prep, you’re setting yourself up for a patchy, disappointing result. The real success of any diy carpet cleaning project happens long before you mix a single drop of cleaning solution. This groundwork is what separates a professional-looking finish from a soggy, streaky mess that takes forever to dry.
Think of it this way: you wouldn't paint a wall without dusting it down and taping the edges. Carpet cleaning works on the same principle. You need a clean canvas to start with, and that means putting in a bit of time upfront.
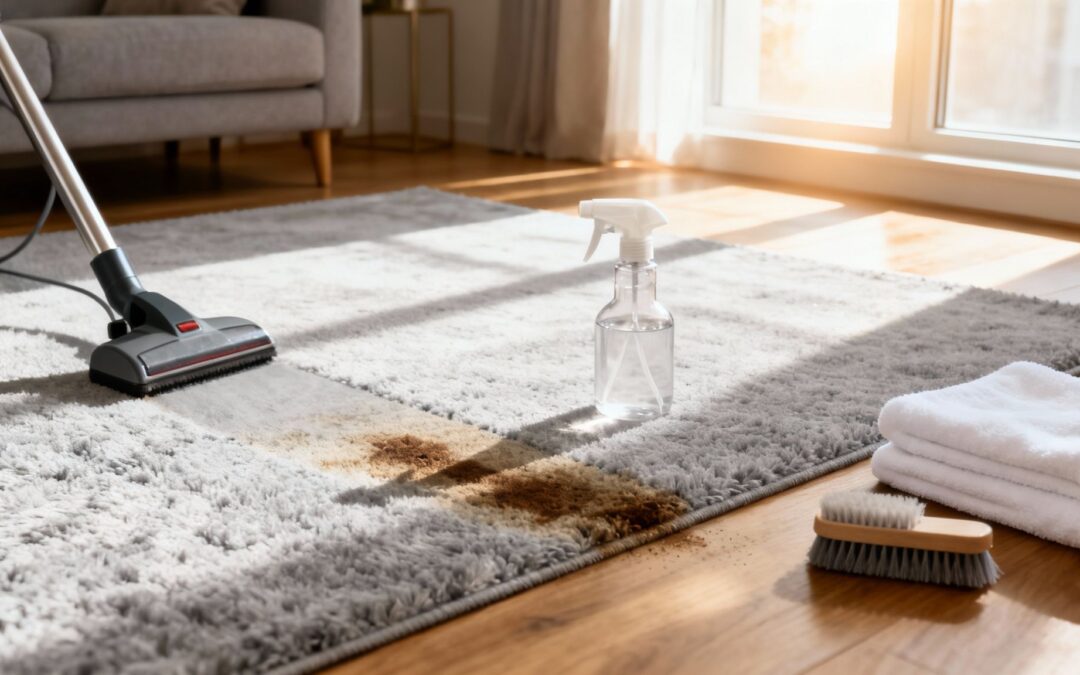
The Power of a Thorough Vacuum
Your most important tool isn’t the carpet cleaner—it’s your vacuum. Believe it or not, up to 80% of the grime in your carpet is dry soil, like dust, grit, and pet hair. When you add moisture to that, you’re basically making mud, which is far harder to get out and can lead to new stains.
Don’t just give the room a quick once-over. A truly thorough vacuuming means getting serious about it:
- Go slow with overlapping passes: Move the vacuum slowly in one direction, then pull it back just as slowly over the same spot. This gives the brush and suction time to actually lift the embedded debris.
- Switch up your direction: Once you've vacuumed the whole room, do it all again at a 90-degree angle to your first pass. This simple trick agitates the carpet fibres from a new direction, pulling up stubborn grit.
- Get into the corners: Use your vacuum’s crevice tool to get right up against the skirting boards. Dust loves to collect there and is easily missed.
This meticulous approach means you’re only tackling the oily stains during the wet cleaning phase, not a layer of mud you’ve just created.
Preparing Your Room for Cleaning
With the dry soil gone, it's time to prep the space itself. This is about more than just shoving the couch to one side—it's about protecting your furniture, walls, and carpet from accidental damage.
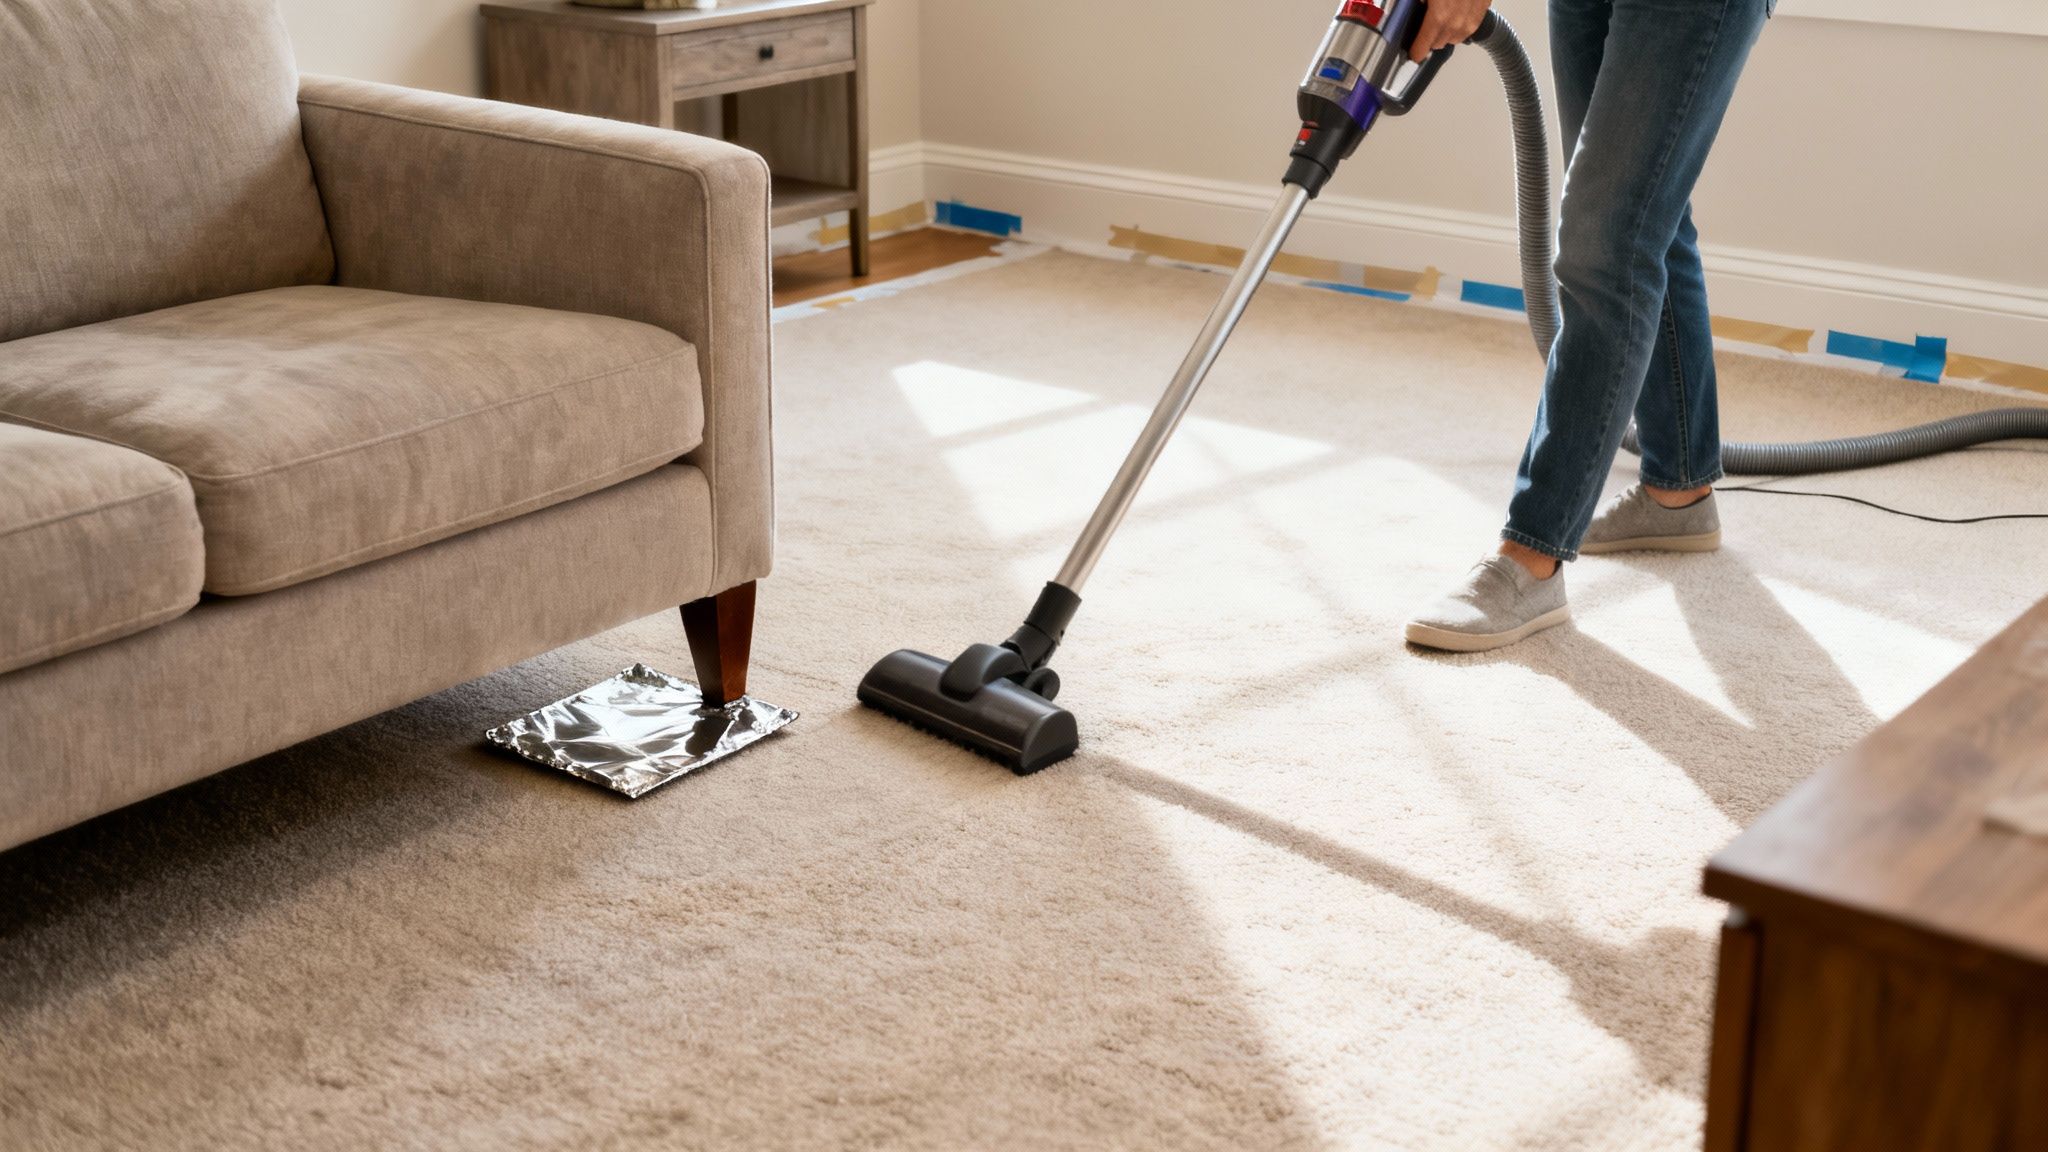
First, clear out as much furniture as you can. For those heavy items that aren't going anywhere, you absolutely have to protect their legs. Wood stains and rust from metal feet can easily leach into a damp carpet, leaving permanent marks you'll regret later.
A simple pro trick we use all the time is to place small squares of aluminium foil or plastic wrap under the legs of any furniture left in the room. This creates a waterproof barrier, stopping any colour transfer while the carpet dries.
Next, think about your skirting boards and any full-length curtains. You can run a line of low-tack painter's tape along the base of your skirting boards to shield them from moisture and cleaning solution splashes. As for curtains, either tie them up securely or take them down for the day. For a deeper dive into the small details that make a big difference, check out this comprehensive cleaning guide for sparkling results.
The Essential Spot Test
This is the one step you cannot skip. Before you go all-in with any cleaning solution, you must do a spot test. It takes two minutes and can save you from a major disaster, like bleaching your entire carpet or damaging the fibres.
Find a small, hidden patch of carpet to experiment on—under a sofa that never moves, inside a wardrobe, or in a corner you know will be covered. Apply a tiny amount of your cleaning solution, let it sit for a few minutes, then blot it with a clean white cloth.
Check the cloth for any colour bleed and inspect the carpet fibres for any changes. If it looks fine after it dries, you’re good to go.
Picking the right gear for your DIY carpet cleaning mission is more than half the battle. Your choices here will make or break the final result, deciding whether you get a fresh, clean carpet or a soggy, soap-filled mess. Let’s break down what you’ll find out there, from the machines you can rent to the cleaning solutions you pour into them.
The first big decision is the machine itself. Most people just pop down to the local supermarket or hardware store to rent a standard unit. While that’s certainly convenient, these machines are a world away from what the pros use. The differences really boil down to three things.
- Heat: Professional truck-mounted systems can blast water at over 100°C. That kind of heat is what you need to dissolve greasy soils and kill off nasty bacteria. Rental units? They usually have no heating element at all. They just rely on the hot tap water you put in, which gets cold fast.
- Pressure: To really get the cleaning solution deep into the carpet fibres where the dirt lives, you need high pressure. DIY machines just don't have the oomph and often end up only cleaning the very surface.
- Suction: This is probably the biggest weakness of all. A rental machine’s vacuum motor is significantly weaker, meaning it leaves a lot of dirty water behind. This not only leads to ridiculously long drying times but also causes that dreaded "wicking" effect, where deep stains magically reappear as the carpet dries.
Decoding Cleaning Solutions
Once you’ve got your machine, you need something to clean with. The shelves are packed with options, but they are definitely not all created equal, especially when it comes to different carpet materials. Reading the label isn't just a suggestion—it's non-negotiable.
If you have wool or other natural fibres, always look for solutions specifically labelled "wool-safe." Harsh, high-pH chemicals can strip the natural lanolin from wool, making it brittle and weak, or even worse, cause the colours to bleed. For synthetic carpets like nylon or polyester, you’ve got a bit more flexibility, but it’s still smart to steer clear of detergents that create a mountain of foam. All those suds are a nightmare for a weak rental machine to extract, leaving behind a sticky residue that becomes a magnet for new dirt.
A quick spot test in a hidden area can save you from a complete disaster. Dab a little solution on, wait a few minutes, and press a white cloth against it. If you see any colour transfer or the carpet's texture changes, stop right there and find another product.
The Truth About Homemade Cleaners
For those leaning towards a more natural approach, a simple mix of white vinegar and water often gets thrown around as the ultimate homemade solution. And it’s true, vinegar is a fantastic deodoriser and its mild acidity can help cut through light, everyday grime.
But, you have to be realistic about what it can and can't do. A vinegar solution is great for a light refresh, but it’s just not going to touch heavy soiling or set-in stains. It simply lacks the chemical muscle needed to break down greasy or oily messes.
Baking soda is another DIY favourite, usually sprinkled over the carpet to soak up odours before vacuuming. It can definitely help with smells, but it's not a deep cleaner. In fact, if you use too much, you can end up with a fine white powder residue that’s surprisingly tough for a standard vacuum to pick up completely.
The reality is, while DIY cleaners have their place for minor issues, they fall short on serious cleaning. Expert analysis consistently shows that professional eco-pretreatments are far more effective and can significantly extend the life of your carpet. In Australia's humid climate, the powerful extraction from professional services prevents over 70% of re-soiling—something a temporary DIY fix just can't compete with. You can discover more about the effectiveness of professional vs DIY methods to get the full picture.
DIY Cleaning Solutions vs Professional Treatments
When you're standing in the cleaning aisle, it’s easy to get overwhelmed. The DIY options seem convenient, but how do they stack up against what the professionals use? It’s not just about cleaning power; it’s also about safety and long-term results for your carpet.
Here's a look at some common DIY concoctions versus their professional-grade counterparts.
| Cleaning Agent | Best For | Potential Risks | Professional Alternative |
|---|---|---|---|
| Vinegar & Water | Light deodorising, tackling very minor surface grime. | Can damage natural stone or grout if over-sprayed; ineffective on oil-based stains. | Acidic Rinse Agents: pH-balanced to neutralise detergents without harming fibres. |
| Baking Soda | Absorbing surface-level odours before vacuuming. | Can leave a fine, white residue that’s hard to remove and may clog vacuum filters. | Enzyme Deodorisers: Break down the organic source of the odour at a molecular level. |
| Dish Soap Solution | Emergency spot cleaning on very small, fresh spills. | Leaves a sticky, foamy residue that attracts dirt; very difficult to fully rinse out. | Low-Moisture Encapsulation Polymers: Crystalise around dirt for easy vacuum removal. |
| Store-Bought Shampoo | General cleaning of synthetic carpets with a rental machine. | Can cause over-wetting, leading to mould; harsh chemicals may irritate skin or pets. | Hot Water Extraction with Pre-Treatment: Deep cleans and sanitises with minimal residue. |
Ultimately, choosing your DIY arsenal comes down to understanding your carpet type and being honest about the level of dirt you're dealing with. For a light touch-up, a rental machine with a carefully chosen, low-foam solution might just do the trick. But for anything more challenging, or if you have delicate natural fibres, the limitations of DIY gear become glaringly obvious.
Your Go-To Guide for Tackling Common Stains
Let’s be honest, spills happen. It's just a part of life. But a stray glass of wine or a dropped slice of pizza doesn’t have to become a permanent, ugly reminder on your living room floor. With a bit of know-how and quick action, you can tackle most common household stains yourself. Think of this as your emergency playbook for those heart-stopping "oops" moments.
The number one rule for any spill? Act fast. The longer a stain has to sit, the deeper it works its way into the carpet fibres, making it exponentially harder to get out. Your first move should always be to blot up as much of the mess as possible before it has a chance to set.
From there, your approach will depend on your carpet. This simple decision tree can help you figure out the best first step based on your carpet's material.
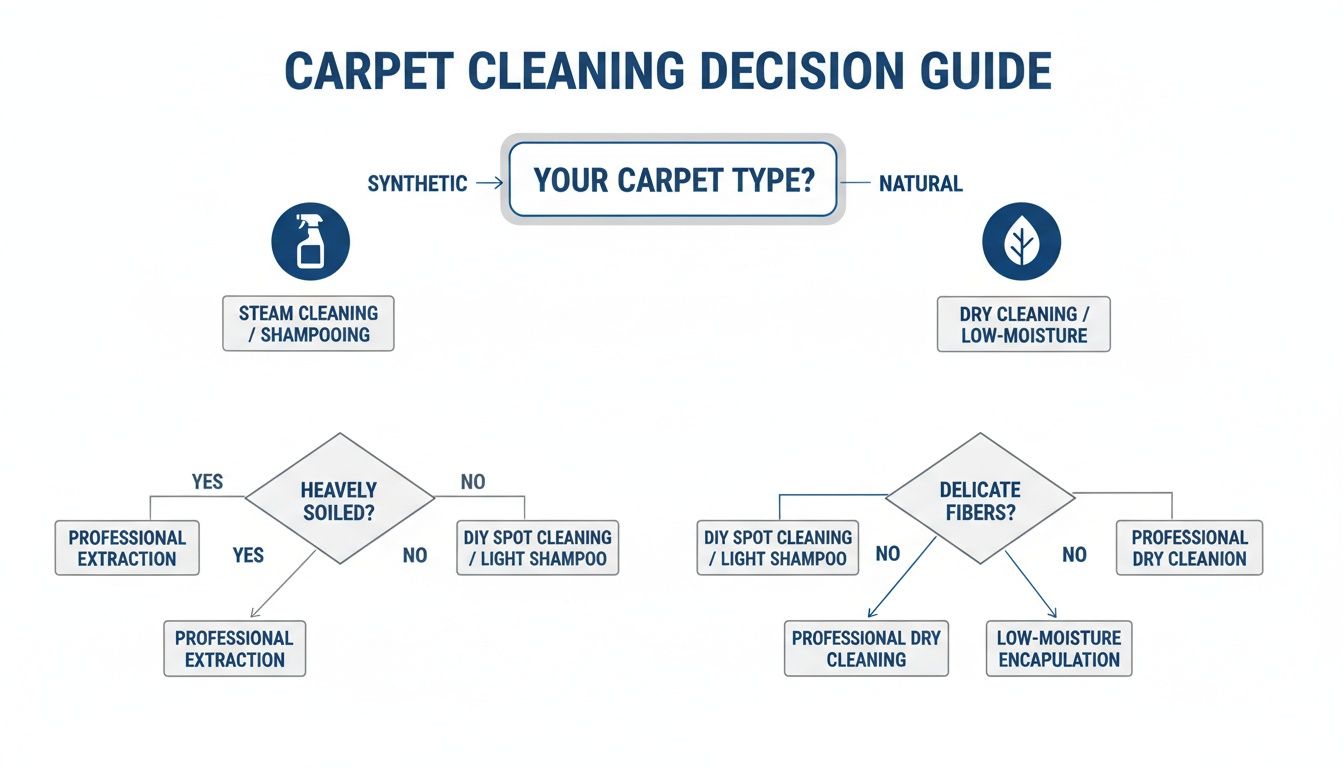
As you can see, knowing whether your carpet is made from synthetic or natural fibres is crucial. It guides your choice of cleaning agents and helps you avoid causing accidental damage.
Tackling Red Wine Spills
A spilled glass of red wine can look like a complete disaster, but it's usually salvageable if you get to it quickly. Whatever you do, resist the urge to scrub frantically. That will only push the stain deeper and make it spread.
Instead, gently blot the spill with a clean, dry white cloth. Always work from the outside of the stain inwards to stop it from getting bigger. Once you've soaked up the excess, cover the stain generously with salt or baking soda to draw out even more liquid. Let it sit for a few minutes until it looks dry, then vacuum it all up.
If there's still some discolouration left, a mix of one part white vinegar to two parts water can do the trick. Lightly spritz the solution onto the spot, let it sit for about five minutes, and then blot again with a fresh cloth.
Dealing with Coffee and Tea Stains
That morning coffee spill is another all-too-common culprit. Just like wine, the tannins in coffee and tea can leave a stubborn brown mark if you don't treat them straight away. Your first step is the same: blot up as much as you can, immediately.
For these stains, a simple mix of two tablespoons of white vinegar and one tablespoon of mild, clear dish soap in two cups of warm water works wonders. Apply this mixture sparingly with a cloth, blotting gently. It’s crucial to rinse afterwards by dabbing with a cloth dampened with plain cold water to remove any soapy residue.
A quick but important tip: never use hot water on protein-based stains like blood or milk. Heat can essentially 'cook' the protein, binding it permanently to the carpet fibres. Always start with cold water for these types of accidents.
The principles of blotting and using the right solutions aren't just for carpets. For tips on how to handle spills on other home textiles, you might find some great insights on cleaning a mattress effectively.
Pet Accidents and Odour Removal
Pet urine is a double-whammy: you've got the stain and the lingering odour to deal with. The uric acid in urine can cause permanent damage and colour loss if it isn't neutralised properly. After blotting the area thoroughly, it's time to tackle the smell.
This is where an enzymatic cleaner becomes your best friend. These products contain special enzymes that break down the organic proteins in the urine, completely eliminating the source of the smell instead of just masking it. Follow the instructions on the bottle carefully, which usually involves saturating the area and letting it air dry completely.
One thing to avoid is ammonia-based cleaners. Their scent can actually mimic the smell of urine, which might encourage your pet to mark the same spot again.
Conquering Greasy Food Spills
Oil-based stains from things like butter, salad dressing, or that dropped piece of pizza are tricky because water alone won't break them down. The secret is to absorb the grease first.
Start by carefully scraping off any solid bits with a dull knife. Next, sprinkle a generous amount of an absorbent powder like cornflour or baking soda over the stain. Let it sit for at least 15-20 minutes to soak up the oil, then vacuum it all up thoroughly.
To treat what's left behind, you'll need a solvent. A small amount of isopropyl rubbing alcohol on a clean cloth can be blotted onto the stain. As always, test this on a hidden spot first—like inside a closet—to make sure it doesn't affect your carpet's colour. After treating, blot with a water-dampened cloth to rinse.
The Critical Final Step: Drying Your Carpet
You’ve done the hard work of scrubbing and rinsing, and your carpet is finally looking fantastic. It’s tempting to call it a day, but this next stage is arguably the most important one. Improper drying is the number one cause of DIY carpet cleaning disasters, leading to lingering damp smells, mould, and mildew that can ruin both your carpet and your indoor air quality.
The cleaning process is only half the battle; getting the carpet dry quickly and completely is the other. This is where the limitations of those rental machines become painfully obvious. Their notoriously weak suction often leaves carpets far too wet, creating the perfect breeding ground for problems in the underlay and backing.
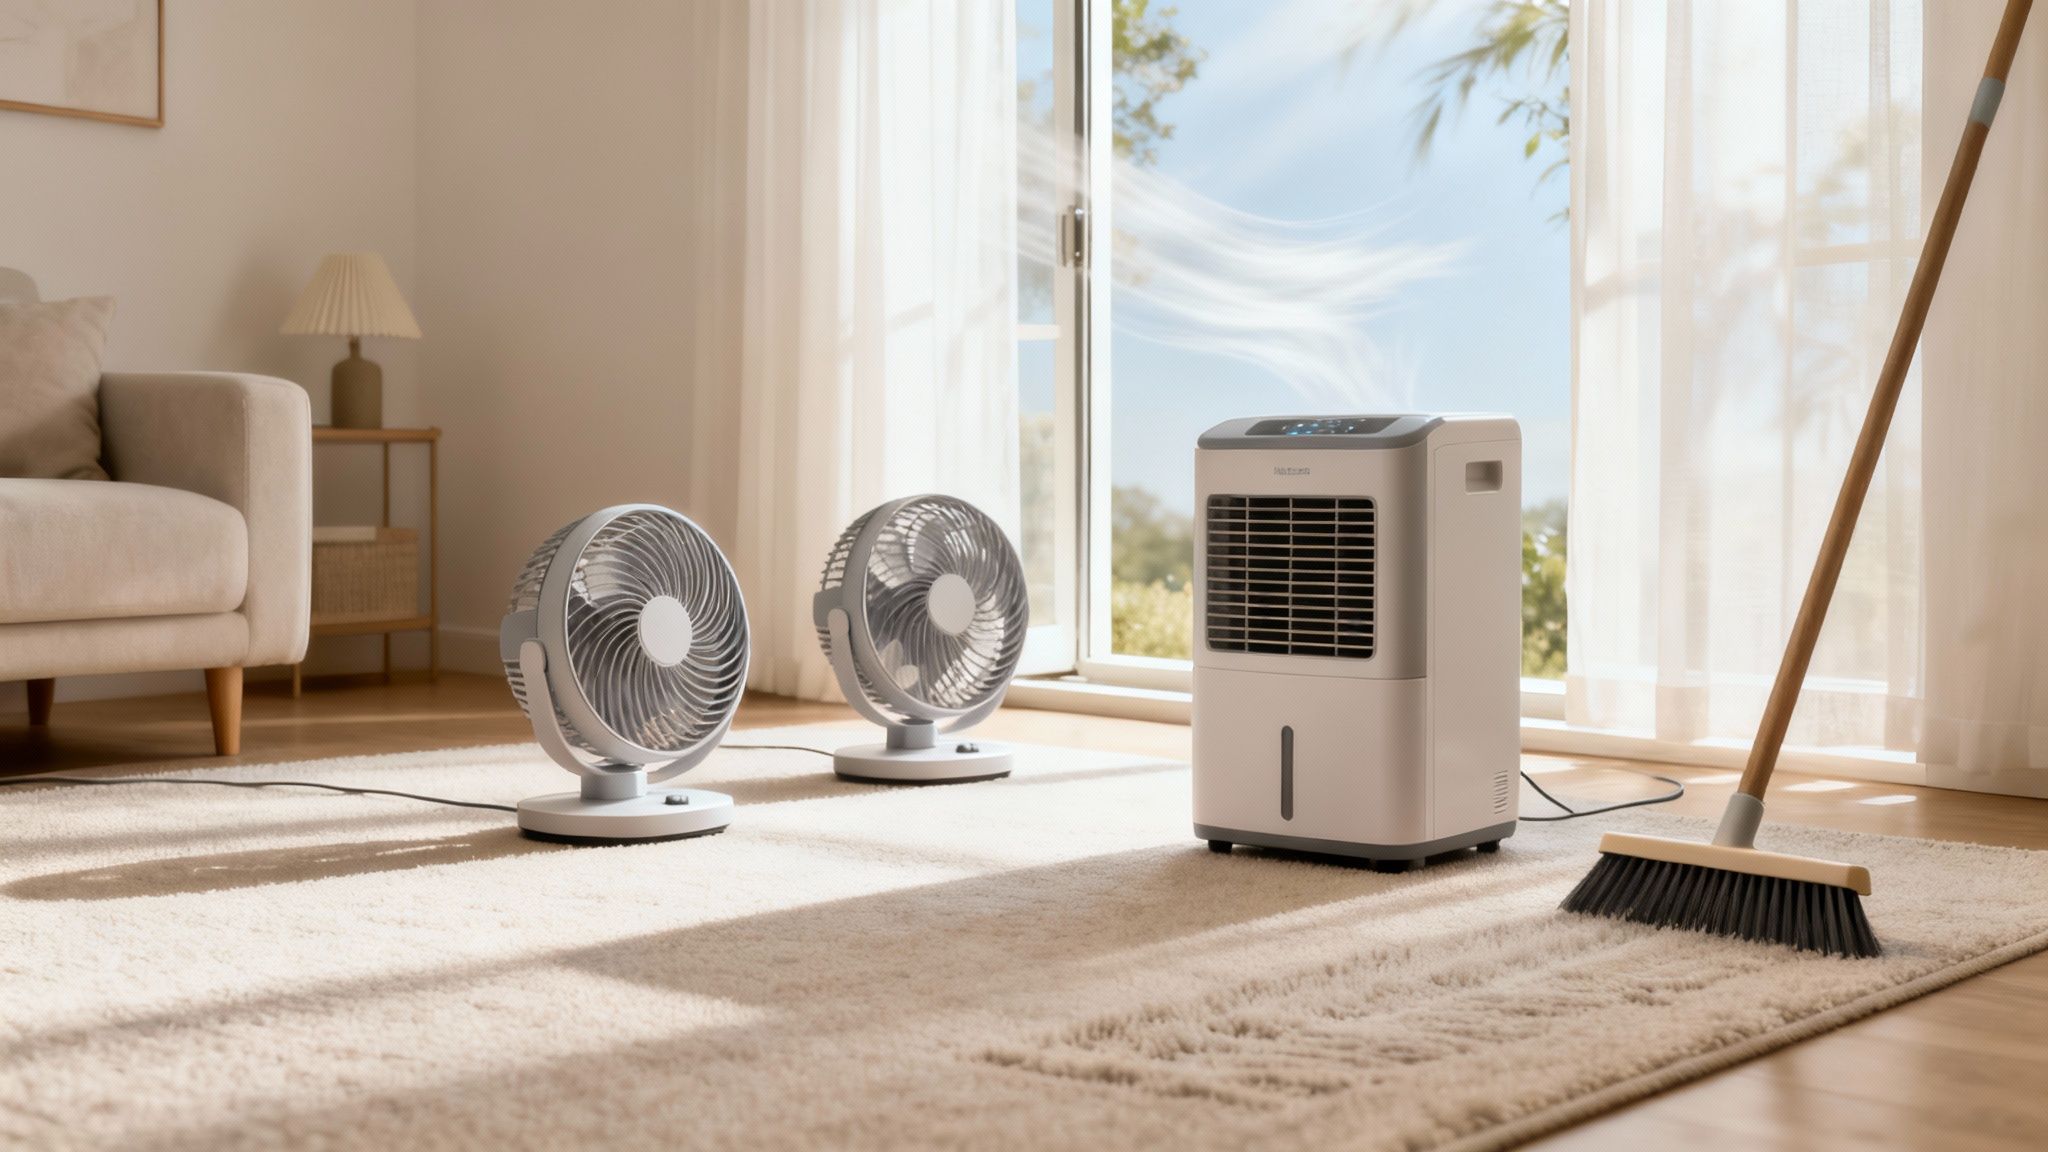
Creating Maximum Airflow
The key to fast and effective drying is simple physics: you need to move as much air as possible across the surface of the carpet. Good ventilation whisks moisture away before it has a chance to settle in and cause trouble. Think of it as creating your own mini wind tunnel.
Here’s how to get the air moving:
- Turn on ceiling fans: Crank them up to their highest speed.
- Use floor fans: Set up a few fans around the room and aim them directly across the carpet’s surface.
- Open windows and doors: If it's a dry, breezy day, this is a free and highly effective way to create cross-ventilation.
- Switch on a dehumidifier: In humid climates or on a damp day, a dehumidifier is your best friend. It will actively pull moisture out of the air, seriously speeding things up.
The goal is to keep the air in the room dry and constantly circulating.
Why You Must Keep Off the Carpet
I know how tempting it is to walk on your freshly cleaned carpet, but this is a critical mistake. Wet carpet fibres are weak and incredibly vulnerable to crushing. Any foot traffic can flatten the pile, leaving permanent dents and marks that won't come out once it's dry.
Worse, walking on a damp carpet can track new dirt from your shoes right back onto it, creating fresh stains before you’ve even had a chance to enjoy your hard work. It’s best to completely block off the room until the carpet is 100% dry to the touch. This can take anywhere from six to 24 hours, depending on the airflow and just how saturated the carpet was to begin with.
Forcing the drying process is a false economy. Rushing this stage can lead to costly mould remediation down the line, completely wiping out any initial savings from a DIY approach.
Many people underestimate the financial hit from improper drying. While professionals generate revenue from cleaning, their success is built on avoiding the hidden costs homeowners face, like mould damage. This is especially true for end-of-tenancy cleans, where DIY jobs often fail to meet the required standard. Find out more about how DIY cleaning costs compare to professional results and see why pros are often mandated in rental agreements.
The Final Professional Touch
Once your carpet is completely dry, there's one last step to get that uniform, professional look. The cleaning process can leave the carpet pile looking a bit messy and pushed in different directions.
To fix this, grab a carpet rake or even a stiff-bristled broom and gently groom the fibres. Brush the entire carpet in a single, consistent direction. This simple action lifts and resets the pile, giving it that fluffy, uniform appearance and a satisfying "like new" finish. It’s a small detail that makes a massive difference to the final result.
When to Call in a Professional Cleaner
While a determined DIY effort can tackle many routine cleaning jobs, there are times when you need to know when to step back and call for professional help. It’s a crucial part of protecting your carpet. Some situations are just too big or too risky for rental machines and home-brewed solutions. Pushing the limits here can lead to irreversible damage and a much bigger bill down the line.
Recognising these scenarios isn’t about admitting defeat; it’s about making a smart, informed decision to safeguard your investment. Professional cleaners bring specialised equipment and years of experience that are absolutely essential for these high-stakes jobs.
Situations Demanding an Expert
Certain problems require a level of power and expertise that DIY methods just can't deliver. If you're facing one of these, it's time to pick up the phone.
- Extensive Water Damage: After a burst pipe or minor flood, a rental machine won't cut it. Professionals use powerful, truck-mounted water extraction systems and industrial-grade air movers to stop mould from growing deep within your carpet and underlay.
- Deep-Set Pet Odours: When a pet accident has soaked right through to the padding, surface cleaning is only a temporary fix. Pros use targeted enzyme treatments and sub-surface extraction tools to get to the source and neutralise the odour for good.
- Delicate or Speciality Carpets: Materials like wool, silk, or jute need a gentle touch. They require specific cleaning methods and carefully balanced pH-neutral solutions. Using the wrong products or too much heat can cause permanent shrinkage, browning, or colour bleed.
- Mandatory End-of-Lease Cleans: Almost every Australian rental agreement requires a receipt from a professional carpet cleaner to get your bond back. A DIY job, no matter how thorough, simply won't meet this legal requirement.
Tackling a flooded carpet yourself is a major risk. A professional can properly assess the damage and ensure the subfloor is completely dried out, preventing long-term structural issues and hazardous mould infestations that DIY methods often miss.
Ultimately, for these complex issues, the value a professional brings is peace of mind. For straightforward, reliable service in tricky situations like these, many Melbourne residents turn to a trusted team like Right Price Carpet Cleaning to ensure the job is done right. Their expertise not only restores your carpet but also protects your investment for years to come.
Your DIY Carpet Cleaning Questions Answered
Even with the best guide, a few questions always pop up when you’re elbow-deep in a DIY carpet cleaning project. Knowing the right answers can be the difference between a great result and a frustrating mistake. Let's tackle some of the most common ones we hear from homeowners.
How Often Should I DIY Clean My Carpets?
For general upkeep, giving your carpets a light DIY clean every six months is a pretty good rule of thumb. It’s perfect for managing surface-level dust and dealing with minor spots that pop up between deeper cleans.
But here’s the thing: this should never replace a professional deep clean, which is essential every 12-18 months. A pro has the right gear to pull out the embedded dirt, allergens, and bacteria that rental machines just can’t touch. If you’ve got heavy foot traffic, pets, or kids, you’ll probably want to book a professional clean more often to keep things hygienic and your air quality fresh.
Can I Use a Rental Machine on My Wool Carpet?
We’d strongly advise against it. Wool is a beautiful, delicate natural fibre, but it’s incredibly sensitive to high heat, aggressive brushes, and the high-pH chemicals you’ll find in most standard cleaning solutions.
Using a typical rental machine on wool is a huge gamble. You risk permanent damage like shrinkage, colour bleeding, or browning. Delicate materials like wool and silk really need a professional touch—someone who uses specific, pH-neutral, wool-safe methods and equipment.
Why Does My Carpet Look Worse After Cleaning It?
This is a classic—and disheartening—DIY problem. It usually boils down to one of two issues, both tied to the limits of rental equipment.
The most common culprit is the machine’s weak suction. It just can't pull out all the dirty, soapy water, leaving behind a sticky residue. That residue becomes a magnet for new dirt, making your carpet look grimy again in no time. The other reason is not vacuuming thoroughly enough beforehand, which turns dry soil into mud that just gets smeared around. Professional systems have far superior extraction power, so they can rinse and remove all that residue completely, stopping this frustrating cycle.
When your DIY efforts just aren't cutting it, trust the experts at Right Price Carpet Cleaning to restore your carpets safely and effectively. Get your free, instant quote online today!
Recent Comments