


When you’re faced with vomit on your carpet, that first moment can feel like pure panic. The sight, the smell—it's overwhelming. But what you do in those first few minutes is absolutely critical. This isn't the time to hesitate; it’s about swift, methodical damage control to stop a mess from becoming a permanent stain.
Your Immediate Response Plan for Carpet Vomit Cleanup
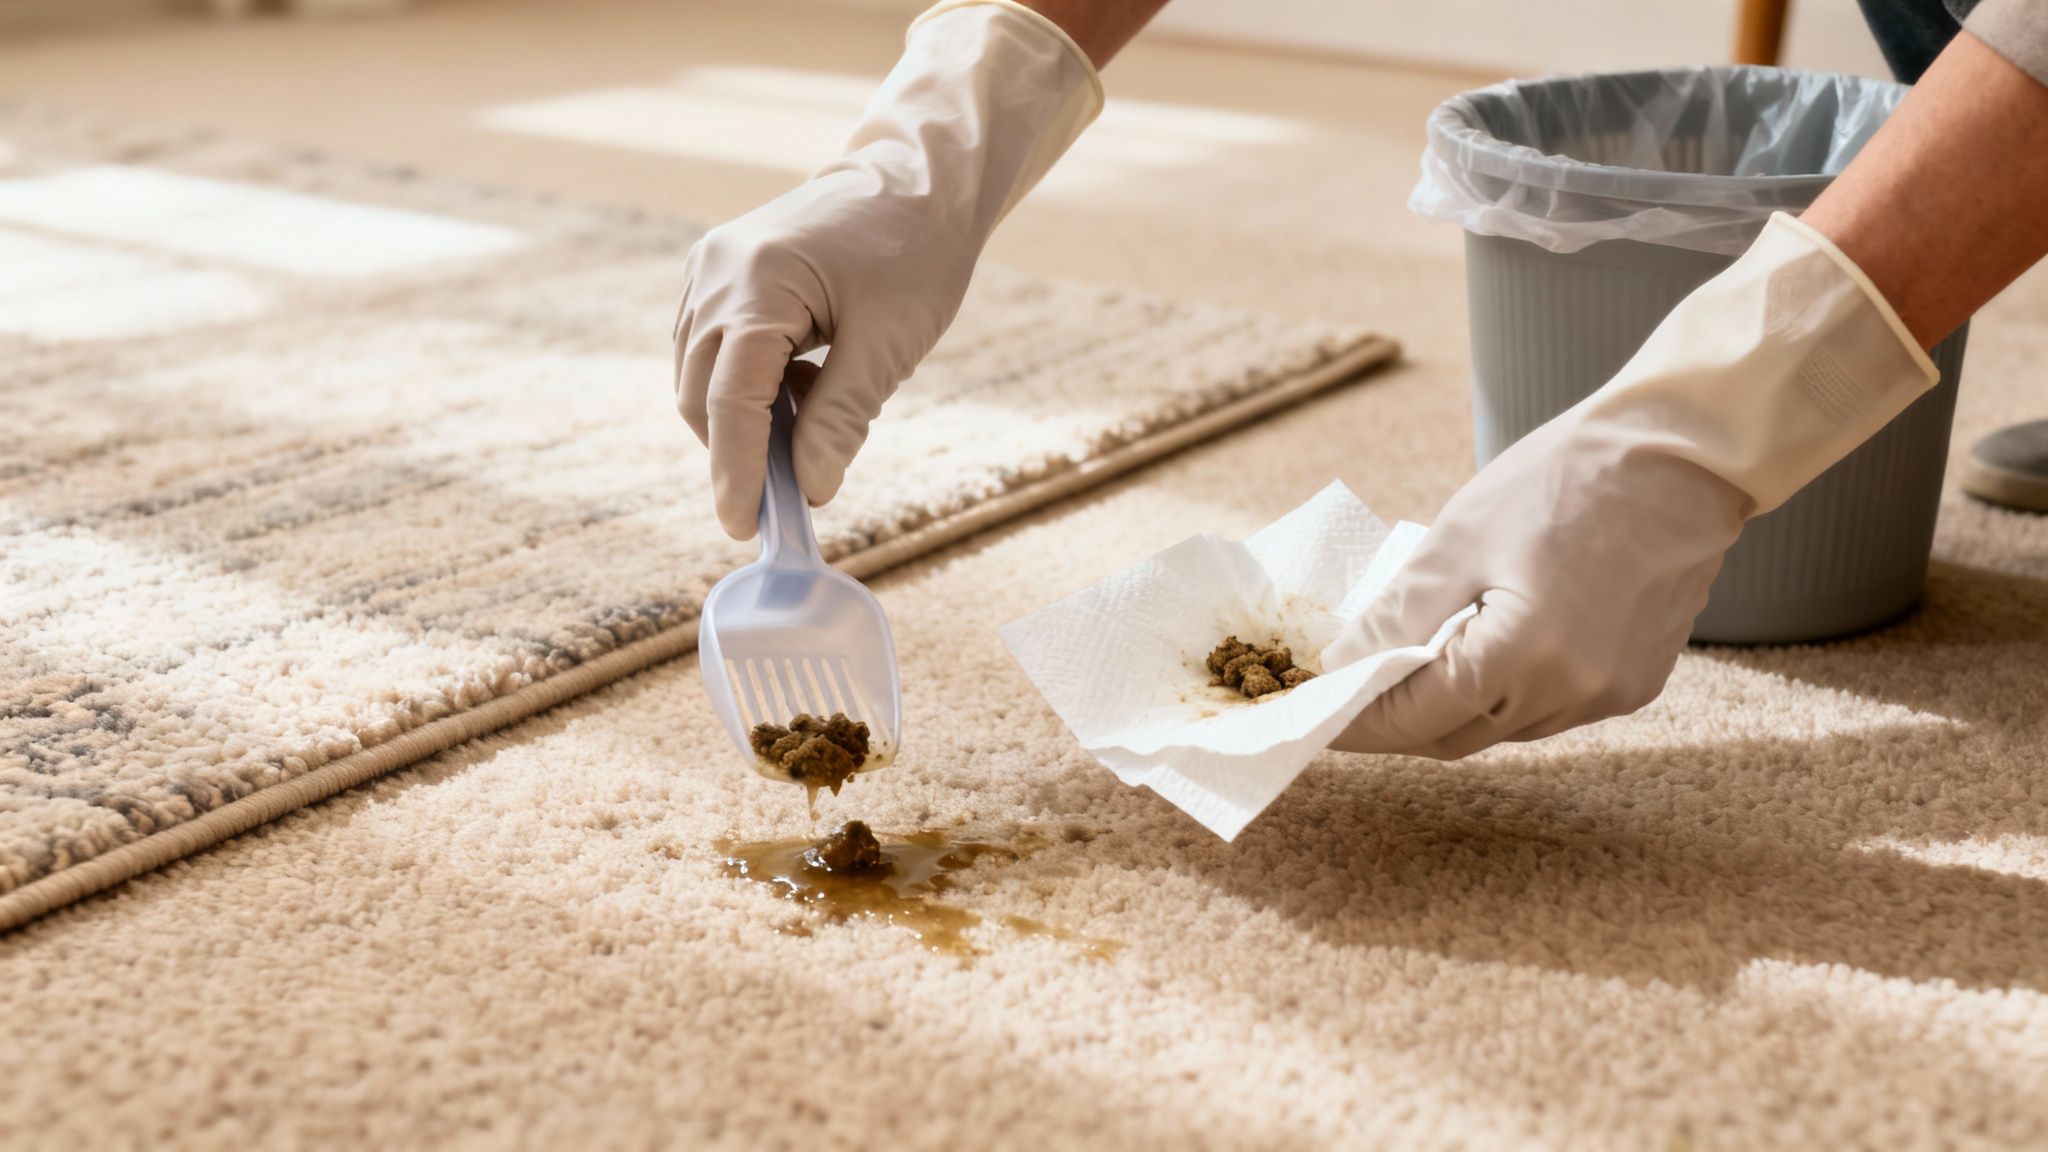
Before you even think about cleaning, think about safety and containment. Pull on a pair of rubber gloves to create a barrier between you and any bacteria or nasty stomach acids. It's also a good idea to open a window to get some fresh air circulating.
This is especially important for natural fibres. Stomach acids are incredibly corrosive and can begin to degrade wool carpets—a common choice in many Aussie homes—by up to 25% if left for more than 30 minutes. Your immediate goal is to get the bulk of the mess up before it has a chance to soak through to the carpet backing.
To help you act quickly and correctly, here's a quick-reference checklist. Keep these dos and don'ts in mind, and you'll be setting yourself up for a much easier cleanup.
Emergency Vomit Cleanup Checklist
| Action Item | Why It's Important | What to Avoid |
|---|---|---|
| Wear Gloves | Protects your hands from bacteria and stomach acid. | Touching the mess with bare hands. |
| Scoop Inwards | Lifts solids without smearing them deeper into the carpet. | Spreading the vomit by wiping outwards. |
| Blot, Don't Rub | Gently absorbs liquid without damaging carpet fibres. | Scrubbing, which grinds the stain in. |
| Use Cold Water | Helps dilute the stain without "cooking" the proteins. | Using hot water, which can set the stain. |
| Ventilate the Room | Disperses unpleasant odours and improves air quality. | Keeping windows closed and trapping smells. |
Following this simple list immediately after an incident can make all the difference between a temporary problem and a lasting one.
Scoop, Don’t Spread
First things first, get rid of the solids. Grab something with a firm edge—a dustpan, a sturdy paper plate, or even a large spoon will work perfectly.
The technique here is what really matters. Start from the outside edges of the spill and gently scrape everything inward toward the centre. This simple ‘scoop, don’t spread’ method stops you from accidentally making the stain bigger and pushing the mess deeper into the pile. By working from the outside in, you contain the spill and can usually lift 80-90% of the solid material right away.
The Art of Blotting
Once the solids are gone, you’ll be left with a damp, discoloured patch. Whatever you do, resist the urge to start scrubbing like mad. Aggressive rubbing is one of the worst things you can do, as it forces the acidic liquid deeper into the carpet fibres, damaging them and setting the stain.
Instead, grab a clean, dry cloth or a thick stack of paper towels. Gently blot the area by applying firm, downward pressure. You'll see the moisture transfer to the cloth. Keep using fresh sections of the cloth or new paper towels and repeat the process until the area is only slightly damp. This single step makes the follow-up stain and odour removal so much more effective.
Key Takeaway: Your immediate response should focus on removal and absorption, not deep cleaning. By scooping solids and blotting liquids, you set the stage for successful stain treatment and prevent a minor accident from becoming a permanent problem.
The principles of tackling organic spills quickly are universal. For similar advice on dealing with other nasty accidents, this guide on how to remove pet urine from carpet offers some excellent, transferable tips.
Choosing the Right Cleaning Solution for the Job
Once you've dealt with the immediate mess, the next big decision is picking the right cleaning solution. This isn't a one-size-fits-all situation; what works for a small mishap on a synthetic carpet might be useless—or even damaging—on a large stain covering delicate wool fibres.
Your choice here really is the difference between a fully restored carpet and a lingering stain, a funky smell, or worse, permanent damage. Many people instinctively reach for whatever they have in the pantry, and honestly, that's often a great place to start.
The Power of Pantry Staples
You don't always need to rush out and buy a specialised product. Two of the most effective tools for tackling vomit stains and smells are probably already in your kitchen, waiting to save the day.
-
White Vinegar and Water: A simple mix of one part white vinegar to one part cool water is brilliant for this job. Stomach acid is, well, acidic, but the vomit itself can be alkaline, and the vinegar helps neutralise it all. More importantly, it’s fantastic at knocking out those sour odours. Just mix it in a spray bottle, give the area a light mist (don't soak it!), and let it sit for a few minutes before you start blotting again.
-
Bicarb Soda (Baking Soda): This stuff is a true hero for absorbing leftover moisture and smells. After you’ve blotted the area with your vinegar solution, sprinkle a generous layer of bicarb soda over the damp spot. It works like a sponge, drawing out any remaining liquid and neutralising odours. Let it sit for at least an hour—or even overnight for really stubborn smells—before vacuuming it up thoroughly.
This one-two punch is a fantastic, cheap, and safe first line of attack for most household carpet messes. But sometimes, especially with stubborn organic stains, you need to bring in the big guns.
When to Use an Enzyme Cleaner
If your vinegar and bicarb soda trick didn't quite finish the job, it’s time for an enzyme cleaner. These aren't your average carpet shampoos; they're specialised formulas that work on a microscopic level to literally break down the mess.
Expert Insight: Enzyme cleaners contain specific proteins (enzymes) that are designed to target and break down the organic molecules found in things like vomit, urine, blood, and faeces. Instead of just covering up the stain or lifting the colour, these cleaners actually digest the source of the mess and its odour, completely eliminating it.
Think of it this way: the enzymes are like tiny Pac-Men, munching away at the gross proteins causing the stain and smell until there's nothing left. This is why they're so good at preventing those "ghost stains" that seem to reappear days later when the humidity changes.
When you're shopping for one, look for a product specifically labelled for pet stains or organic waste, as they'll have the right kind of enzymes for the job. And always, always do a quick spot test on a hidden area of your carpet first—like inside a closet or under the couch—to make sure it doesn't affect the colour, especially on natural fibres like wool.
A Practical Guide to Applying Your Cleaning Solution
Alright, you've chosen your cleaning solution—now it's time to put it to work. How you apply it is just as important as what you're using. Getting this part right is the secret to knocking out stains and smells for good, so they don't haunt you later.
The first move is to apply your cleaner correctly. Whether it’s a homemade vinegar mix or a store-bought enzyme spray, the aim is to dampen the area, not drown it. Soaking the carpet can backfire, pushing what's left of the mess deeper into the underlay and creating a much bigger headache. A light, even mist is all you need.
If you’re using a bicarb soda paste, gently spread it over the stain with the back of a spoon. You want just enough to cover the whole spot without caking it on too thick.
This chart breaks down the typical cleaning process, starting with simple household items and escalating to the heavy-duty enzyme cleaners for the really tough stuff.
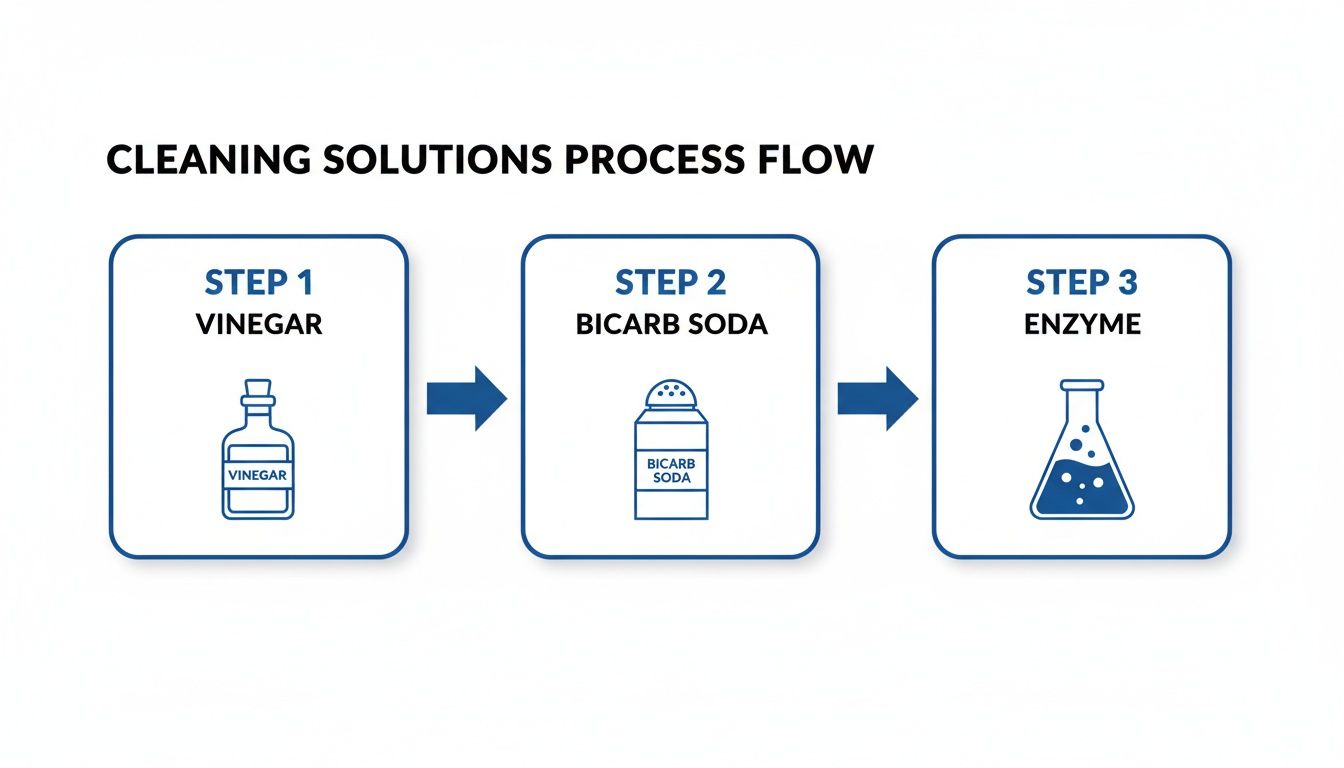
As you can see, it’s a logical progression. You start with basic neutralisers like vinegar and then move on to specialised treatments if the stain is being stubborn.
Give the Solution Time to Work
Once your cleaner is on, it needs what we call "dwell time." This is probably the most overlooked—and most vital—part of the entire process. You have to give the solution time to actually do its job: breaking down proteins, neutralising acids, and lifting the gunk out of the carpet fibres.
For a vinegar spray, let it sit for at least 10-15 minutes. If you're using a powerful enzyme cleaner, you might need 30 minutes or even longer. Always check the label. Rushing this step is a surefire way to end up with a "ghost stain" that mysteriously reappears weeks later. Don't skip the wait.
Master Your Blotting and Rinsing Technique
After the dwell time is up, grab a clean, light-coloured cloth and start blotting. Remember, just like in the initial cleanup, it's all about firm, downward pressure. No scrubbing! As your cloth gets damp, fold it over to a fresh, dry section to keep lifting moisture out effectively.
Once you’ve blotted as much as possible, it’s time for a final rinse. Lightly dampen a new cloth with cool water and blot the area again. This step is crucial for removing any leftover cleaning residue, which can become a dirt magnet if left behind. Always use cool water—hot water can set protein stains like vomit 3x faster.
Finish with one last round of dry blotting to get the carpet as dry as you can. This is your best defence against mould and mildew, especially in humid Australian climates where mould risk can be cut by a staggering 85% with proper air drying. Efficient cleaning is all about method. A systematic approach, from solid removal to a final rinse, can slash your total cleaning time from 45 minutes down to just 22. You can find more insights on effective cleaning methods in various industry reports.
Crucial Tip: Whatever you do, don't walk on the damp spot. Foot traffic will crush the carpet fibres and grind any remaining residue deeper into the pile. It can make the area look permanently dirty, even after it’s fully dry. Keep pets and kids away until it's good to go.
How to Tackle Dried and Set-In Vomit Stains
Discovering a dried, crusty vomit stain is a completely different ball game. Unlike a fresh spill, the acidic compounds have had hours or even days to chemically bond with your carpet fibres, making both the stain and the smell far more stubborn. The proteins have hardened, and the moisture has evaporated, leaving behind a concentrated, set-in problem.
Your first instinct might be to scrub it aggressively, but this is one of the worst things you can do—it will likely damage the carpet pile permanently. The key is to work smart, not hard, by safely rehydrating the area first.
Rehydrating the Stain Safely
Before you can clean it, you need to soften that dried-on mess. The goal here is to make it workable again without spreading the stain to the surrounding clean carpet.
- Create a Rehydrating Solution: Mix up a simple solution of cool water with a small splash of white vinegar or a tiny drop of dish soap. You absolutely want to avoid using hot water, as the heat can effectively 'cook' the proteins and set the stain for good.
- Apply Carefully: Using a spray bottle, lightly mist the dried area. You're not trying to saturate it; you just want to dampen the surface enough to soften the crust. Let that sit for about 10-15 minutes.
This gentle rehydration step makes the next part much easier and far less damaging to your carpet.
Scrape and Lift the Solids
Once the area is slightly damp and the dried gunk has softened, it's time to get rid of the solids. Grab a dull-edged tool, like the side of a spoon, a butter knife, or a plastic scraper.
Gently work from the outside edges of the stain inward, carefully scraping and lifting the rehydrated material. Take your time with this. The more solid residue you can physically remove now, the less work your cleaning solution has to do later.
Key Insight: Acting quickly is always best. Data from Australian carpet care surveys shows that 62% of vomit stains on carpets in Melbourne homes set permanently if not treated within the first hour. When dealing with set-in stains, enzyme cleaners are your best bet, successfully breaking down proteins in 88% of cases versus only 45% for vinegar alone. Find more details on these findings from a regional analysis by Steam Clean Team.
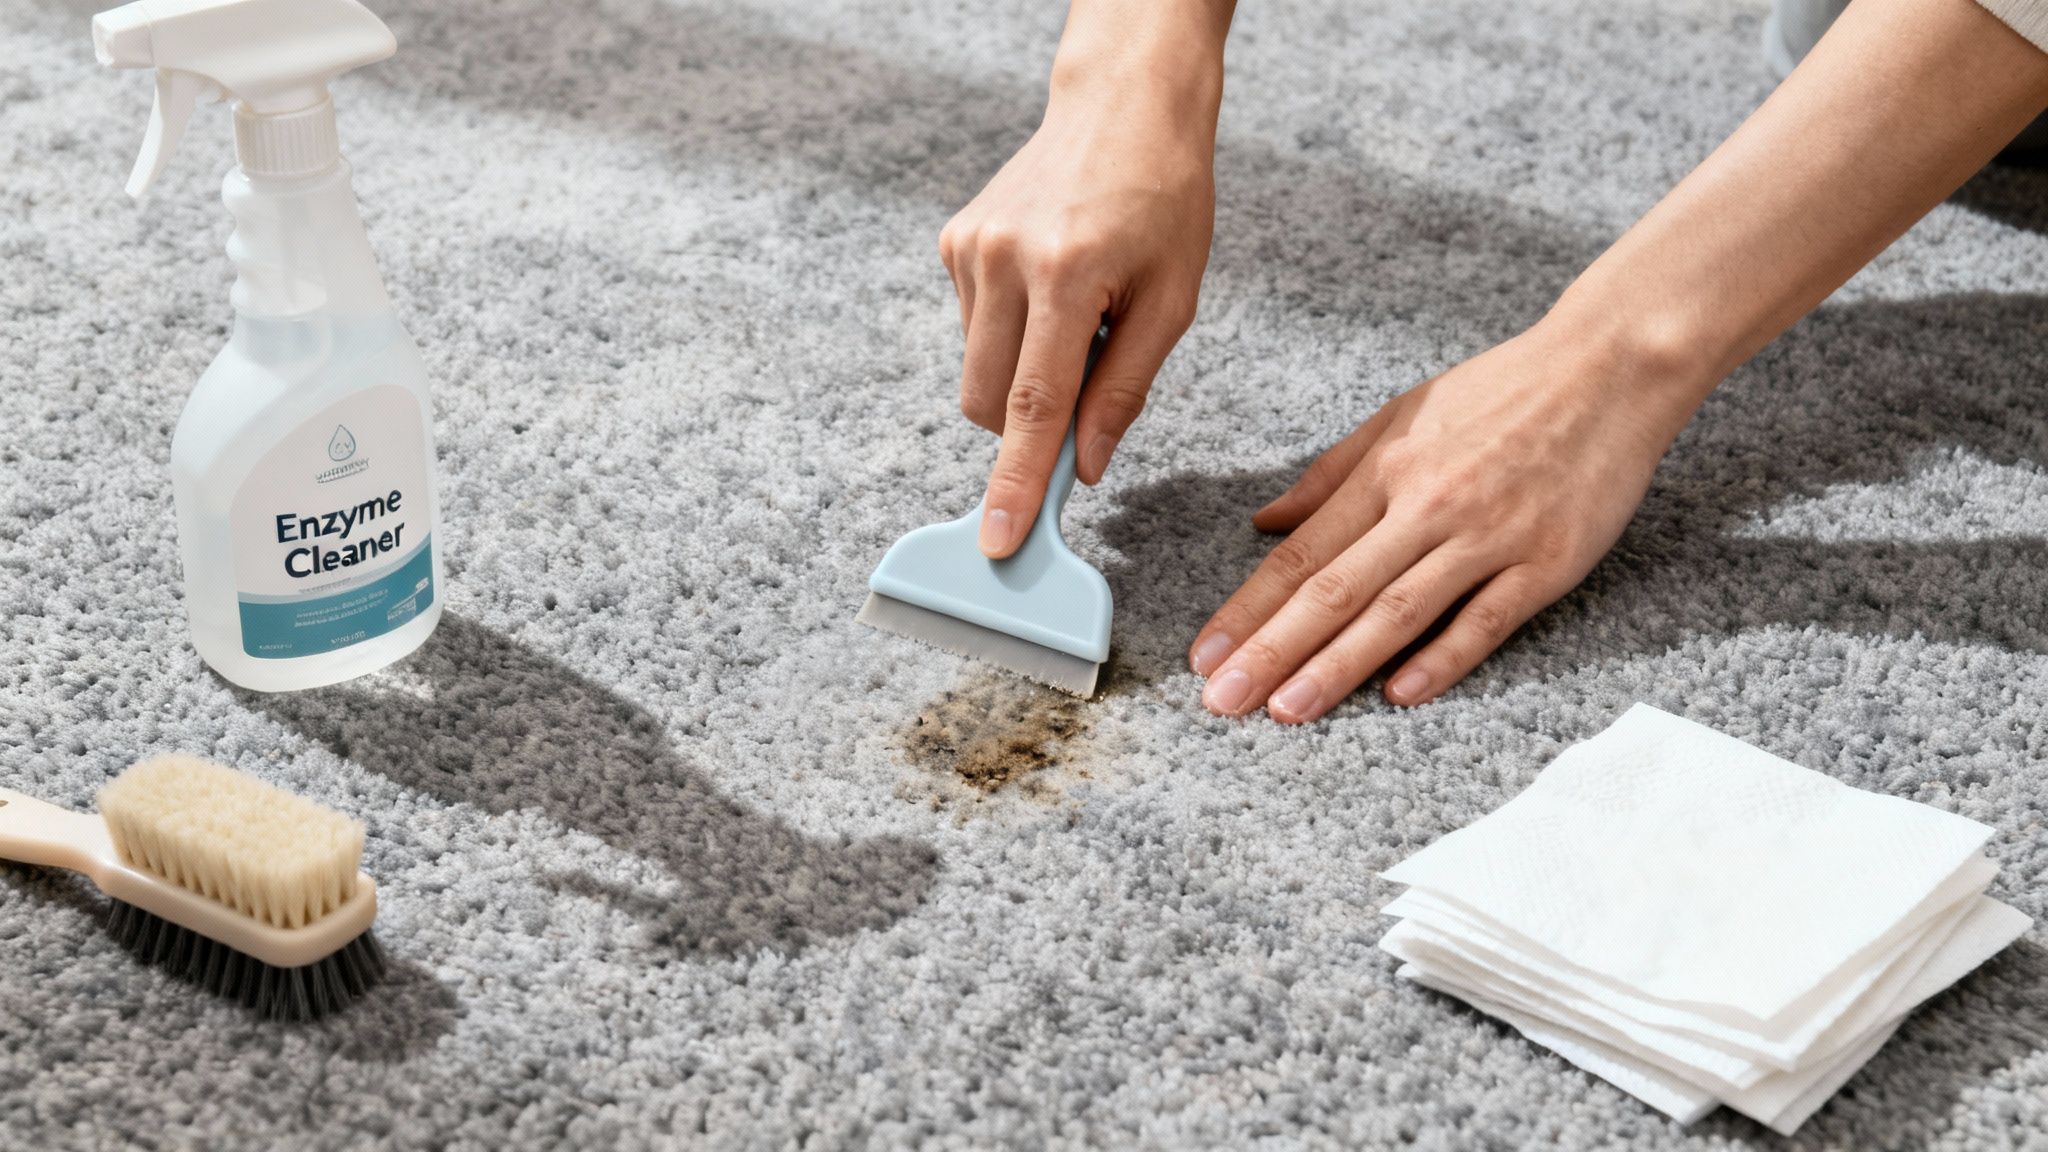
Applying a Powerful Cleaner
After scraping, you'll still be left with a discoloured patch. This is where a high-quality enzyme cleaner becomes absolutely essential. Since the hardened proteins are the primary cause of both the stain and the lingering odour, you need a solution specifically designed to digest them.
Generously apply the enzyme cleaner according to the product's directions, making sure the entire stained area is covered. You need to let it sit for the recommended 'dwell time'—often 30 minutes or longer—to give the enzymes enough time to work their magic.
Finally, blot the area thoroughly with a clean, dry cloth until no more moisture transfers. Let it air dry completely. For especially tough, old stains, you might need to repeat this process a second time to fully lift it.
You’ve scraped, blotted, and scrubbed, but sometimes, a DIY approach just doesn’t cut it. Knowing when to throw in the towel and call for backup isn't a sign of defeat—it's a smart move to protect your carpet from permanent damage.
Let's be honest, certain situations just escalate beyond the capabilities of household cleaners and good old-fashioned elbow grease.
If you’re staring down a very large mess, a recurring odour that creeps back days later, or a stain on a delicate or light-coloured carpet, it's probably time to consider a professional. Materials like wool, silk, or viscose are highly absorbent and easily damaged by the wrong pH levels found in many DIY solutions. Using vinegar on these fibres, for example, can lead to irreversible discolouration or fibre damage.
The Limits of DIY Cleaning
Your efforts at home can be remarkably effective for small, fresh incidents on durable synthetic carpets. But they do have their limits.
Household vacuums and manual blotting simply can't achieve the deep extraction needed to pull all the contaminants out from the carpet backing and underlay. This is where those lingering odours almost always come from. While the surface looks clean, residual organic matter deep within the fibres continues to decompose, creating that persistent, sour smell. If you find yourself repeatedly treating the same spot, you're likely only cleaning the top layer.
Professional intervention is often the most effective and hygienic solution. Research from Perth's Wizard Cleaning WA highlights this, showing a 100% success rate across 450 professional vomit removal jobs using enzyme agents, compared to a self-reported 51% success rate for DIY methods. These statistics underscore the value of expert treatment, particularly when hygiene is a major concern. Learn more about their findings and the importance of thorough cleaning from this insightful case study.
Benefits of Professional Hot Water Extraction
When you call a service like Right Price Carpet Cleaning, they bring in equipment that far surpasses anything you can rent or buy for home use. Their powerful, truck-mounted hot water extraction systems (often called steam cleaning) are a game-changer.
Here's how they work:
- Injecting a heated, professional-grade cleaning solution deep into the carpet pile under high pressure.
- Agitating the fibres to dislodge any deeply embedded dirt, bacteria, and acidic residue.
- Extracting almost all the moisture and contaminants with an incredibly powerful vacuum, leaving carpets far cleaner and drier than any home machine could.
This process doesn't just remove the stain you can see; it eliminates the odour-causing bacteria you can't.
Deciding whether to tackle a stain yourself or bring in the experts can be tricky. This table breaks down common scenarios to help you make the right call for your carpet.
DIY vs Professional Cleaning: When to Make the Call
| Situation | Recommended DIY Action | When to Call a Pro |
|---|---|---|
| Small, Fresh Spill on Synthetic Carpet | Act immediately. Scrape, blot, and use an enzyme cleaner. This is usually manageable. | If the stain remains after two attempts or an odour develops after a day. |
| Large Area Affected | Contain the spill, but avoid deep scrubbing, which can spread the mess. | A large volume of vomit has likely soaked through to the underlay. Pros have the extraction power to fix this. |
| Dried, Set-in Stain | You can try rehydrating with water and using an enzyme cleaner, but success rates drop significantly. | If the stain has been there for more than 24 hours. Dried vomit is much harder to break down and remove completely. |
| Delicate Carpet Fibres (Wool, Silk) | Avoid all acidic cleaners (like vinegar) and harsh scrubbing. Blot gently with water and a pH-neutral cleaner. | Immediately. These fibres are too sensitive for guesswork. The risk of permanent damage is extremely high. |
| A Persistent Sour or Musty Odour | A lingering smell means organic matter is still trapped in the carpet backing or underlay. | This is a clear sign DIY methods haven't reached the source. Professional extraction is needed to neutralise it for good. |
| Pet Vomit (Especially Cat) | Treat as a normal stain, but be aware that pet vomit can be more acidic and contain bile that stains. | If the stain is brightly coloured (yellow/green from bile) or if your pet is repeatedly sick in the same spot. |
Ultimately, calling a professional is an investment in your carpet's longevity and your home's hygiene. If you do decide to hire a service for severe carpet stains, it's important to be vigilant. Learning how to avoid scams when hiring professional cleaning services is a crucial step to ensure you get quality results from a reputable company.
Common Questions People Ask About Cleaning Vomit From Carpet
Even after a successful cleanup, it's natural to have a few questions lingering. Getting the little details right not only gives you a much cleaner carpet but also saves you from accidentally causing damage—making sure all that hard work actually pays off.
Let's clear up some of the most common queries that pop up when you're faced with cleaning vomit off a carpet.
Should I Use Hot or Cold Water?
This is probably the biggest question people have, and getting it wrong can make things so much worse. It seems logical to use hot water to sanitise the area, but with a protein-based stain like vomit, it's a critical mistake.
Hot water will essentially "cook" the proteins in the vomit, causing them to bind tightly with the carpet fibres. This chemical reaction sets the stain, making it incredibly difficult, and sometimes impossible, to get out later. Always stick with cool or cold water for rinsing and blotting. It keeps the proteins from setting and gives you the best chance of removing everything.
Dealing With Pet Vomit and That Awful Yellow Bile
Anyone with pets knows that not all vomit is created equal. When your dog or cat brings up that bright yellow, frothy liquid, you're dealing with bile. This stomach fluid is highly acidic and acts like a powerful dye, leaving behind stubborn yellow or greenish stains that are especially noticeable on light-coloured carpets.
With bile, speed is even more critical. Once you've removed any solids, your main goal is to neutralise the acid and lift the colour. A simple solution of one part white vinegar to one part cool water is a great first step, immediately followed by an enzyme cleaner made specifically for pet stains.
Pro Tip: Never use ammonia-based cleaners on pet stains. The smell can mimic urine to a pet's nose, which might encourage them to use the same spot as a toilet. Stick to enzyme formulas for the best results and to avoid any repeat accidents.
What if Bicarb Soda Doesn't Get Rid of the Smell?
Bicarb soda is a fantastic deodoriser, but sometimes that sour, acidic smell just refuses to go away. This usually means that odour-causing bacteria are still lurking deep in the carpet pile, or worse, have soaked into the underlay.
If a second round of bicarb soda doesn't fix it, you need to step up your game. A thorough application of a high-quality enzyme cleaner is your next move. Don't rush it—let the cleaner dwell for at least an hour to give the enzymes enough time to break down all the remaining organic gunk. If the smell is still there after it dries, that’s a big red flag that the mess has reached the underlay and you'll need professional extraction to solve it.
Is It Safe to Use Vinegar on My Carpet?
Vinegar is a go-to for many DIY cleaning jobs, but it isn't a one-size-fits-all solution for carpets. Because it's acidic, it can cause real problems for natural fibres.
- Synthetic Carpets (like Nylon or Polyester): Generally safe. These materials are pretty tough and can handle the mild acidity of a diluted vinegar solution without any issues.
- Wool and Silk Carpets: Avoid vinegar at all costs. The acid can strip the natural oils from these delicate fibres, leading to damage and even permanent discolouration.
No matter what, always do a quick spot test in a hidden area first, like inside a closet or under the sofa. If you have no idea what your carpet is made of, it's much safer to stick with a pH-neutral cleaner or call a professional instead of risking a costly mistake.
If you've tried everything and the stain or odour just won't budge, don't risk permanent damage. The experts at Right Price Carpet Cleaning have the professional-grade equipment and expertise to safely and effectively restore your carpets. Get an instant quote online and book your service today!
Recent Comments