
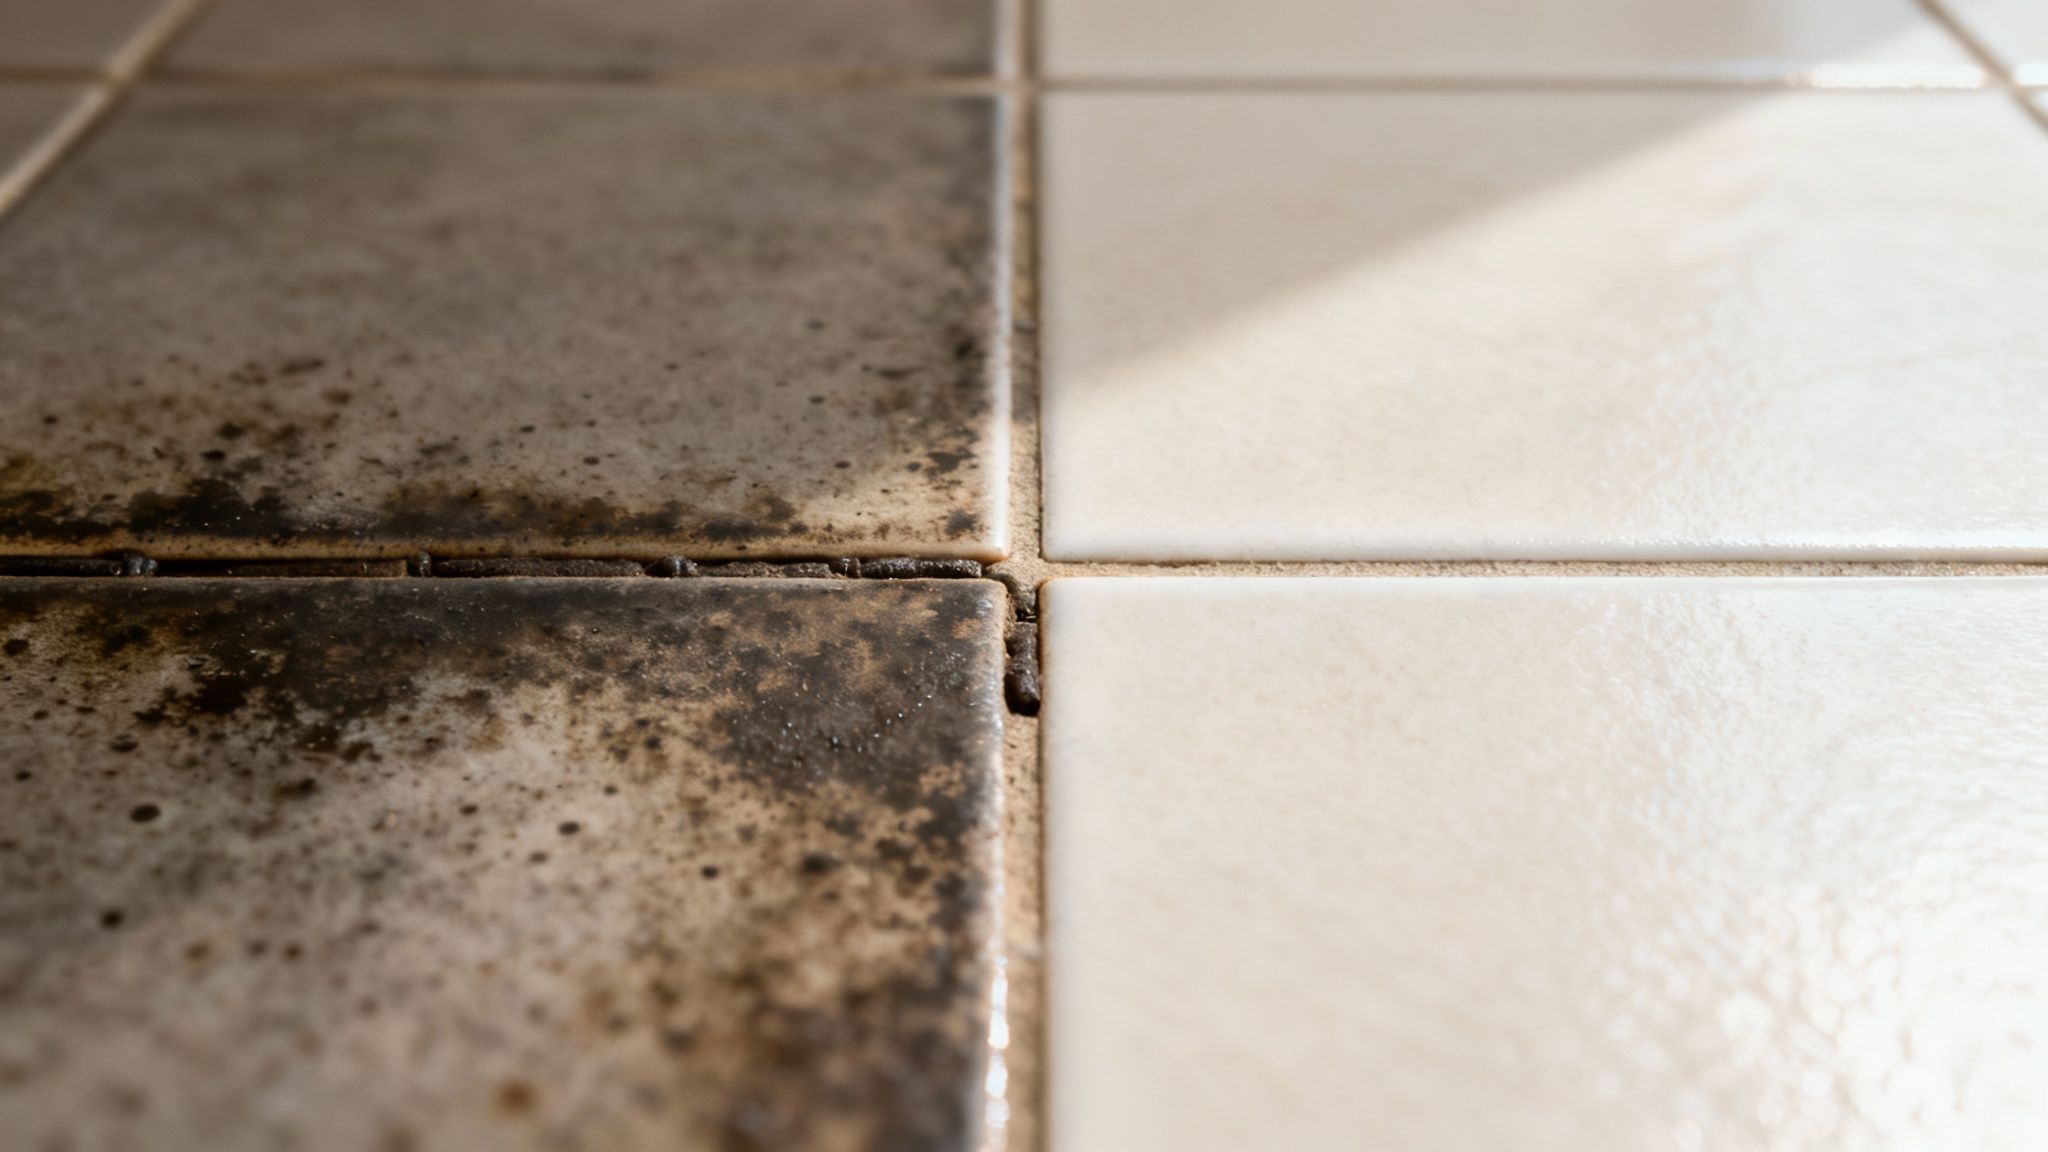
Let's be honest, dirty grout can make even the most beautiful tiles look dull and uninviting. It’s a common frustration, but it's not usually a sign that you're cleaning poorly. The real culprit is the grout itself.
Think of grout as a tiny, hard sponge running between your tiles. Its porous nature means it eagerly soaks up everything it comes into contact with, from muddy footprints to morning coffee spills.
Effectively cleaning tile grout floors boils down to a simple formula: the right solution, a bit of agitation, and a thorough rinse. It's all about breaking down the absorbed dirt and grime that turns grout lines dark and dingy, transforming your floor from tired to sparkling.
This guide is your roadmap from frustration to satisfaction. We'll skip the generic advice and get straight to what works, exploring why certain areas get dirtier than others and what you can do about it.
Understanding the Problem
The core issue lies in grout's composition. Most standard grout is a cement-based mixture riddled with microscopic pores. These pores create a perfect trap for:
- Daily Dirt and Grime: Everything tracked in on shoes settles right into those low-lying grout lines.
- Spills and Stains: Coffee, juice, or pet accidents don't just sit on the surface; they seep deep into the grout, causing stubborn discolouration.
- Soap Scum and Moisture: In bathrooms and kitchens, soap residue and constant moisture create a sticky film that acts like a magnet for more dirt.
This explains why high-traffic areas like entryways and kitchens almost always have the darkest grout lines, while the grout under the furniture still looks pristine. If you want to dive deeper into grout maintenance, this comprehensive guide on how to clean grout offers some great additional strategies.
The demand for effective cleaning products is clear. The Australian household cleaners market, which includes products for tile floors, reached approximately USD 774 million in 2024. This figure highlights how many households are actively seeking solutions for common problems like grimy grout.
By the end of this guide, you'll know the techniques that professionals use to achieve that 'like-new' look, ensuring your efforts lead to lasting results.
Picking the Right Grout Cleaning Solution
Choosing the right cleaner is probably the most important call you'll make when you decide to tackle your tile and grout floors. The best product really comes down to two things: what your tiles are made of and how bad the stains are. Get it wrong, and you could end up with a cleaner that does nothing, or worse, one that permanently damages your floor.
Before you even pop open a bottle of cleaner, a little prep work makes a huge difference. Give the entire floor a good sweep or vacuum to get rid of all the loose dirt, hair, and whatever else has collected. This simple step stops you from turning dry dust into wet mud, which just makes the whole job messier and harder.
Next up, and this is critical, figure out what kind of tile you have. Is it a tough, durable porcelain or ceramic, or are you dealing with a more delicate natural stone like marble, slate, or travertine? This matters because acidic cleaners (like vinegar) or other harsh chemicals can easily etch, dull, or discolour natural stone, causing damage that you just can't undo.
Navigating Your Cleaner Options
Walking down the cleaning aisle can feel a bit much, but your options usually boil down to a few main types. Each one has its place, whether you're doing a bit of light maintenance or getting rid of years of built-up grime.
For just a bit of discolouration or your regular clean, a simple DIY paste can work wonders. A mix of baking soda and water makes a gentle, slightly abrasive cleaner that’s safe for most types of tile. It's a great non-toxic and budget-friendly place to start.
When you’re up against more serious dirt and build-up, a dedicated commercial alkaline grout cleaner is what you need. These are specifically made to cut through grease, soap scum, and heavy soiling without being as harsh as acid-based products. They’re generally the go-to for ceramic and porcelain tiles.
Pro Tip: Always, always do a spot test. Before you go all-in on the entire floor, find a small, hidden area—like inside a cupboard or behind the fridge. Apply your cleaner there, let it sit, give it a scrub, and rinse it off just like you would on the main floor. This is your insurance policy against accidentally ruining your tiles or grout.
Comparing Your Grout Cleaner Options
Not all cleaners are created equal. Picking the right one for your specific floor means understanding what each one does best—and what it can't do. Starting with the gentlest option and only moving to something stronger if needed is the smartest way to protect your tiles while getting them sparkling clean.
| Cleaning Solution | Best For | Pros | Cons and Cautions |
|---|---|---|---|
| Baking Soda Paste | Light discolouration and routine cleaning on most tile types. | Eco-friendly, affordable, and gentle on surfaces. | May not be effective enough for deep-set stains or mould. |
| Oxygen Bleach | Whitening stained grout and killing mould or mildew. | Less harsh than chlorine bleach; effective whitener. | Requires dwell time; can be too strong for some natural stone. |
| Alkaline Cleaners | Heavy dirt, grease, and soap scum on porcelain/ceramic tile. | Powerful degreasers that break down stubborn grime effectively. | Can be caustic; requires gloves and good ventilation. Not for stone. |
| pH-Neutral Cleaners | Safe, regular cleaning for all tile types, especially natural stone. | Gentle and safe for sensitive materials like marble or travertine. | Lacks the power to remove deep, embedded stains. |
Ultimately, the goal is to choose the strongest cleaner necessary for the job that is still safe for your floor. Once you’ve picked your weapon and tested it out, you’re ready to get stuck into the main event.
Mastering Your Grout Cleaning Technique
So, you've picked out your cleaning solution and done your spot test. Now comes the part where a bit of technique makes all the difference. This is what separates a frustrating battle against grime from a genuinely satisfying project. The secret isn't scrubbing harder; it's about working smarter.
First things first: patience. After you've applied your cleaner, you have to give it time to work its magic. This "dwell time" lets the solution seep into the porous grout and start breaking down all the built-up dirt, soap scum, and grime. For most alkaline cleaners, this means letting it sit for about 5-10 minutes. Seriously, don't rush this step—it does most of the heavy lifting for you.
A classic mistake is trying to tackle the whole floor at once. I've seen it countless times, and it almost never works. The cleaner just dries out in one spot before you can even get to it. Instead, work in small, manageable sections, no bigger than a square metre at a time. This keeps the solution wet and active, so it can actually do its job.
This visual guide breaks down the initial steps for choosing and preparing your cleaning solution.

Following a logical process of prep and testing is the best way to avoid damaging your floors and ensures you’ve picked the right cleaner for your specific grout.
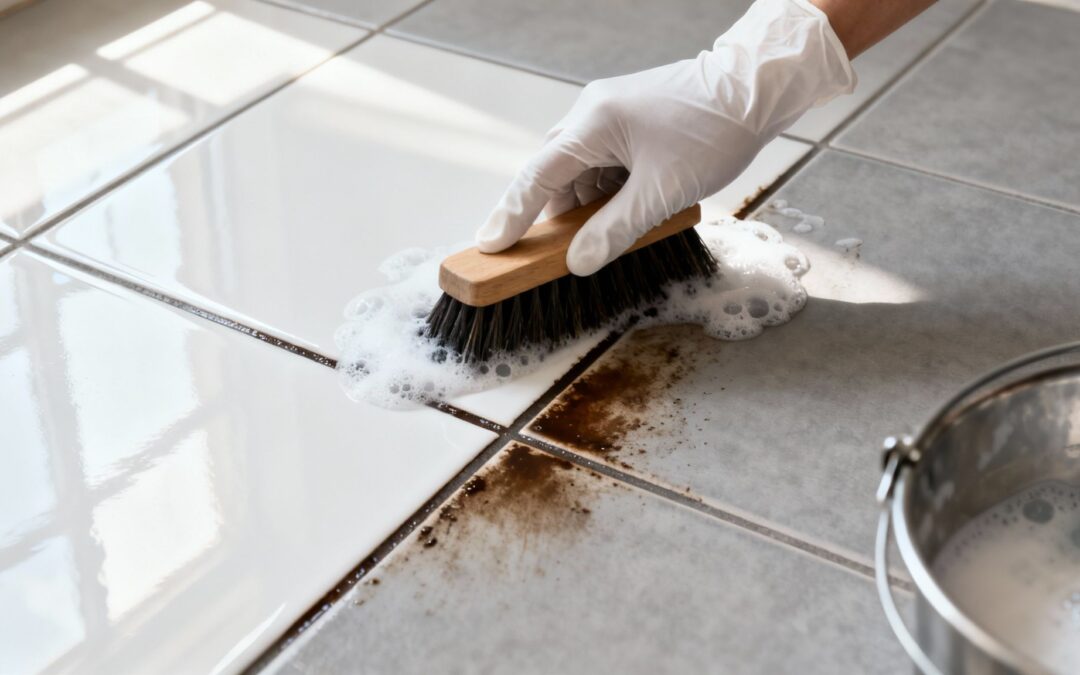
The Art of Agitation
Once the cleaner has had a chance to dwell, it's time to get scrubbing. This physical agitation is non-negotiable; it’s what actually lifts the loosened grime out of the grout's pores.
A firm, narrow grout brush is your best friend here. Its stiff bristles are designed to get right into the grout lines without scratching most tiles. If you’re cleaning a larger floor, do your back a favour and get a long-handled version. You'll be amazed at how quickly the gunk lifts, creating a dirty slurry on the surface.
The goal of agitation isn't just to scrub, but to create a 'slurry'—a mix of the cleaner and the lifted dirt. This is the visual confirmation that the process is working. If you're scrubbing a dry line, you're just grinding dirt around.
For those who want to step up their game, steam is an incredible tool. When you're dealing with really stubborn grime or just want a deeper clean, it's worth looking into professional steam cleaning services. Even a home steam cleaner can be a game-changer, using high-pressure hot vapour to blast away grime with minimal chemicals. It's particularly great for sanitising bathrooms and kitchens.
Extraction and Rinsing
Getting the dirt out of the grout is only half the job. Now you have to get it off the floor. If you let that dirty slurry dry, all that grime will just settle right back where it came from, and you'll have wasted all your hard work.
The best way to handle this is with a clean mop and a bucket of fresh, hot water. Mop up the slurry, rinse the mop head thoroughly in the clean water, wring it out, and go again. You'll probably need to change the bucket water a few times to make sure you're actually removing the dirt, not just spreading a thinner layer of it around.
- Rinse thoroughly: Go over the section at least twice with clean water. This neutralises any leftover cleaner and removes the last of the grime.
- Dry the area: Grab an old towel or a microfibre cloth and wipe the section dry. This stops water spots from forming and lets you see the real results straight away.
- Move to the next section: Once one area is clean, rinsed, and dry, you can move on to the next one, overlapping just a little to keep the results consistent.
The growing floor cleaning equipment market in Australia reflects a real shift towards more efficient tools. The sector was valued at USD 294.64 million in 2024 and is projected to hit USD 493.62 million by 2033. It's a clear sign that people are adopting technologies that deliver better, faster results—including tools that make extraction and rinsing far more effective than the old mop-and-bucket method.
How to Handle Stubborn Grout Stains
You’ve done the big clean, but a few stubborn spots are refusing to budge. Sound familiar? It’s a common frustration when you’re cleaning tile and grout, especially in high-traffic zones like the kitchen or bathroom. These lingering stains aren’t a sign you’ve done a bad job; they just need a more targeted game plan than your all-purpose cleaner can offer.
I like to think of it like doing laundry. You use a general detergent for the whole load, but you’d pull out a specialised stain remover for a grass stain or an ink spot. The same logic applies here. Different stains—from organic mould to mineral-based rust—have different chemical makeups and require specific treatments to break them down properly.
Tackling Mould and Mildew
Bathrooms are prime real estate for mould and mildew. All that dampness and humidity create the perfect environment for those unsightly black or greenish spots to take hold. Not only do they look bad, but they can also be a health concern.
For this job, an oxygen bleach solution is your best friend. It’s far less harsh than traditional chlorine bleach and won’t fill your home with toxic fumes. Just mix the powdered oxygen bleach with warm water until you have a paste (follow the product directions for the right ratio). Slather it directly onto the mouldy grout, let it bubble away for about 15-20 minutes, then give it a good scrub with a stiff brush and rinse everything clean.
Dealing with Kitchen Grease and Grime
Kitchen floors take a real beating from cooking splatters, grease, and dropped food. Over time, this creates dark, sticky grout lines that a simple mopping just won’t touch. Because these are oil-based stains, standard water-based cleaners aren't going to cut it.
This is where a heavy-duty alkaline degreaser comes in. You’ll often find them sold as "grout deep cleaners." Apply the solution, give it time to dwell and break down the grease, and then get in there and agitate it vigorously with a brush. If you're in a pinch, a paste made from baking soda and a few drops of dish soap can also help lift some of that greasy residue before you do a final clean.
When Cleaning Is Not Enough
Every now and then, you’ll come across a stain that has permanently discoloured the grout. This often happens with rust from something like a metal plant stand or from certain dyes in spilled liquids. When cleaning fails, it's time to stop scrubbing and switch to cosmetic repair.
This is where grout pens and colorants are absolute lifesavers. They’re essentially a specialised paint designed to cover up stains and bring a uniform colour back to your grout lines.
- Grout Pens: These are perfect for small touch-ups and finer grout lines. They’re as easy to use as a marker, but you’ll want a steady hand.
- Grout Colorants: A better choice for larger areas or if you fancy changing the grout colour altogether. You apply them with a small brush, and they often include a sealant for extra protection.
Before you even think about applying a colorant, make sure the grout is spotlessly clean and bone dry. If you don't, you'll just seal the dirt in, and the colorant will end up chipping and peeling off. A clean surface is non-negotiable for a professional-looking, long-lasting finish.
Lock It In: Sealing and Maintaining Your Grout
Getting your grout lines sparkling clean is a huge achievement, but the job isn't quite done. Now, the focus shifts to protecting all that hard work. This final phase is all about locking in that clean look and making future maintenance far less of a chore.
The most important first step? Make sure the grout is completely dry before you even think about sealing it. Rushing this can trap moisture under the sealer, which can lead to cloudy results or even kick-start mould growth from within.
As a rule of thumb, wait at least 24 hours after the final rinse.
How to Choose the Right Grout Sealer
Just like cleaners, grout sealers aren't a one-size-fits-all product. Your choice will depend on where the tiles are and how much foot traffic they get. You'll generally run into two main types: penetrating sealers and membrane-forming sealers.
Penetrating (Impregnating) Sealers
These are the go-to choice for most floors. They work by soaking into the porous grout, creating an invisible shield that repels water and oil-based stains from the inside out.
- Perfect for high-traffic areas like kitchens, hallways, and bathrooms.
- They don’t change the look or texture of the grout.
- They allow the grout to "breathe," letting any trapped vapour escape naturally.
Membrane-Forming (Topical) Sealers
These create a protective film that sits right on top of the grout surface, almost like a clear coat of paint. You can often find them in gloss or satin finishes.
- Best suited for areas with very low foot traffic, as the film can wear away over time.
- They can alter the look of your grout, sometimes giving it a slight sheen.
- While they offer solid protection, they can be trickier to reapply down the line.
For most floors in a typical home, a high-quality penetrating sealer is the way to go. It offers durable protection without changing the look you just worked so hard to restore.
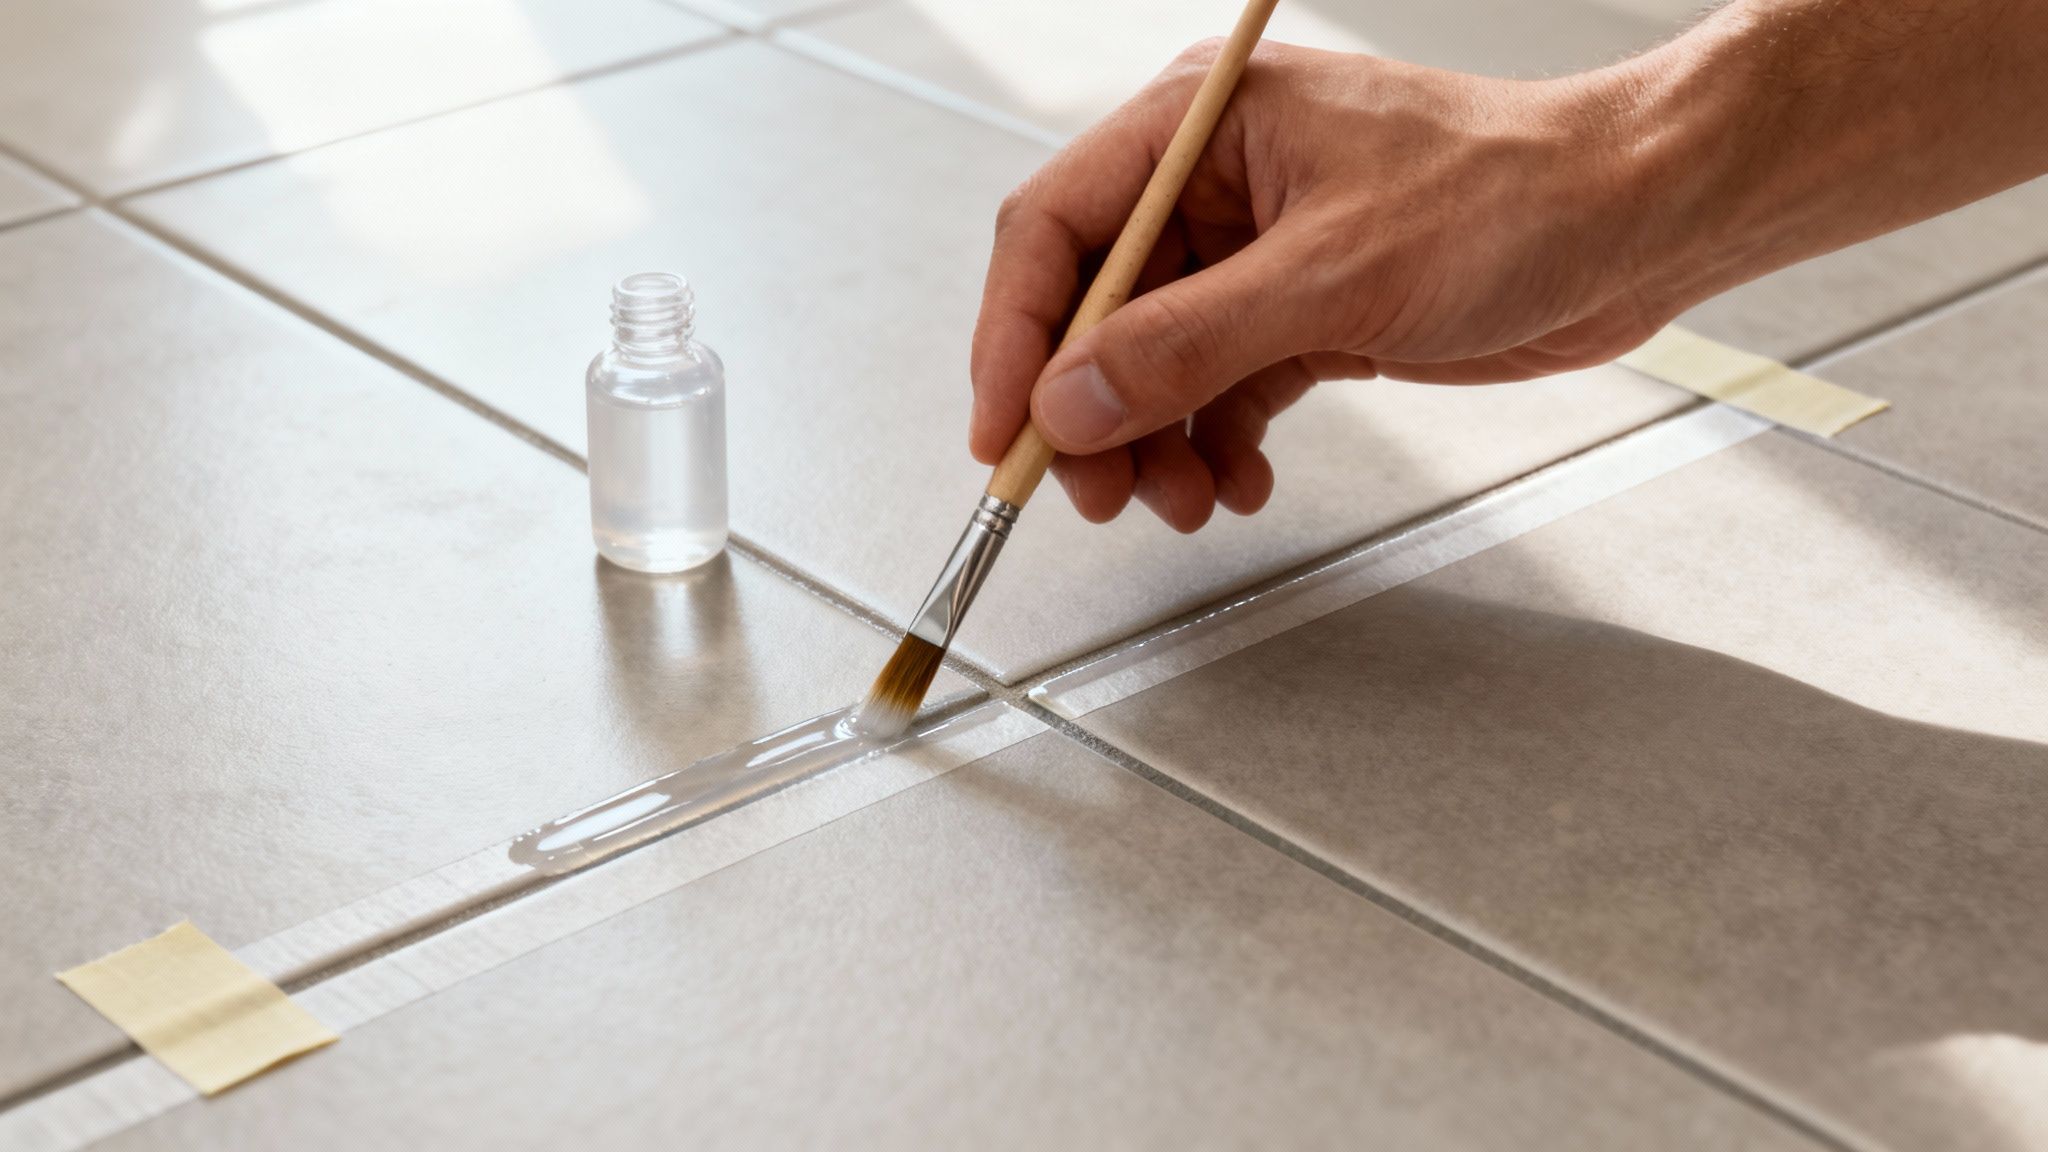
Applying Sealer Like a Pro
Applying grout sealer isn’t difficult, but a little care goes a long way. The main goal is simple: get the sealer on the grout lines, not all over the tile face.
Start with a small applicator brush or a sealer bottle that comes with a roller tip. Work in small, manageable sections, applying a thin, even coat directly onto the grout line.
One of the biggest mistakes people make is over-application. A heavy coat doesn't offer more protection; it just creates a sticky residue on your tiles that's a pain to clean up. Keep a clean, dry microfibre cloth handy to wipe any excess sealer off the tile surface immediately.
Let the first coat soak in for about 5-15 minutes, then apply a second coat if the manufacturer's instructions recommend it. After the final coat, you need to let it cure. This usually takes 24-48 hours, so keep heavy traffic and moisture off the floor until it's fully set.
Building a Simple Maintenance Routine
With your grout sealed, keeping it clean is so much easier. You've essentially turned that porous, dirt-grabbing sponge into a stain-resistant surface.
Now, a simple routine is all you need:
- Sweep or Vacuum Regularly: This removes the loose dirt and grit before it can get ground into the grout lines.
- Clean Spills Promptly: The sealer buys you time, giving you a window to wipe up spills before they have a chance to soak in and stain.
- Use a pH-Neutral Cleaner: For regular mopping, stick to a gentle, pH-neutral cleaner. Harsh, acidic, or alkaline chemicals can slowly break down the sealer, undoing all your hard work.
This simple combo of proper sealing and mindful maintenance will keep your floors looking fresh and push your next deep clean much further down the road.
Got Questions About Cleaning Tile and Grout?
Even with the best guide, you’re bound to have a few questions when you’re on your hands and knees tackling grimy grout. Getting the right answers can be the difference between a job well done and a frustrating afternoon. Let's clear up some of the most common queries we hear about cleaning tile floors.
One of the biggest questions is always about timing. How often do you really need to do a full deep clean? For most homes, a thorough scrub and reseal every 1-2 years is a solid benchmark. That said, high-traffic zones like the kitchen floor or the main bathroom will likely need attention every year to keep them from looking tired and grubby.
Steam cleaning is another hot topic. It's a fantastic tool for sanitising and lifting stubborn grime from porcelain and ceramic tiles, no doubt. But it's not a one-size-fits-all solution. You need to be extremely careful using high-pressure steam on natural stone like marble or travertine. The intense heat can easily damage these delicate surfaces or strip away the sealant, leaving them vulnerable.
When To Call a Professional
Knowing when to put down the brush and pick up the phone is key. DIY methods are great for maintenance, but some jobs are just better left to the experts. There's a reason the commercial cleaning services market in Australia, which includes specialised floor care, was valued at USD 14.03 billion in 2024 and is set to keep growing. Professionals bring a level of power and expertise that’s hard to replicate. You can read more about the commercial cleaning market trends to see just how valued that expertise is.
It’s probably time to call in a pro if you’re seeing:
- Crumbling or Cracked Grout: This isn’t just a cleaning issue; it points to a deeper structural problem. The grout will need to be repaired or completely replaced.
- Permanent Staining: If you’ve tried every targeted stain remover and even colourant pens without any luck, the professionals have access to commercial-grade solutions that can often succeed where DIY products fail.
- An Overwhelming Job: Sometimes the sheer scale of the tiled area is too much. If you’re looking at a huge space, the time and physical effort might just not be practical.
A professional service doesn’t just bring more powerful equipment to the table; they bring experience. They can quickly diagnose underlying problems, figuring out if it's just dirt or something more serious like failing grout or hidden water damage beneath the tiles.
Ultimately, the choice between DIY and hiring a pro comes down to the state of your grout and how much time you're willing to invest. For routine upkeep and tackling moderate grime, the steps in this guide will get you far. But for widespread damage or stains that simply won’t budge, an expert can save you time, effort, and a whole lot of frustration, delivering a flawless result that's tough to match on your own.
Ready to let the professionals handle it? The team at Right Price Carpet Cleaning uses powerful, truck-mounted steam cleaning equipment to restore tile and grout across Melbourne, delivering a deeper clean with faster drying times. Get your instant online quote today at https://rightpricecarpetcleaning.com.au.
Recent Comments