


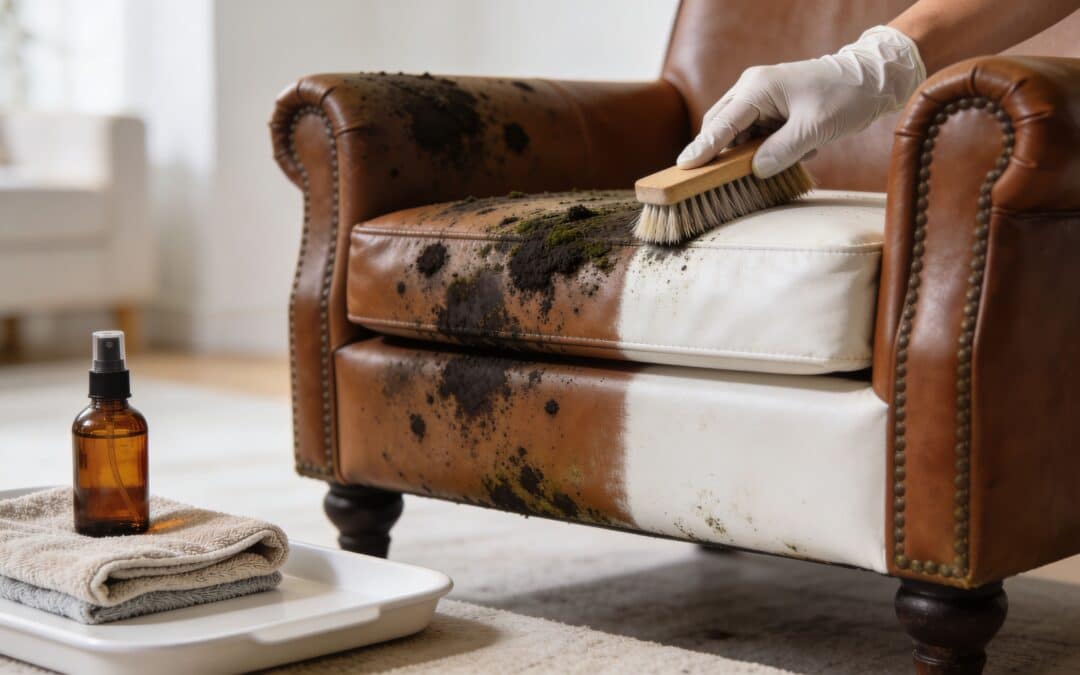
That faint musty smell from the lounge often starts as a small annoyance. Then you notice a dusty white bloom in the seam of the armrest, or a darker patch on the seat cushion, and suddenly you’re dealing with more than a bit of surface grime.
Cleaning moldy leather is one of those jobs people usually underestimate. Leather looks sealed, but mould doesn’t need much to get started when moisture, stale air, body oils, dust, and time all meet in the same spot. In Melbourne homes, especially in rooms that stay shut up through humid weather, that combination is common.
A careful clean can save the piece. A rushed one can spread spores through the room, stain the leather, dry it out, or leave enough contamination behind for the mould to return.
Why Mould on Leather Is a Common Melbourne Problem
Melbourne homes see a lot of stop-start moisture. A room feels dry one week, then muggy the next. Windows stay closed during rain, heaters run in winter, and furniture often sits hard against walls with very little airflow behind it. That’s exactly the sort of environment where mould settles in.
Leather adds its own challenges. It isn’t a sheet of plastic. Upholstery leather has pores, grain variation, stitching lines, piping, folds, and padding underneath. Dust and skin oils sit on the surface, then moisture from humidity or a spill feeds mould growth. Once spores get into seams or under cushions, wiping the visible patch rarely solves the underlying problem.
According to this leather mould guide, mould affects 1 in 3 homes in Australia, Melbourne’s average summer humidity is near 70%, and Victoria reported a 25% increase in mould-induced asthma cases from 2022-2025. The same source says DIY mould cleaning recurrence rates can be as high as 60%, compared with 10% for professional high-temperature steam cleaning.
Why leather gets mouldy faster than people expect
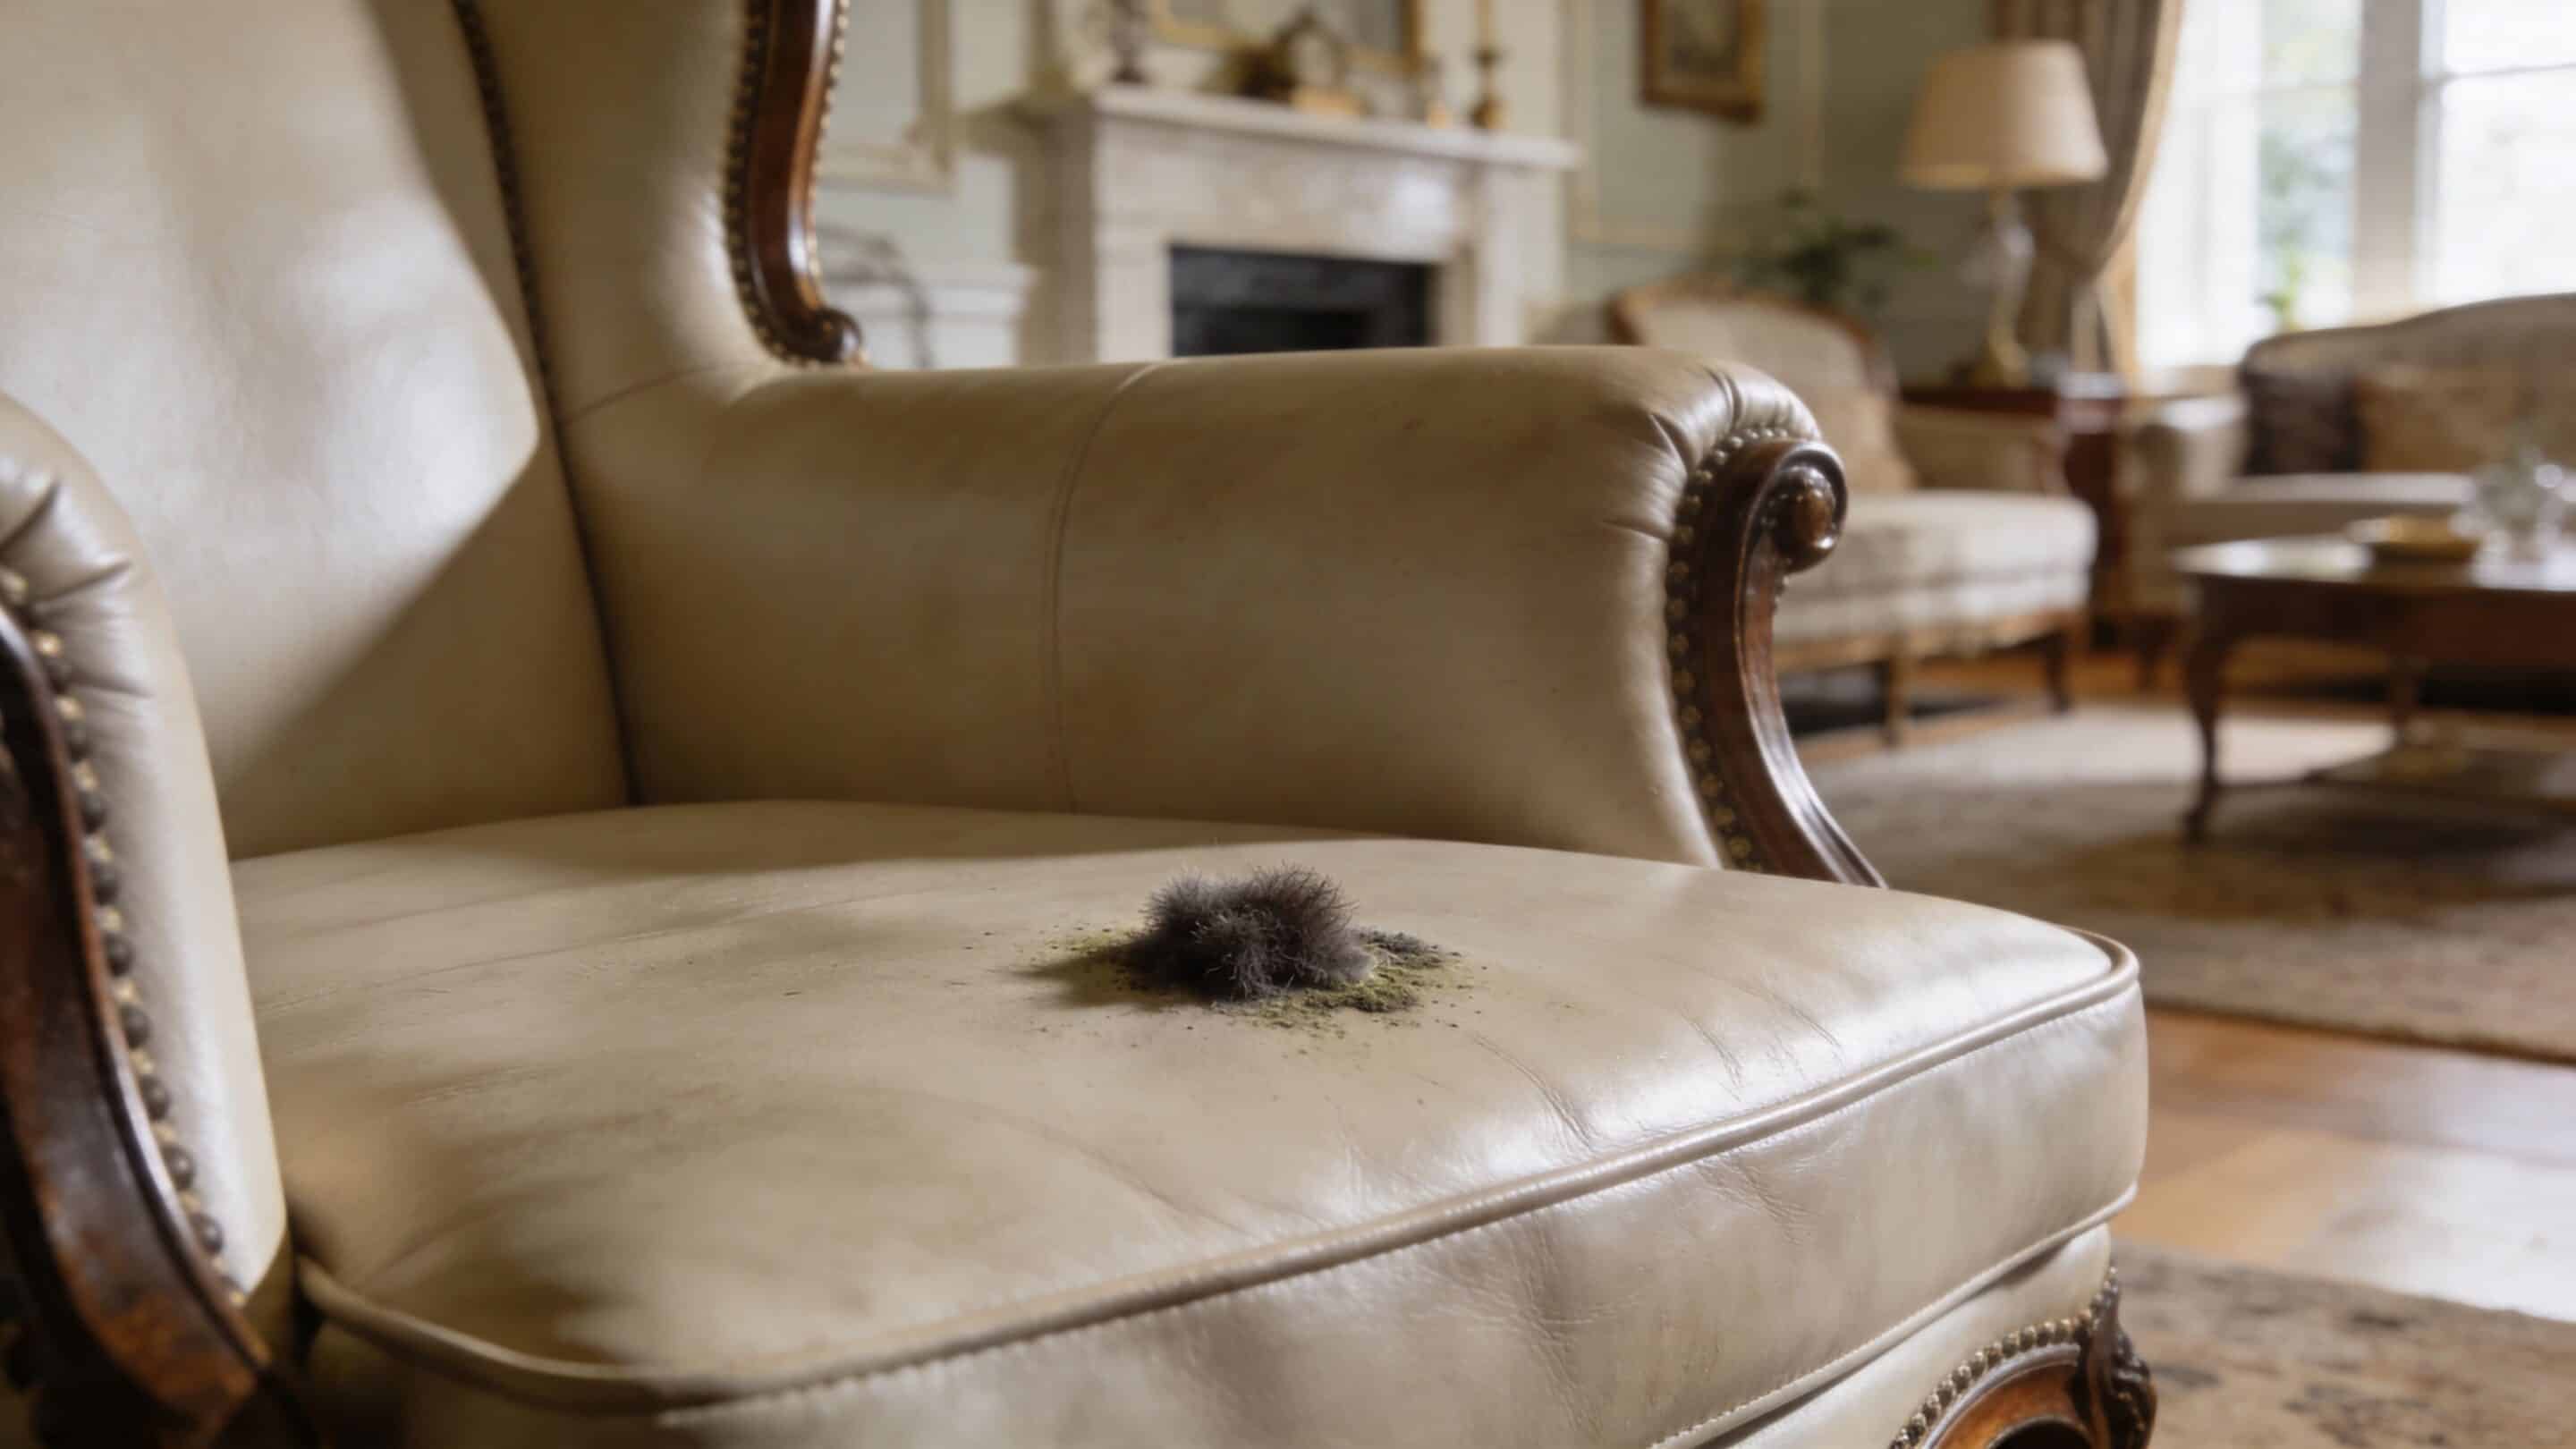
A leather sofa can look clean and still be a good host for mould. The growth often starts in places people don’t inspect closely:
- Seat creases: Moisture and body oils collect where people sit most.
- Rear panels: Furniture pushed close to cold walls gets poor airflow.
- Under cushions: Dust settles, air movement drops, and humidity lingers.
- Decorative seams and buttons: Spores catch in textured areas that cloths skip over.
Protected leather usually gives you more room to clean safely. More absorbent finishes don’t. Aniline, nubuck, suede-like finishes, and older untreated leather can take on moisture and cleaning solution much faster, which raises the risk of tide marks, colour shift, and stiffness.
The health risk isn’t only the visible patch
What worries professionals isn’t just the mould you can see. It’s the spores you disturb while trying to clean it.
Dry scrubbing indoors, aggressive wiping, and using the wrong vacuum can send fine particles into the air. That matters if anyone in the house has asthma, allergies, or a sensitive chest. It also matters if the lounge is in a shared family space where the contamination keeps circulating.
Practical rule: If the mouldy leather item smells stronger than it looks, there’s usually more contamination present than the eye can see.
That’s why cleaning moldy leather has to be approached as a containment job first, a stain removal job second. If you only remove the fuzzy patch and leave spores in seams, foam, or surrounding dust, you haven’t finished the job. You’ve just made it look better for a week.
Before You Clean Assess the Damage and Gear Up
People often damage leather before they’ve even started cleaning it properly. They grab supermarket spray, soak a cloth, scrub hard, and hope for the best. With mould, that approach can lock in staining and push contamination deeper into the material.
A better first move is to slow down and identify what you’re working with. That matters for renters too. According to this guide on leather mould removal, nearly 15% of end-of-lease disputes in Greater Melbourne in 2025 involved damage from mould on furnishings like leather sofas. The same source notes that many DIY failures happen because people use the wrong products on sensitive aniline or veg-tanned leathers, which can absorb solutions and lead to dry rot.
Work out what type of leather you have
You don’t need a lab test, but you do need a reasonable idea.
Protected or pigmented leather is the most common on family sofas. It has a more even colour, a slightly coated feel, and better resistance to light wiping.
Aniline leather looks richer and more natural. You’ll see more variation in grain and tone. It feels softer, but it’s more absorbent and more easily marked.
Nubuck or suede-like finishes have a velvety nap. These are high risk for DIY wet cleaning because moisture can stain them quickly and alter the texture.
If you’re not sure, treat it as a delicate finish until proven otherwise.
Check whether it’s surface mould or a deeper problem
A few signs tell you the job may be bigger than a simple spot clean.
- Surface issue: Small, localised growth. No heavy odour. No obvious spread into lining, underside, or padding.
- Deeper contamination: Growth in seams, repeated return after wiping, widespread odour, dampness in the frame or filling.
- Water event history: If the leather was exposed to flooding, leaks, or prolonged condensation, assume hidden contamination is possible.
If mould is showing on multiple parts of the item, inspect the room as well. Leather often reflects a moisture problem in the home rather than causing it.
Get your gear ready before touching the mould
Use dedicated cleaning gear. Don’t improvise with the kitchen sponge.
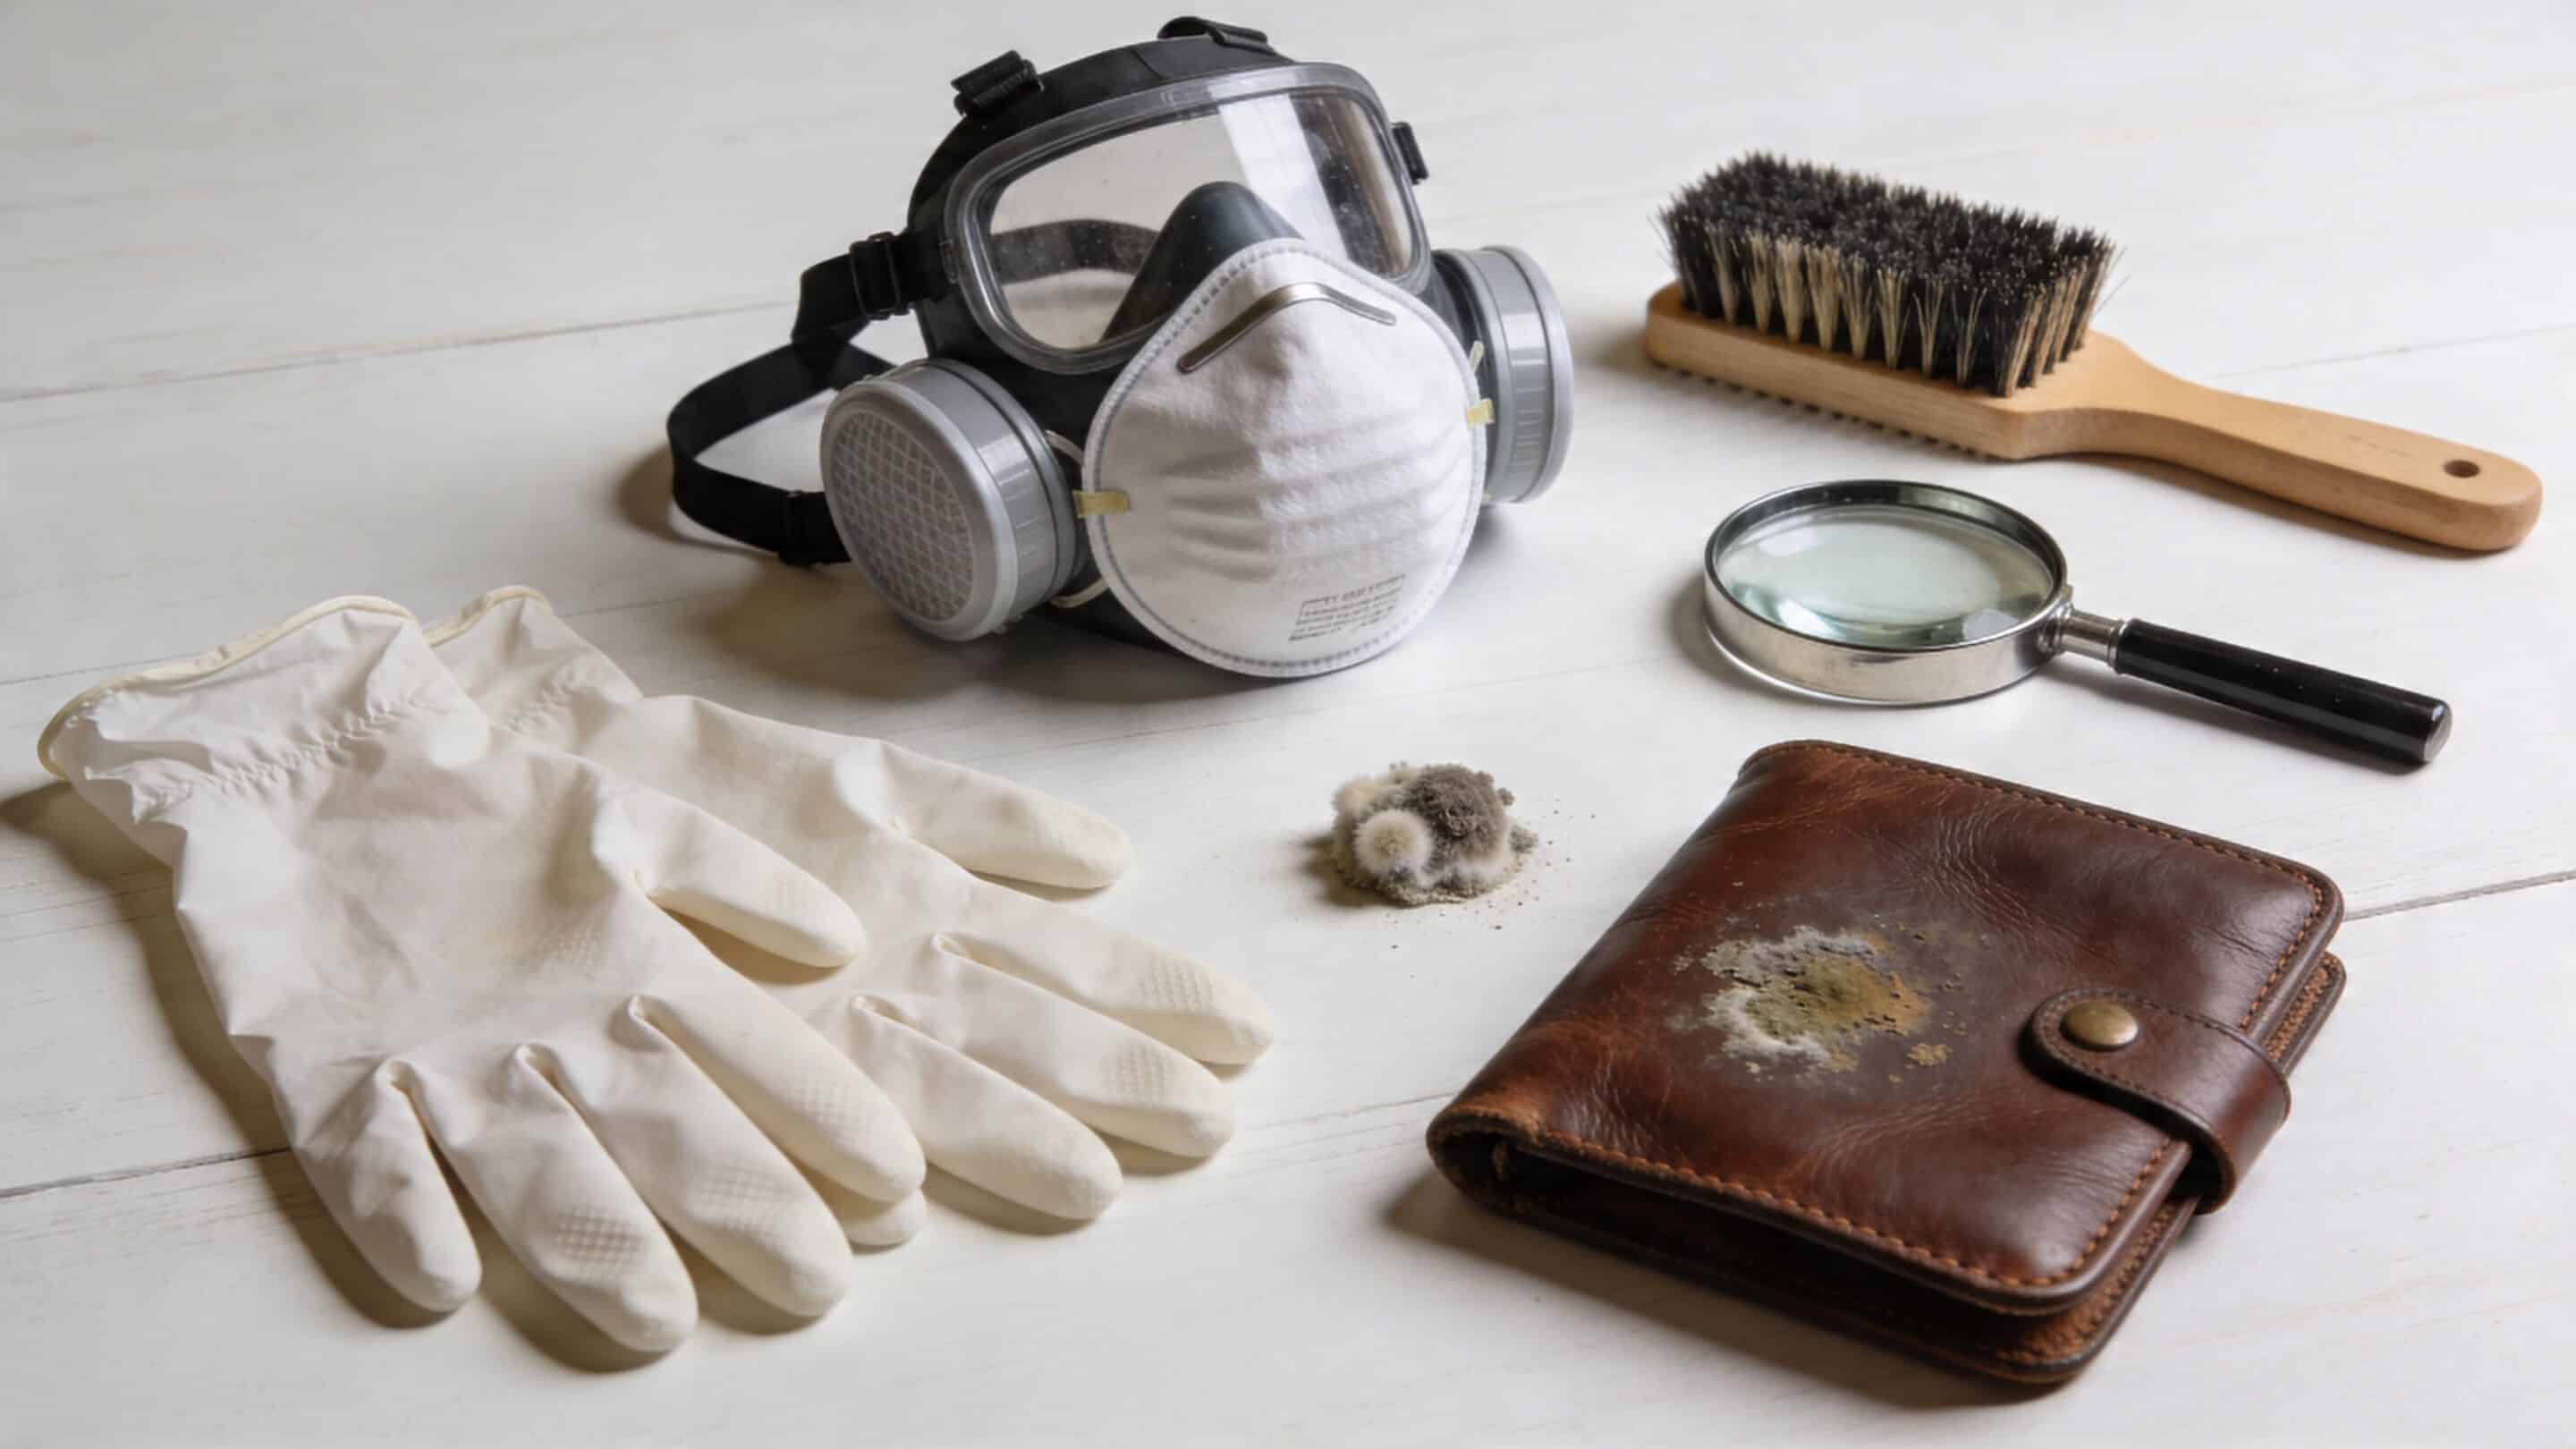
A sensible setup includes:
- Gloves: Disposable or washable gloves keep spores and cleaning solution off your skin.
- Mask: A properly fitted respirator-style mask is the safer choice when disturbing mould.
- Soft brush: A soft-bristle detailing brush works better than anything stiff.
- Microfibre cloths: Use several, because cross-contaminating with one dirty cloth defeats the point.
- HEPA-filter vacuum: This matters more than people think. A standard vacuum can blow fine particles back into the room.
- Good lighting: You need to see texture, bloom, and residue clearly.
Don’t start cleaning moldy leather in a closed bedroom or lounge room. Air movement and isolation matter as much as the solution you use.
Do a spot test properly
A real spot test is small, patient, and boring. That’s why it works.
Choose an inconspicuous area such as the lower back panel or inside edge under a cushion. Lightly apply your chosen solution to a cloth, not directly to the leather. Dab the area, let it dry, then check for:
- colour transfer onto the cloth
- darkening that doesn’t lift as it dries
- stiffness
- dull patches
- sticky finish changes
If any of those show up, stop. The leather is telling you it doesn’t tolerate that method well.
Your Step-by-Step Guide to Removing Mould from Leather
The safest workflow starts dry, controlled, and systematic. Don’t jump straight to wet wiping. If loose mould is still sitting on the leather, adding liquid can smear it across a wider area.
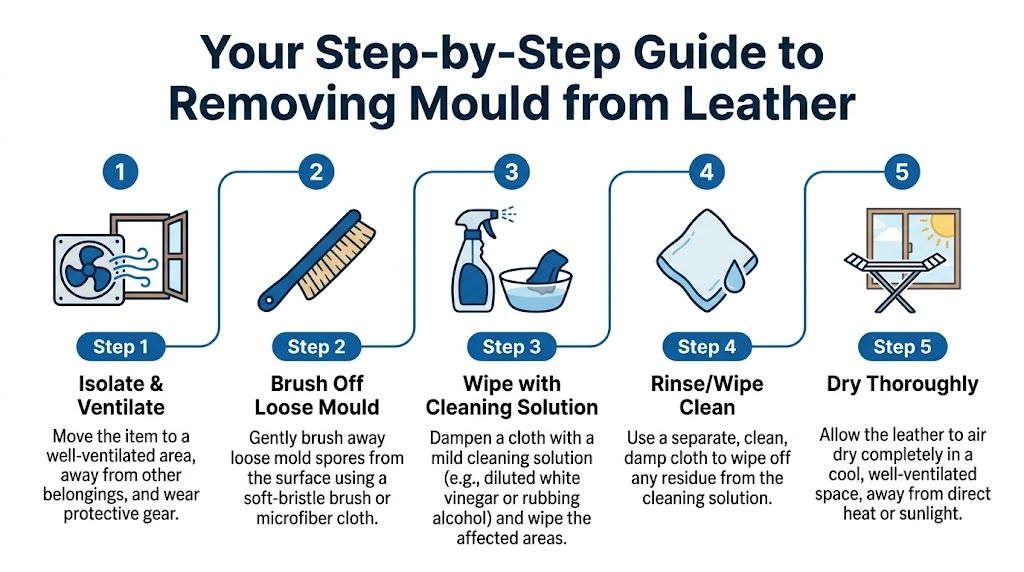
Move the item to a safer working area
If possible, work outdoors in shade or in a very well-ventilated area away from soft furnishings and wardrobes. If the item is too large to move, open the area up and clear nearby fabrics, cushions, and throws.
Keep children and pets away while you work. This isn’t a job for a casual quick clean between errands.
Brush off loose growth gently
Use a soft brush or dry microfibre cloth to lift off visible mould from the surface. The pressure should be light. You’re loosening debris, not polishing the leather.
Pay attention to creases, piping, buttoned sections, and stitched edges. Those are the parts that trap dry growth.
If the leather has weak decorative details, use extra care. Conservation guidance from the Canadian Conservation Institute notes that delicate areas can be protected by covering the nozzle with nylon window screening secured with elastic bands when vacuuming, and variable suction helps avoid pulling off weak attachments on fragile leather pieces.
Vacuum with a HEPA filter and do it twice
This is the step many DIY attempts miss or rush. The Canadian Conservation Institute says effective mould removal depends on thorough vacuuming with a HEPA filter, using a systematic two-pass approach in perpendicular directions across the entire surface, not only where mould is visible. The institute also advises discarding the vacuum contents immediately to prevent re-contamination, as explained in its guidance on removing mould from leather.
That means you should vacuum like this:
- First pass: Go in one direction across the whole item, including arms, back, sides, seams, and under removable cushions.
- Second pass: Vacuum again in the opposite direction or at a right angle.
- After vacuuming: Empty or discard contents straight away, outside the living area.
Spores don’t stay politely on the patch you can see. They spread over the whole surface.
Wipe only after dry removal is done
Once the loose mould and dust are gone, use a clean cloth lightly dampened with your chosen cleaning solution. Wring it out well first. The cloth should feel barely damp, not wet.
Wipe in small sections. Rotate to a clean side of the cloth often. If the cloth comes away dirty, keep changing to a clean one rather than re-spreading residue.
For broad leather care basics, including finish awareness and maintenance habits, this practical guide on https://rightpricecarpetcleaning.com.au/how-to-clean-leather/ is a useful reference.
Finish with a clean damp cloth
After the treatment wipe, go over the area with another cloth lightly dampened with plain water. This helps lift residue without flooding the leather.
Don’t overwork the spot. Repeated rubbing can remove finish, create shine differences, or leave a tide mark around the cleaned area.
Common mistakes that make the problem worse
Some methods look productive but usually create more work later.
- Using too much liquid: Leather and padding underneath can stay damp long after the surface looks dry.
- Scrubbing hard: This can damage grain, stitching, and colour.
- Vacuuming with a non-HEPA machine: Fine spores may not be contained properly.
- Stopping after the visible patch is gone: Hidden spores in seams and surrounding dust can remain active.
- Sealing the room back up too soon: The item needs time and airflow.
If your cloth is wet enough to leave obvious moisture behind, it’s too wet for leather.
Choosing the Right Cleaning Solution for Your Leather
The best cleaning solution is the mildest one that works on your leather type. Stronger isn’t smarter here. A mould problem can often be managed with controlled application, but the wrong solution can strip finish, draw out oils, or leave a fragile hide feeling papery.
Leather conservation guidance recommends a 1:1 white vinegar and water solution as the mildest option, and a 1:4 rubbing alcohol to water ratio for moderate contamination. The same guidance says you should never soak the leather and should always test first on an inconspicuous area, as outlined by International Leather Club’s mould cleaning guidance.
What each option is good for
White vinegar and water is usually the first thing to try. It’s the least invasive of the common household options listed in the verified guidance. It suits light surface growth and leather that you suspect may be a bit sensitive.
Rubbing alcohol diluted with water is the step up when mild treatment isn’t enough. It’s better reserved for moderate contamination and used with a very controlled cloth application.
Mild soap-based cleaner with germicidal or fungicidal action can be useful if mildew persists after alcohol treatment. The important point is still moderation. The leather should never be saturated.
Hydrogen peroxide is described in the verified guidance as harsh but effective, and it requires dilution because of its leather-damaging properties. For most household readers, that moves it out of the everyday DIY category and into the use-with-extreme-caution category.
Ethyl alcohol should be avoided.
Leather Cleaning Solution Guide
| Leather Type | Recommended Solution | Application Notes | Risk Level |
|---|---|---|---|
| Protected or pigmented leather | 1:1 white vinegar and water | Apply to cloth, not directly to leather. Wipe lightly and dry promptly. | Low to moderate |
| Protected or pigmented leather with moderate mould | 1:4 rubbing alcohol to warm water | Use sparingly after spot testing. Follow with careful drying. | Moderate |
| Aniline leather | Start with the mildest option only if spot test is successful | Use the least moisture possible. Stop if darkening or colour shift appears. | Moderate to high |
| Veg-tanned leather | Mildest approach only, with strict spot testing | These leathers can absorb solution and dry out quickly. | High |
| Nubuck or suede-like leather | DIY wet cleaning is risky | Surface work only, with very limited moisture and extreme caution. | High |
| Unknown leather finish | Treat as delicate until identified | Start mild, test thoroughly, and avoid saturation. | Moderate to high |
A specialist service for lounges and upholstered leather pieces can also help if you’re unsure what finish you’re dealing with. This page on https://rightpricecarpetcleaning.com.au/leather-lounge-cleaner/ covers the sort of situations where that extra care matters.
Trade-offs worth knowing
Vinegar is gentler, but it may not be enough for more established growth.
Alcohol can be more effective on moderate contamination, but it also increases the chance of drying the leather if used too heavily or too often.
Soap sounds harmless, but soapy residue left behind can create its own problems if it isn’t removed cleanly.
Use the least aggressive method that passes your spot test. If you jump to the strongest option first, you can end up with clean mould and damaged leather.
The method matters as much as the recipe. A perfect dilution used on a soaked cloth is still poor practice. A careful wipe with the correct amount of solution usually beats a heavy-handed clean.
Drying Conditioning and Preventing Future Mould Growth
Removing mould is only half the job. If the leather stays damp, or if the room keeps feeding moisture back into it, the growth often returns.
Dry it slowly and thoroughly
Air drying is the safe option. Put the item in a cool, well-ventilated space and let moisture leave gradually.
Avoid direct heaters, hairdryers, and strong sun. Fast heat can stiffen leather, create surface tension changes, and leave it looking uneven. The surface may feel dry quickly while hidden moisture remains in the seams or padding, so give it more time than you think it needs.
For larger sofas, remove and separate cushions if you can. Stand them so air can reach both sides.
Condition after the leather is fully dry
Cleaning solutions, especially alcohol-based ones, can leave leather thirsty. Once the piece is completely dry, apply a suitable leather conditioner in a light, even coat.
Use a soft cloth and work in thin layers. More product isn’t better. Heavy application can leave the surface greasy and attract dust.
If the finish is delicate or absorbent, test the conditioner in a hidden area first just like you did with the cleaning solution.
Reduce the chance of mould coming back
Prevention usually comes down to airflow, dryness, and regular inspection.
- Create breathing space: Pull leather furniture slightly away from external walls.
- Keep dust down: Dust feeds mould. Regular vacuuming around and under furniture helps.
- Check hidden spots: Lift cushions and inspect the back panel now and then.
- Deal with moisture fast: Spills, condensation, and leak events need attention straight away.
- Store leather properly: Don’t wrap it in plastic or seal it in damp storage.
If you want broader household strategies, this full home guide on mold prevention is a useful companion resource because it looks beyond the furniture itself and focuses on moisture control through the whole home.
For households already dealing with recurring dampness, it also helps to review practical approaches to a https://rightpricecarpetcleaning.com.au/natural-mould-killer/ so you’re not treating one leather item while ignoring the surrounding environment.
Leather rarely gets mouldy in isolation. The room usually tells the same story if you look closely enough.
When to Call a Professional Leather Cleaning Service
Some mould problems are suitable for careful home treatment. Some aren’t. The hard part is knowing where that line is before you damage the leather or keep exposing the household to recurring contamination.
Call a professional if the mould covers a broad area, sits deep in seams, keeps returning, or followed a leak, flood, or long damp period. The same goes for pieces with sentimental or high replacement value. Once you’re dealing with aniline finishes, older leather, stitched detailing, or uncertainty about the hide type, the cost of a mistake rises quickly.
Professional cleaning also makes sense when the room environment is part of the problem. If you clean one sofa three times and it still comes back musty, the issue usually isn’t your cloth technique. It’s hidden moisture, incomplete spore removal, contamination in the filling, or a wider indoor air problem.
Signs you should stop DIY
- The mould returns after cleaning
- The odour remains strong even when the surface looks clear
- The leather darkens, stiffens, or loses colour during your spot test
- Growth is inside seams, tufting, or hard-to-reach folds
- Anyone in the home has respiratory sensitivity
- The item was exposed to major moisture
There’s also a restoration judgement call. Some furnishings and finishes respond better to specialist handling. If you’re weighing up whether a valuable piece is a cleaning job or a restoration job, this guide to commonly restored items better left to professionals gives a useful outside perspective.
A good professional service doesn’t just “wipe it better”. It brings controlled extraction, proper upholstery handling, safer product selection, and experience with leather finishes that react very differently under moisture and heat. That’s often what saves the piece.
If your leather sofa, chair, ottoman or upholstery has started smelling musty or showing visible mould, Right Price Carpet Cleaning can help with practical advice and professional cleaning across Melbourne. Their team handles leather and upholstery care with the kind of equipment and finish awareness that matters when DIY starts getting risky.
Recent Comments