
Tackling bathroom mould isn't a one-and-done job. To truly get rid of it for good, you need to follow a proven, three-stage process: identify the mould, safely remove it, and then prevent it from coming back. This approach is the only way to break the cycle and move beyond just cleaning the visible spots to fixing the underlying cause.
Why Bathroom Mould Is a Persistent Problem in Melbourne
If you live in Melbourne, fighting a losing battle against bathroom mould probably feels all too familiar. You spend a weekend scrubbing it off your grout and silicone, only to see those ugly black spots creep back just weeks later.
This isn't just bad luck. It's a direct result of our city’s unique climate and the way our homes are built.
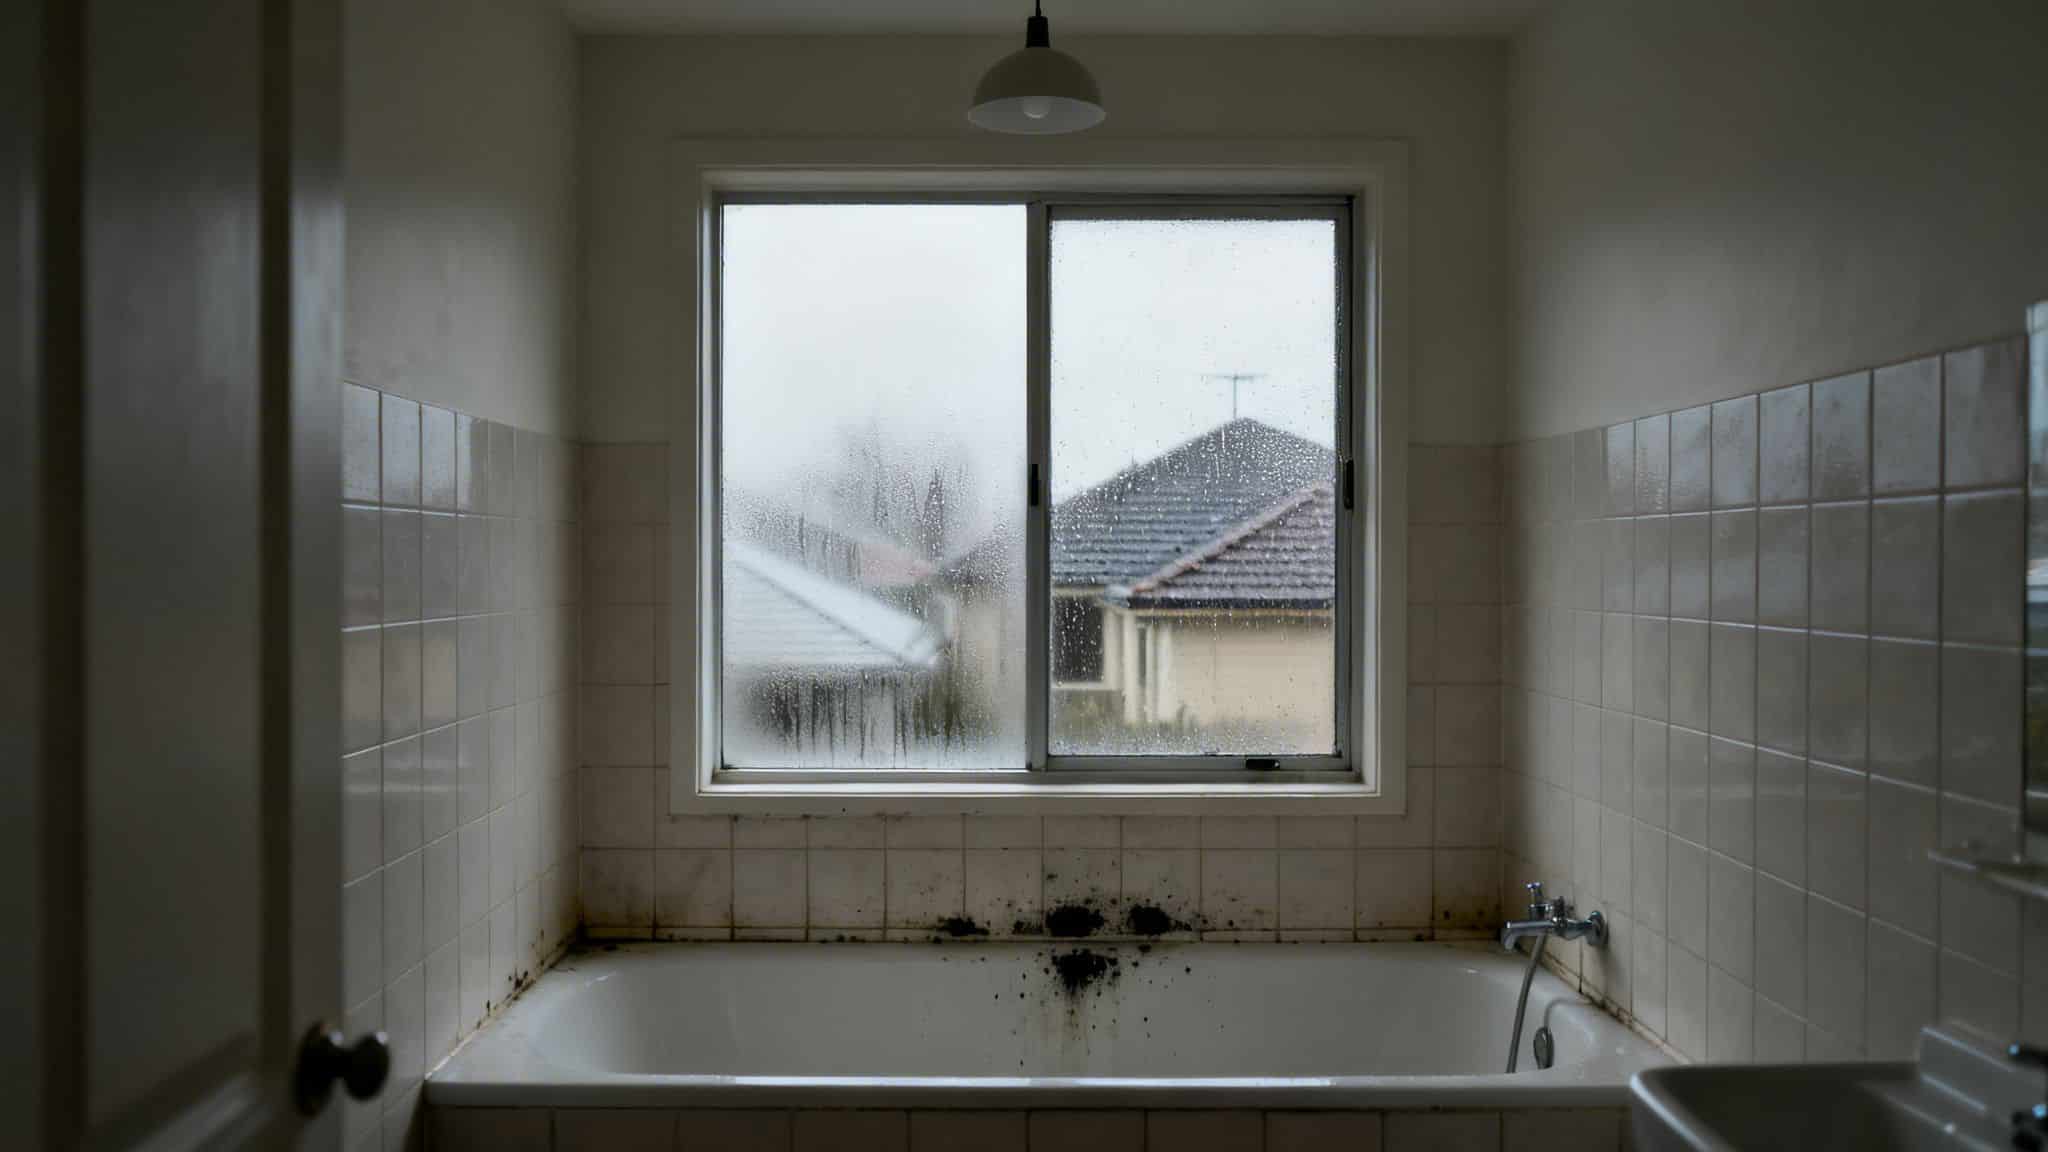
Melbourne's damp, cool winters and surprisingly humid summers create the perfect storm for mould. Bathrooms, with their constant steam from hot showers, become the ideal breeding ground. Factor in the charming but often poorly ventilated older homes and apartments scattered across the city, and you have a recipe for a mould problem that never seems to go away.
The Melbourne Mould Phenomenon
The link between Melbourne's weather and bathroom mould is undeniable. At Right Price Carpet Cleaning, we've been tackling this for homeowners since 2007, and we always see a spike in calls after a particularly wet season.
The data backs this up. After one of our wettest winters, Airtasker saw a 12% jump in mould removal jobs right here in Melbourne. Our city now has a 'mould score' of 73.83 out of 100, making it the fourth-mouldiest capital in Australia. These numbers show just how much our rainfall and older housing contribute to the problem. You can explore more about how local climates influence mould growth across the country.
Key Takeaway: The mould in your bathroom isn't just a cleaning issue; it's an environmental one. Melbourne's climate gives mould a head start, meaning you need a more robust strategy than just occasional scrubbing to win the battle.
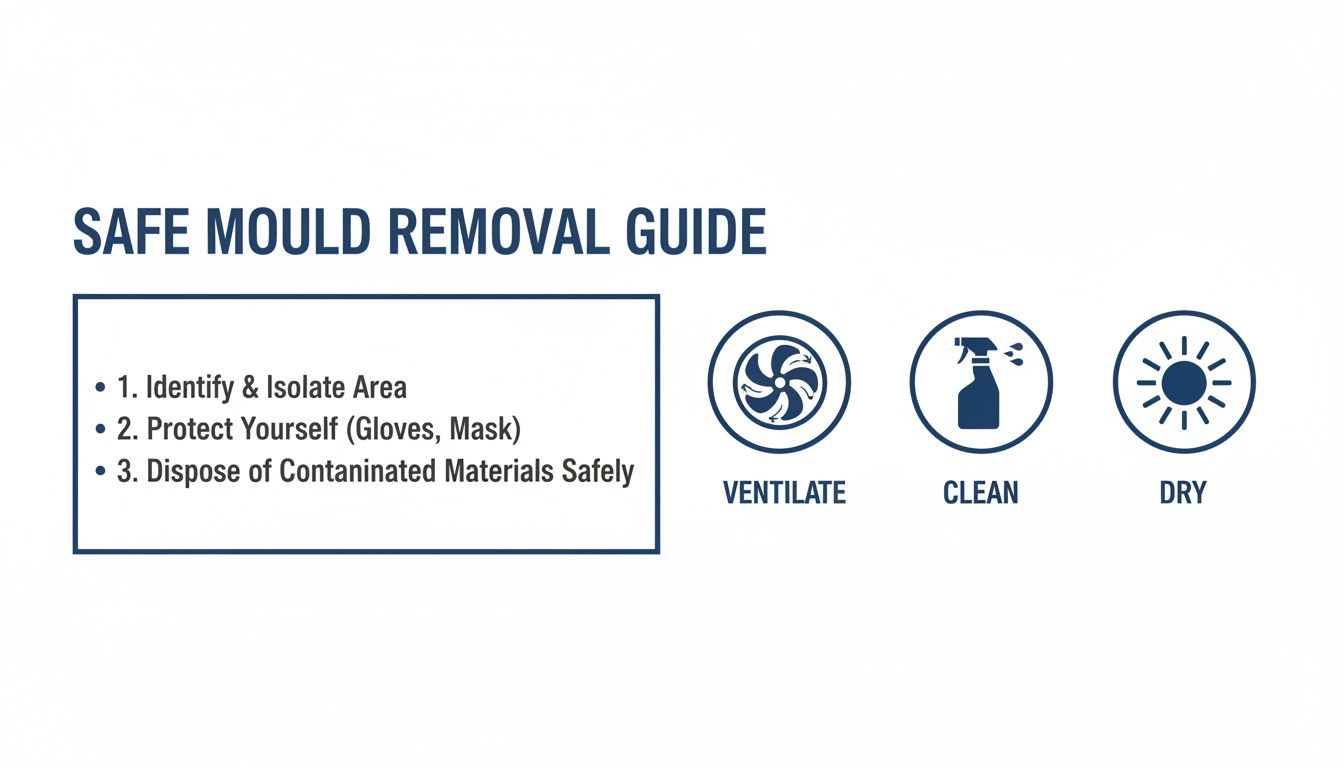
A Strategic Framework for Mould Elimination
Before you grab the bleach and a scrubbing brush, it’s important to have a game plan. Knowing how to eliminate bathroom mould for good requires a structured approach that stops you from just treating the symptoms (the visible stains) while ignoring the root cause (the moisture).
Thinking about it in stages makes the whole process manageable.
Here’s a simple framework that breaks down the entire process. This is the roadmap we'll follow to get your bathroom back to being healthy and clean.
The Three Stages of Mould Elimination
| Stage | Objective | Key Actions |
|---|---|---|
| 1. Identify | To understand the scope and severity of the mould problem. | Inspecting all bathroom surfaces, identifying mould types, and assessing if it's a DIY job or requires professional help. |
| 2. Remove | To safely and completely eradicate all visible mould and its roots. | Preparing the area, using effective cleaning solutions (DIY or commercial), and thoroughly scrubbing affected surfaces. |
| 3. Prevent | To stop mould from returning by controlling the environment. | Improving ventilation, managing moisture levels, and performing regular maintenance on grout and silicone. |
By following this three-stage process, you can finally shift from a reactive cleaning cycle to a proactive prevention mindset. This guide will walk you through each of these phases, giving you the practical steps you need to reclaim your bathroom and keep it mould-free for the long haul.
How to Identify Your Bathroom Mould Problem
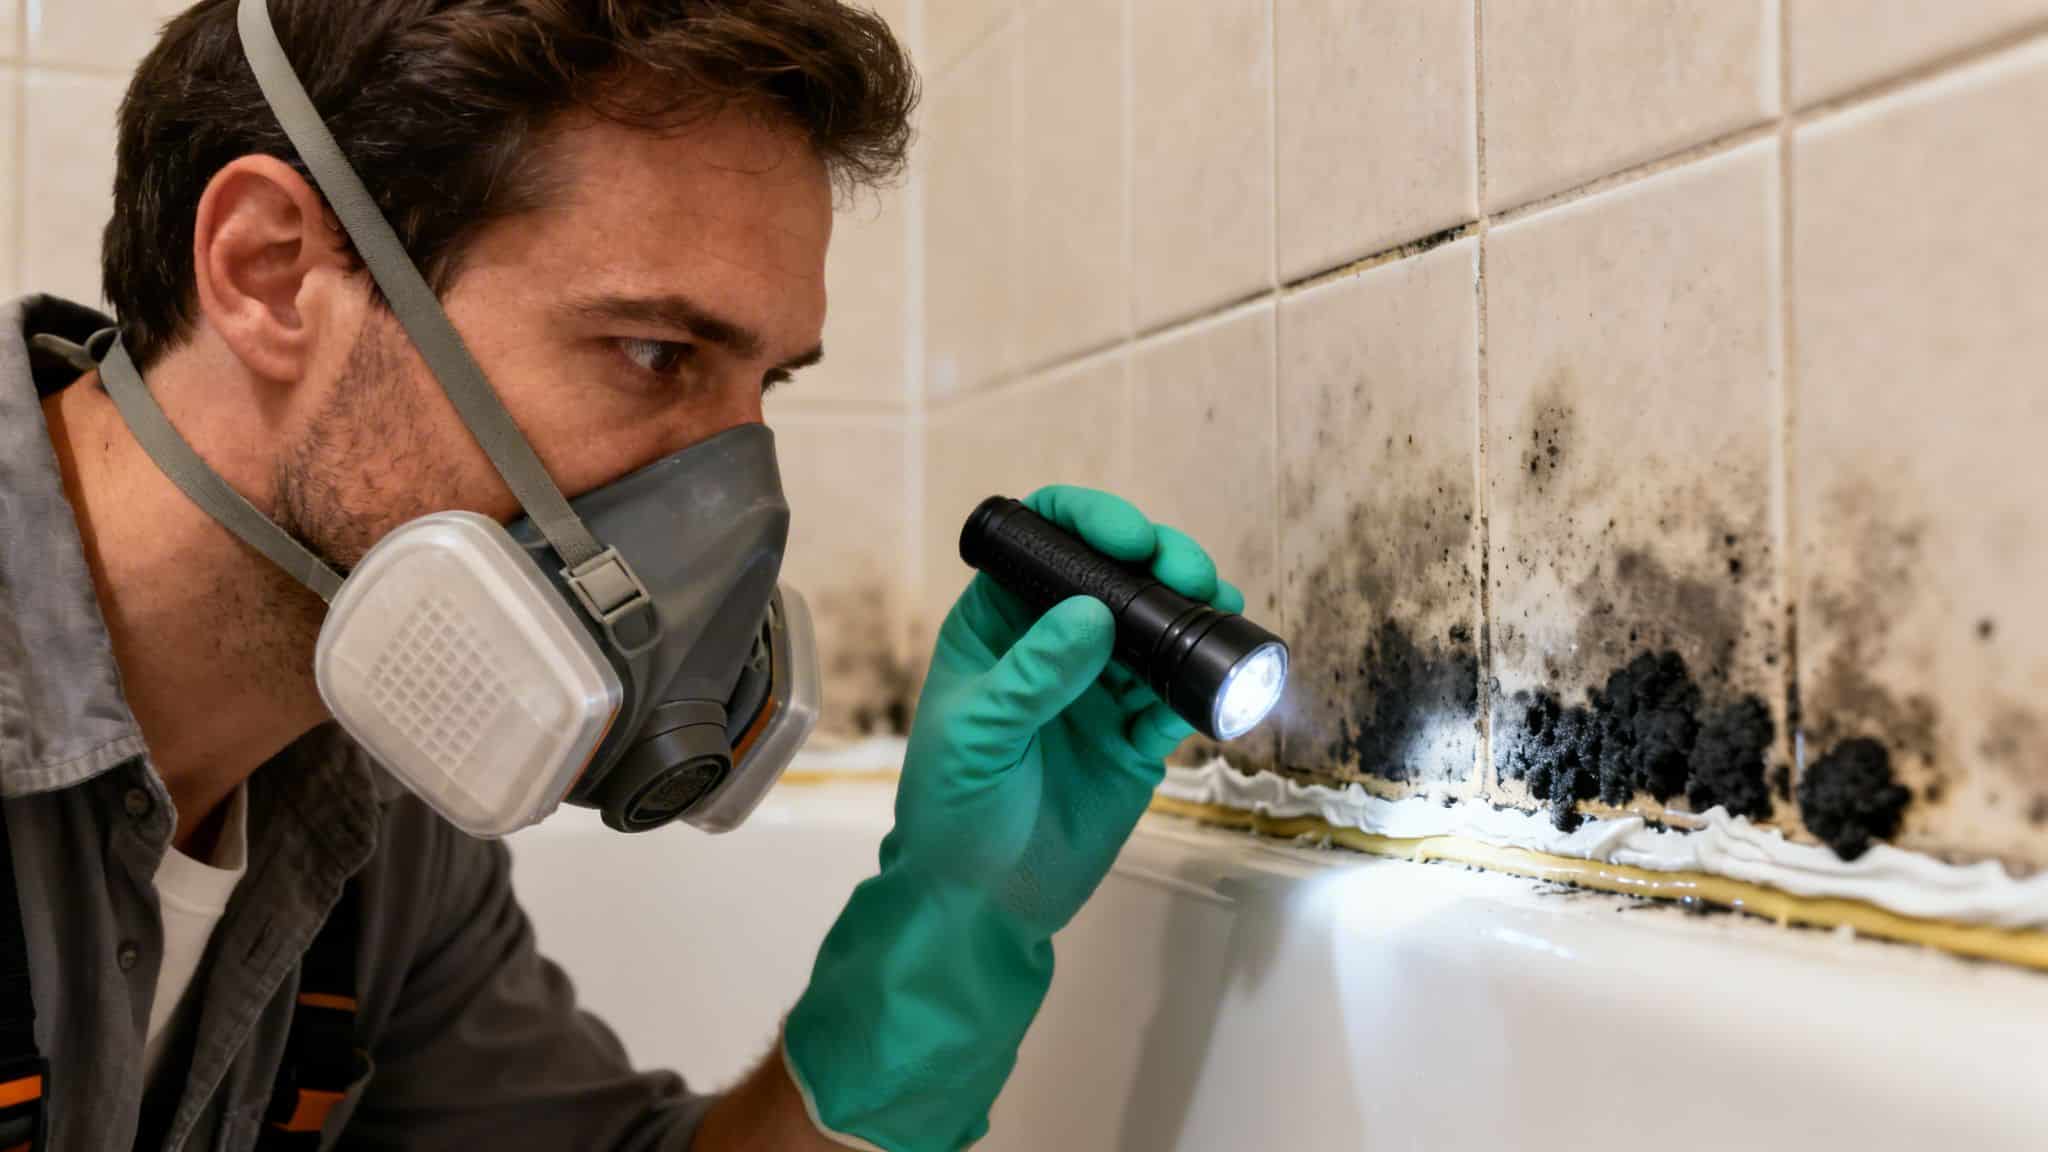
Before you can tackle bathroom mould, you need to play detective. Not all dark spots are the same, and knowing what you're up against is the first step to winning the battle. A good inspection will tell you whether you have a simple weekend job on your hands or a more serious issue that needs an expert.
Your bathroom is prime real estate for mould. Grab a torch and do a systematic check of these common hotspots. Look closely at the grout lines between tiles, the silicone sealant around your shower screen and bathtub, and the corners of the ceiling, especially right above the shower.
Don't forget the less obvious places. Check under the sink, around the base of the toilet, and even inside your vanity cabinets. Any spot that can trap moisture is a potential breeding ground.
What Does Bathroom Mould Look Like
Mould isn't always the stereotypical black spotting. It shows up in a variety of colours and textures, each giving you clues about what you're dealing with and how bad the moisture problem really is.
You might come across:
- Greenish or black spots: This is often Aspergillus, a very common indoor mould that loves damp surfaces. You'll typically find it on walls or spreading through grout.
- Velvety, dark green or brown patches: This could be Cladosporium, which can grow in both cool and warm conditions, making it a frequent, unwelcome guest in bathrooms.
- Slimy, pinkish-orange film: While people call it "pink mould," this is usually a bacterium named Serratia marcescens. It feeds on soap residue and isn't as dangerous as true mould, but it’s a clear sign you have a moisture problem.
Pay close attention to the texture. Is it fuzzy, slimy, or powdery? Does it look like it's just sitting on the surface, or is it growing out from inside the grout or silicone? These details help you gauge the severity of the problem.
Mildew vs. Mould: An Important Distinction
You’ll often hear the terms "mildew" and "mould" used as if they're the same thing, but they are different. Mildew is a specific kind of surface-level mould. It usually looks like a flat, powdery patch of grey or white.
Mould, on the other hand, is often fuzzy or slimy and can be green, black, or a range of other colours. The crucial difference is that mould has roots that burrow deep into porous materials like grout, plasterboard, and wood.
This is a key difference. Wiping away mildew is often enough to solve the problem. Simply wiping the surface of a true mould infestation only removes the visible part, leaving the roots behind to regrow almost immediately.
When to Suspect a Hidden Problem
Sometimes, the biggest clues aren't visible at all. A persistent, musty, earthy smell is a major red flag that mould is growing somewhere you can't see it—perhaps behind tiles, under the floor, or inside a wall cavity.
Other warning signs to watch for include:
- Warping or bubbling paint or wallpaper.
- Soft or crumbling plasterboard.
- Tiles that feel loose or spongy when you press on them.
If you notice these signs without seeing any actual mould, it’s almost certain there is a hidden leak fuelling the growth. Tackling this yourself can lead to much bigger problems down the track. A thorough inspection is the first step in a proper plan to eliminate bathroom mould for good, and if you're unsure, it's always safer to get an expert opinion rather than risk spreading spores or missing the root cause.
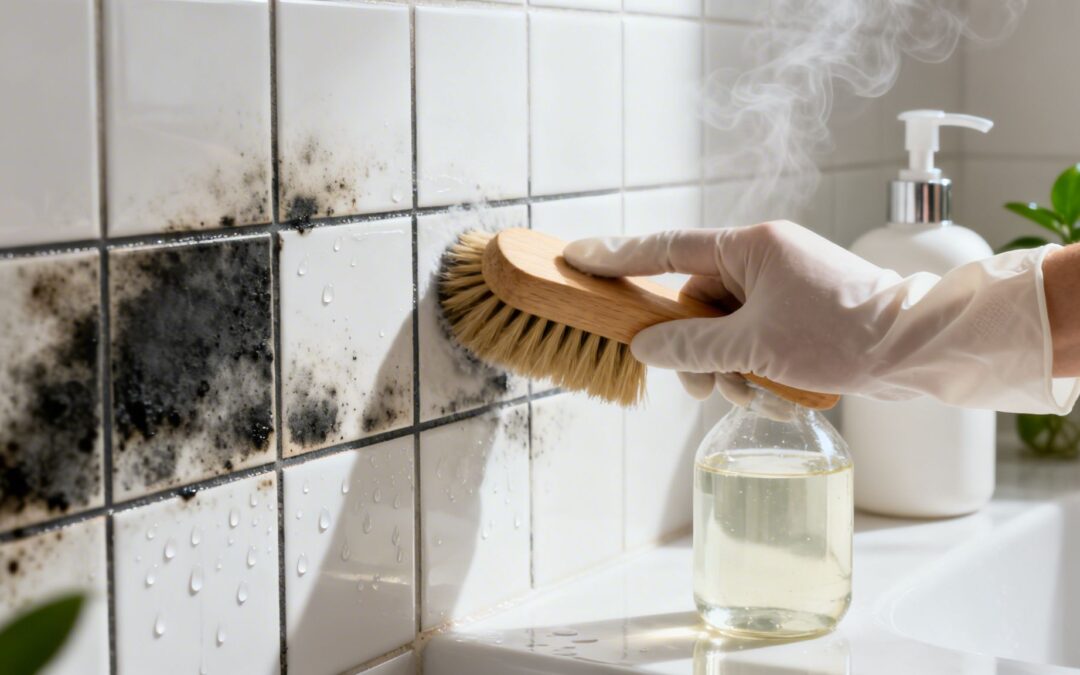
A Practical Guide to Removing Bathroom Mould Safely
Alright, you’ve spotted mould in your bathroom. Now it’s time to tackle it head-on—and do it safely. This is the no-fluff game plan for DIY mould removal, focusing on the techniques that genuinely work on common bathroom surfaces like tile, grout, and silicone.
Our aim here isn’t just to bleach the stains away. We’re going after the mould at its source to break down its structure before you even start scrubbing.
Get Your Area Ready and Put Safety First
Before you even think about mixing a cleaning solution, your first job is to contain the area. The moment you disturb mould, its spores can become airborne, and you don’t want them spreading through your home.
Start by clearing out everything you can—towels, toiletries, bathmats, the lot. Open a window and point a fan outwards to push any airborne spores outside. If you don't have a window, make sure your exhaust fan is running. It's also a good idea to lay down old sheets or plastic drop cloths to catch drips and debris.
Your safety is the top priority here. Always wear:
- A P2 or N95 respirator mask to stop you from breathing in mould spores.
- Safety goggles to shield your eyes from splashes and spores.
- Long rubber gloves to protect your skin from both the mould and any cleaning chemicals.
Choosing Your Weapon: The Right Cleaning Solution
Walking down the cleaning aisle can feel overwhelming, and countless blogs will tell you that natural remedies are the only way to go. But what actually gets the job done? The truth is, the best cleaner depends on the surface you’re dealing with and how bad the mould is.
Natural Cleaners vs Commercial Products
| Cleaner Type | Best For | How It Works | Pro Tip |
|---|---|---|---|
| White Vinegar | Mild to moderate surface mould on non-porous surfaces like tiles and some sealants. | The acetic acid in vinegar is surprisingly effective, killing over 80% of mould species by breaking down their cellular structure. | For those stubborn spots, let undiluted vinegar sit for at least one hour before you start scrubbing. This gives it time to work its magic. |
| Baking Soda | Light mould stains and as a gentle abrasive scrub for grout. | It creates a mild alkaline solution that cleans and deodorises. The slightly gritty texture helps lift stains without scratching surfaces. | Make a thick paste with water, apply it to the grout, and then give it a spray with vinegar. The fizzing reaction helps to physically lift the mould out. |
| Commercial Removers | Stubborn, deep-set mould in grout and silicone, especially nasty black mould. | These usually contain potent fungicides or bleach-based agents that kill the mould and whiten the stains at the same time. | Read and follow the label's safety instructions to the letter. These are powerful chemicals that need excellent ventilation. |
A quick word on bleach: while it's a popular go-to, it often just provides a cosmetic fix. It’s fantastic at whitening the stains mould leaves behind, but it may not actually kill the underlying roots, especially on porous materials like grout. This is why mould often seems to magically reappear a few weeks after a bleach treatment. For a more thorough approach, learning how to properly fight mold in your bathrooms is a game-changer.
The Step-by-Step Removal Process
With your area prepped and your solution chosen, it’s time for action.
Apply the Solution Liberally
Whether you’re using vinegar or a commercial product, don't be shy. The entire mouldy area should be visibly wet. Now, this is where patience is key. Let the solution sit for the recommended time—at least 10-15 minutes for commercial products, and up to an hour for vinegar.
This “dwell time” is the step people skip most often, but it’s the most important one. It allows the cleaner to soak into the porous grout and sealant to attack the mould’s root system. Scrubbing right away is like trying to pull a weed without loosening the soil first.
Time to Scrub
Once the cleaner has had time to do its thing, grab a stiff-bristled brush (an old toothbrush works wonders on tight grout lines) and start scrubbing in a circular motion. You should see the mould starting to lift away. Use firm pressure, but steer clear of wire brushes, which can easily damage your grout and tiles.
If you’re working on silicone sealant, be gentle. Scrubbing too aggressively can tear the sealant, creating a perfect new hiding spot for moisture and mould. A cloth or a softer brush is a much better choice here.
Rinse, Dry, and Inspect
After scrubbing, give the whole area a good rinse with clean water. This washes away the dislodged mould and any leftover cleaning solution, preventing spores from just resettling somewhere else.
Finally—and this is non-negotiable—dry the area completely with a clean towel or cloth. Any moisture left behind is an open invitation for mould to come right back, sometimes within just 24 to 48 hours. Once everything is bone dry, give it a final inspection. If a few stubborn stains are still hanging around, you might need to repeat the process or bring in a stronger solution for those specific spots.
DIY Solutions Versus Professional Mould Removal
So you've spotted mould in the bathroom, and now you're faced with a classic homeowner dilemma: roll up your sleeves and tackle it yourself, or call in the pros? It's tempting to think a quick trip to the hardware store is all you need, but when it comes to the stubborn mould that thrives in Melbourne bathrooms, the DIY route has some serious limitations.
This decision isn't just about cost. It’s about getting a real, lasting solution versus a temporary fix that puts your health and home at risk. Let's dig into what really separates a weekend scrubbing session from a professional deep clean.
The Reality of DIY Mould Removal
For a tiny spot of mildew on your tiles, a bit of elbow grease and a bottle of vinegar or a store-bought cleaner can absolutely do the trick. If you catch it early, you can often handle it yourself.
The biggest draw for DIY is obviously the cost. A bottle of spray and some gloves are far cheaper upfront than hiring a service. You have immediate control and it feels like a quick win for routine maintenance.
But here’s the catch: most DIY methods only clean what you can see. Store-bought cleaners, particularly those with bleach, are fantastic at whitening the ugly stains mould leaves behind. This gives you the illusion of a clean surface, but it rarely penetrates porous materials like grout where the real problem is hiding.
Key Insight: Think of store-bought sprays as a cosmetic fix. They bleach the visible mould but leave the "roots"—the hyphae—alive and well inside the grout. This is precisely why the mould keeps coming back in the exact same spot. It was never really gone.
The Power of Professional Intervention
When you're dealing with mould that keeps returning, or if it's spread across a large area, calling a professional is less of a luxury and more of a necessity. Professionals bring specialised gear and know-how that you just can't replicate with household products. We don't just clean the surface; we eradicate the problem at its source.
The basic steps for safe mould removal—identification, protection, and proper cleaning—are principles we follow with industrial-grade precision.
This guide highlights the fundamentals, but professional equipment takes it to another level.
At Right Price Carpet Cleaning, our technicians use high-pressure steam cleaning for tile and grout, and it’s a total game-changer for a few key reasons:
- Deep Penetration: The high-pressure steam blasts deep into the pores of your grout, reaching the hidden mould roots that DIY sprays leave behind.
- Heat Disinfection: The steam heats up to over 100°C, killing mould spores and bacteria on contact without relying on harsh, smelly chemicals.
- Total Extraction: Our powerful truck-mounted vacuums suck out all the dislodged mould, dirt, and moisture. This leaves your surfaces far drier and cleaner than you could ever get them by hand.
This isn’t just about cleaning. It’s a full-on sanitisation process that removes the guesswork and ensures the mould is gone for good.
DIY Mould Removal vs Professional Services
So, how do you decide? It really comes down to being honest about the scale of your mould problem. This head-to-head comparison should make the choice clearer.
| Factor | DIY Methods | Professional Service (e.g., Right Price) |
|---|---|---|
| Best For | Small, surface-level mould spots (less than 1 square metre). | Recurring mould, large infestations, or deep-set mould in grout and silicone. |
| Effectiveness | Can be effective on non-porous surfaces. Often provides a temporary, surface-level fix on porous materials like grout. | Highly effective at eradicating mould at its source, including the roots, for a long-lasting solution. |
| Equipment | Household cleaners, cloths, and scrubbing brushes. | Industrial-grade equipment like high-pressure steam cleaners and powerful extraction tools. |
| Safety | Relies on your own knowledge of safety gear (masks, gloves) and proper ventilation. | Trained technicians follow strict safety protocols and use containment measures to prevent cross-contamination. |
| Cost | Low initial cost for supplies. | Higher initial investment but can save money long-term by preventing recurring mould and potential structural damage. |
At the end of the day, knowing how to get rid of bathroom mould is also about knowing your limits. If you’ve scrubbed the same black spots in your shower three times this year, it’s a clear sign the problem is deeper than your brush can reach.
Investing in a professional service isn't just about getting sparkling tiles; it's about safeguarding your home's value and creating a healthier space for your family to live in.
How to Stop Mould from Coming Back for Good
Getting rid of mould is a great feeling, but the real win is making sure it stays gone. Prevention is all about breaking the frustrating cycle of scrubbing and regrowth. It means shifting from constantly reacting to a mould problem to proactively creating a bathroom where it just can't get a foothold.
Think of it this way: mould needs a few key things to survive, but the most important one by far is moisture. Since you can’t completely eliminate dust and bathrooms are often dark, your best weapon is controlling the dampness. Every good prevention strategy circles back to this one crucial goal.
These aren't complicated chores, either. They're simple habits that disrupt the mould growth cycle, saving you a lot of stress and money down the track.
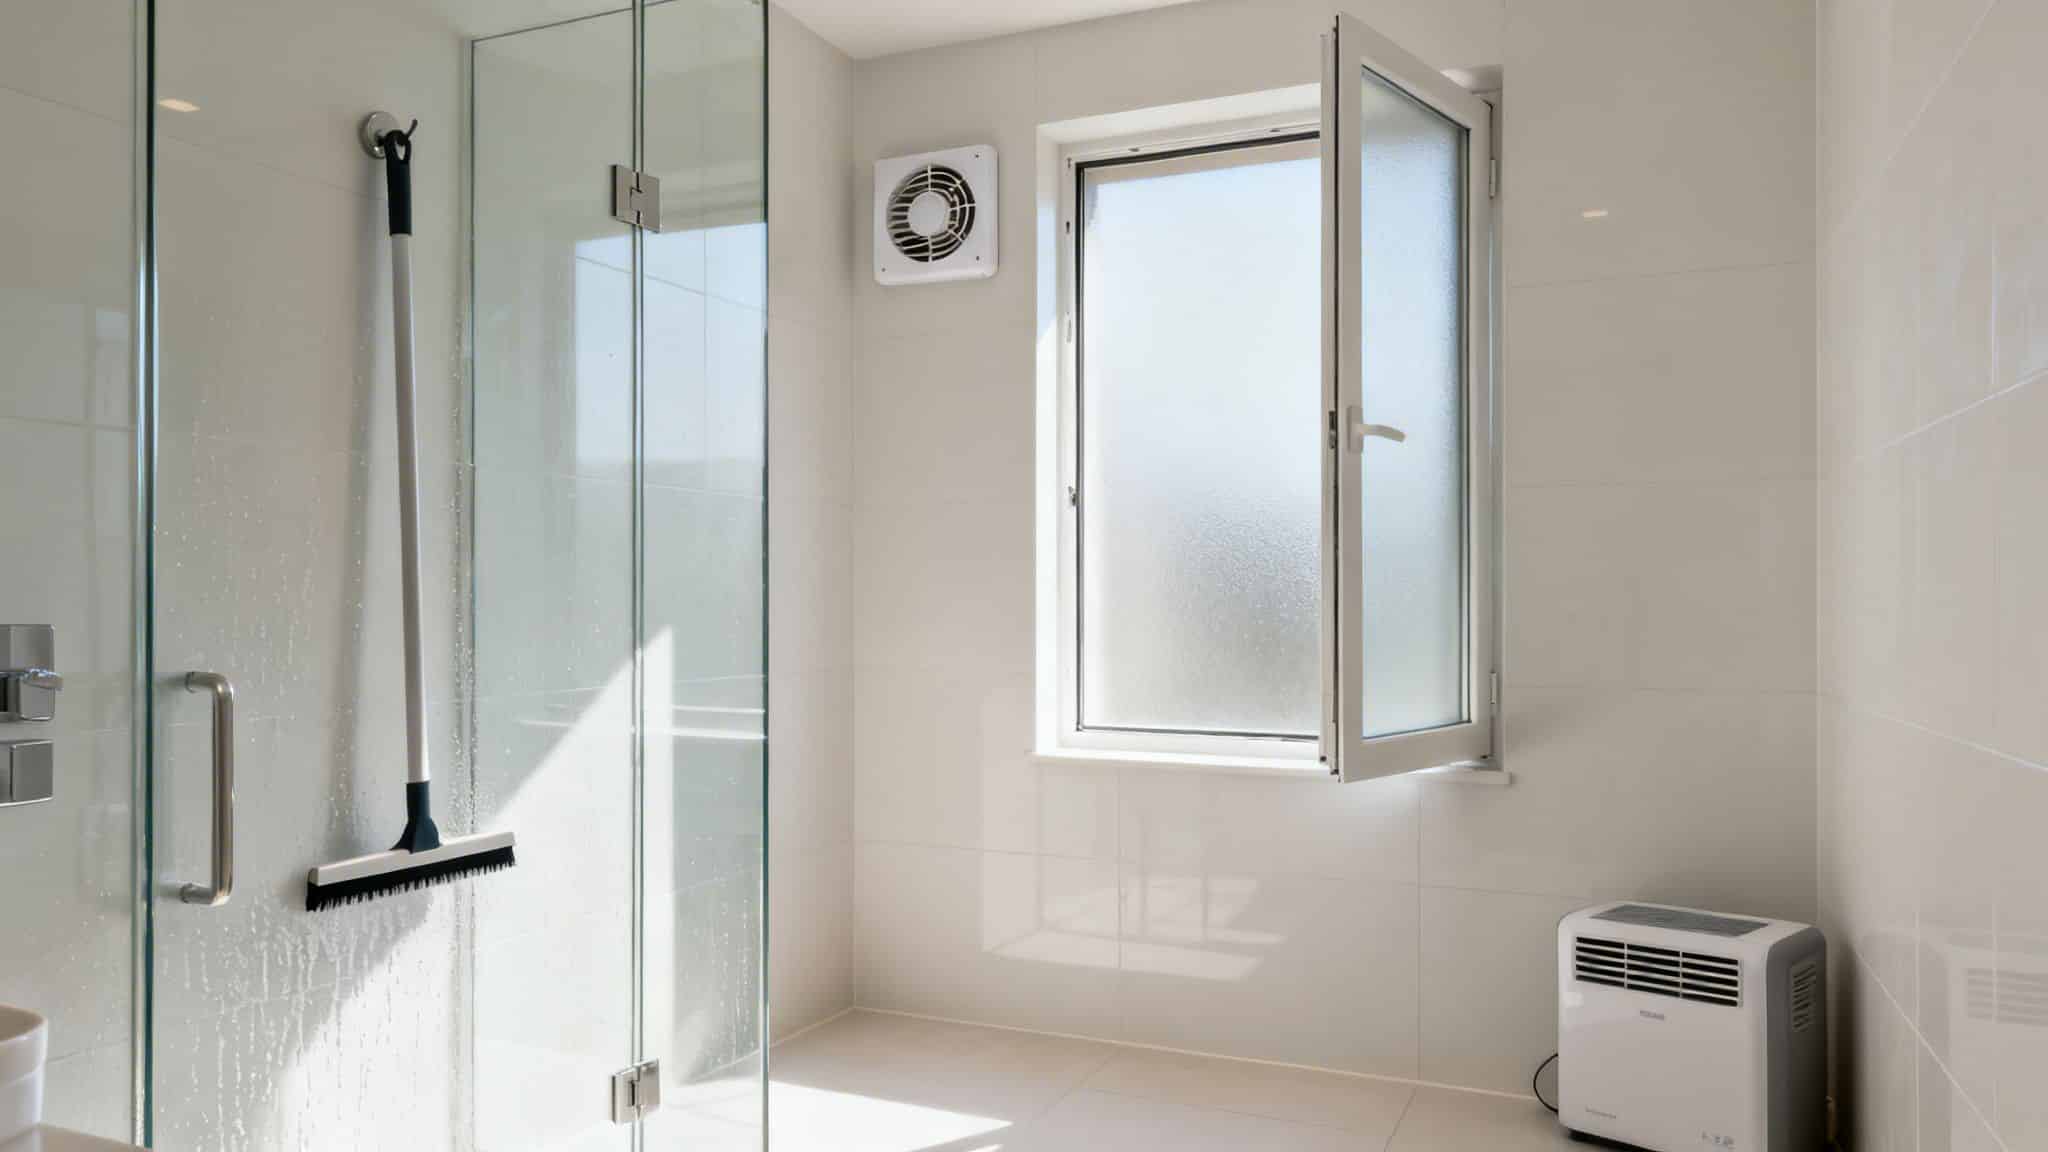
Master Your Bathroom's Airflow
Mould absolutely loves still, damp air. Your number one defence is to keep the air moving, and that makes your exhaust fan your most valuable player. Just flicking it on while you shower isn't quite enough to make a real difference, though.
For the fan to be effective, it needs to run for at least 20-30 minutes after you've turned off the water. This gives it enough time to pull all that lingering steam out of the room. If your fan is old, noisy, or just seems a bit weak, it might be time for an upgrade. A modern, high-powered fan is a small investment with a massive payoff.
No exhaust fan? No problem. Opening a window wide during and after your shower is the next best thing.
Adopt a Daily Moisture-Busting Routine
Small, daily habits can make a huge impact. By getting rid of standing water quickly, you rob mould of the moisture it needs to get started. Remember, mould can begin to grow on a wet surface in as little as 24-48 hours.
Here’s a simple checklist to work into your daily routine:
- Squeegee Shower Walls: After the last shower of the day, take 30 seconds to run a squeegee over the glass and tiles. It’s the single most effective way to stop water from sitting in grout lines.
- Wipe Down Surfaces: Use a microfibre cloth to give the shower floor, bathtub ledge, and taps a quick dry.
- Hang Towels and Bathmats: Never leave wet towels or bathmats bunched up on the floor. Spread them out so they can dry completely—ideally outside the bathroom if your ventilation is poor.
It might sound tedious, but think of it like this: spending two minutes drying surfaces today saves you from two hours of scrubbing mould next month. It’s a trade-off that’s always worth it.
Long-Term Maintenance for a Mould-Free Future
Beyond the daily habits, a little bit of regular maintenance will fortify your bathroom against future invasions. These tasks are all about spotting and fixing weak points before mould can exploit them.
First, stay on top of leaks. A slow-dripping tap or a tiny crack in the silicone around your tub might seem minor, but it provides a constant water source for mould. Get any leaks fixed as soon as you spot them.
Second, think about your grout. Once your grout is professionally cleaned and totally dry, applying a quality grout sealer creates an invisible barrier. This stops moisture from soaking into the porous material, making it much harder for mould to take root. Reapplying it once a year is a fantastic preventative measure. For a deeper dive into home-wide strategies, this guide on how to prevent mold offers an even broader action plan.
Ultimately, stopping mould from returning comes down to creating a dry, well-ventilated space. By combining smart habits, good airflow, and a bit of occasional maintenance, you can finally win the war against bathroom mould and keep your space healthy and clean for good.
When to Call a Professional for Mould Removal
Sometimes, even with the best intentions and plenty of elbow grease, a bathroom mould problem is just too big, too stubborn, or too risky to tackle yourself. Knowing how to get rid of bathroom mould also means knowing your limits. Being able to spot the warning signs that it’s time to call in an expert is crucial for protecting both your health and your home.
A tiny patch of surface mildew is one thing—that’s usually a manageable DIY job. But certain situations are clear signals that you need professional firepower. Ignoring these red flags often leads to a cycle of cleaning and regrowth, not to mention potential health risks for your family.
The Problem Is Larger Than You Think
One of the most obvious signs is the sheer size of the mould patch. If you’re staring down an area of mould that’s bigger than one square metre (think the size of a large bath towel), it’s time to put down the scrubbing brush and pick up the phone.
A large, visible patch almost always points to a much bigger issue hiding out of sight. What you see on your plasterboard or tiles is often just the tip of the iceberg, with a more extensive colony thriving behind the wall or under the flooring. Trying to clean a large area yourself is a bad idea—it dramatically increases the risk of disturbing the mould and sending a huge cloud of spores into the air.
The Mould Keeps Coming Back
You’ve done everything right. You’ve scrubbed with vinegar, tried the strongest commercial cleaners, and made sure the fan is running. But a few weeks or months later, those same ugly black spots are creeping back into your grout and silicone.
Recurring mould is the classic sign that your DIY efforts aren’t getting to the root of the problem. This is incredibly common with porous materials like grout, where store-bought sprays just bleach the surface but leave the mould’s “roots” intact, ready to grow back. When mould consistently returns, it means the underlying infestation was never really gone. It’s time for a more powerful approach.
Key Takeaway: If you find yourself cleaning the same patch of mould every few months, you aren't failing at cleaning. It's a clear signal that the problem is deeper than your tools can reach and requires professional equipment to eradicate completely.
You Detect a Persistent Musty Smell
Sometimes, the biggest clue isn’t visible at all. If your bathroom has a constant, damp, earthy odour that just won’t go away no matter how much you clean or air it out, you should be concerned. That signature musty smell is a tell-tale sign of hidden mould.
This almost always points to a moisture issue behind the scenes—a slow leak in a pipe, a failed waterproof membrane under the shower tiles, or condensation building up inside a wall cavity. Professionals use moisture meters and other diagnostic tools to pinpoint the source of this hidden dampness. It’s a step that’s impossible for most homeowners but essential for a permanent fix.
Health and Safety Concerns
Professional help becomes non-negotiable if anyone in your household suffers from allergies, asthma, or other respiratory conditions. According to the CDC, mould exposure can trigger serious allergic reactions and asthma attacks.
The health of your family should always come first. Attempting to remove significant mould yourself can dislodge spores, making your indoor air quality worse and putting vulnerable individuals at risk. Certified technicians are trained to use proper containment and air filtration methods to keep the rest of your home safe during the removal process.
Don’t let stubborn mould compromise your home’s health and value. If any of these signs sound familiar, it’s time to bring in the experts. The team at Right Price Carpet Cleaning uses powerful, truck-mounted steam cleaning technology to blast away deep-set mould from tile and grout, eradicating the problem at its source. Get an instant quote online and see how our professional deep cleaning services can restore your bathroom and give you lasting peace of mind.
Recent Comments