


When you first spot a patch of mould, reaching for a natural mould killer is a safer and surprisingly effective first move. You don't always need to go nuclear with harsh chemicals. Ingredients you likely already have, like undiluted white vinegar and tea tree oil, are powerful enough to kill most common household mould species without leaving behind nasty chemical residues that can irritate your family and pets.
Why Choose a Natural Approach for Mould
Finding mould in your home is alarming. That immediate impulse to grab the strongest, harshest chemical cleaner you can find is totally understandable. But many of those conventional products, especially the ones loaded with bleach, create their own set of problems.
Often, they just whiten the mould stain on the surface without actually penetrating porous materials to kill the roots growing underneath. It's a cosmetic fix, and it means the mould can—and usually will—come back.
On top of that, the volatile organic compounds (VOCs) released by these chemical cleaners can seriously degrade your indoor air quality, leading to respiratory irritation, headaches, and other health issues.
The Problem with Conventional Cleaners
Store-bought mould removers often rely on aggressive chemicals that introduce several risks you might not have considered:
- Toxic Residues: They can leave behind a chemical film on surfaces that’s unsafe for curious kids and pets.
- Respiratory Irritation: The strong fumes can be a nightmare for anyone with asthma or allergies, triggering attacks and general discomfort.
- Surface Damage: Those harsh chemicals can easily discolour or even corrode sensitive materials like natural stone, waxed wood, and certain fabrics.
Mould is a massive issue in Australian homes. Research suggests that around 70% of homes in the country have some level of mould hanging around. That's a huge concern, especially when you learn that nearly 28% of Australians have a genetic predisposition that makes them more vulnerable to health complications from mould exposure. To get a better handle on this, you can dig into the insights on Australian home environments from That Cleaning Crew.
The Benefits of Natural Solutions
Going for a natural mould killer is a safer and, in many cases, more effective alternative. Simple ingredients from your pantry, like white vinegar, get the job done because their acidic nature breaks down the very structure of mould, killing it right at the source.
The real power of a natural solution like vinegar is its ability to penetrate porous surfaces. While bleach might clean the surface, the mould's "roots" can remain embedded, allowing it to regrow. Vinegar gets deeper, offering a more permanent solution.
This approach doesn't just solve the immediate problem; it helps create a healthier living environment. By ditching the harsh chemicals, you're protecting your family's well-being and the integrity of your home’s surfaces, all while tackling the mould head-on.
Natural vs Chemical Mould Cleaners at a Glance
Deciding between a pantry staple and a store-bought chemical can be tricky. Here’s a quick breakdown to help you see the key differences.
| Feature | Natural Mould Killers (Vinegar, Tea Tree Oil) | Chemical Cleaners (Bleach-Based) |
|---|---|---|
| Effectiveness | Kills mould at the root on porous surfaces. | Often only whitens surface stains, leaving roots intact. |
| Safety | Non-toxic, safe for use around children and pets. | Releases harsh fumes (VOCs) and leaves toxic residue. |
| Surface Impact | Gentle on most materials, non-corrosive. | Can damage or discolour sensitive surfaces like fabrics. |
| Cost | Very affordable and uses common household items. | Can be more expensive, especially for specialised formulas. |
| Odour | Natural smell (e.g., vinegar) that dissipates. | Strong, lingering chemical smell that requires ventilation. |
Ultimately, natural solutions offer a powerful and safe way to handle most household mould issues without compromising your health or home. Throughout this guide, we'll show you exactly how to use these ingredients for the best results.
Safety and Preparation Before You Begin
Before you even think about mixing up a natural mould killer, let's talk prep. This is easily the most important step. If you disturb a mould colony without the right precautions, you’ll release a cloud of microscopic spores into the air, potentially spreading the problem and causing some nasty respiratory irritation.
Proper preparation isn’t just about being cautious; it’s about making the entire job safer and more effective. You want to contain the mould, protect yourself, and have everything you need on hand to get it done right the first time. Think of it as setting the stage for a successful, one-and-done cleaning mission.
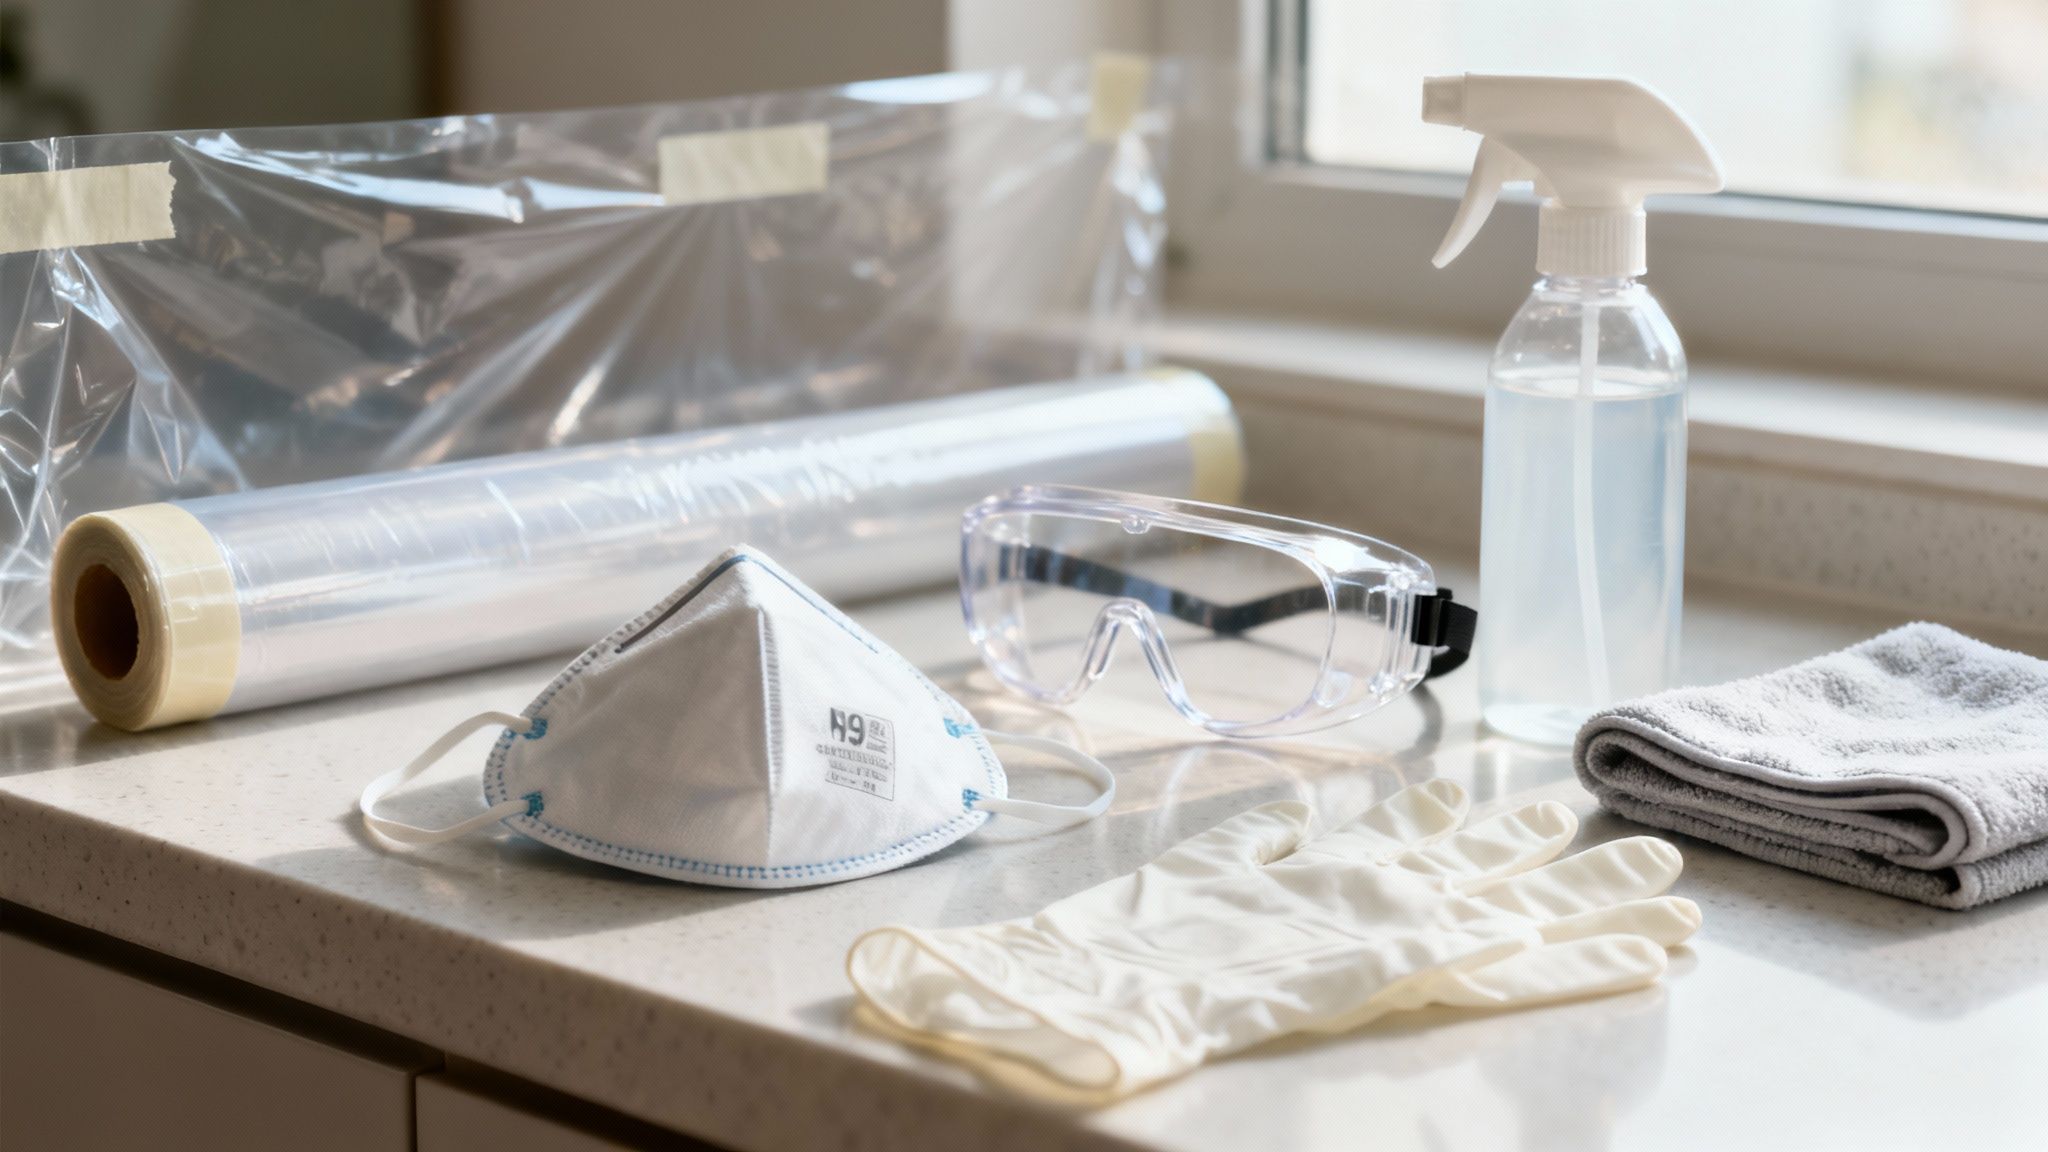
Your Personal Protective Equipment Checklist
Even though we're using natural solutions, direct contact with mould spores is a big no-no. Mould can be an irritant for anyone, but it's especially problematic for people with allergies, asthma, or a compromised immune system. Don't skip this gear—it's non-negotiable for your health.
Here’s your essential PPE list:
- A P2 or N95 Mask: This is your first and best defence against breathing in airborne spores. A simple dust mask just won’t cut it; you need a proper respirator designed to filter out fine particulates.
- Safety Goggles: Protect your eyes from splashes of your cleaning solution and from any spores that get flicked up during scrubbing.
- Non-Porous Gloves: Rubber or nitrile gloves are perfect for keeping your hands from touching the mould and the cleaning agents directly.
Gathering these items beforehand means you won’t be tempted to cut corners once you’ve started. This simple setup is the barrier between you and potential health issues.
Containing the Work Area
Once you’re geared up, the next priority is to stop the mould from hitching a ride to other parts of your home. Spores are incredibly light and travel easily on air currents.
Start by closing any doors to the affected room and stick a towel at the bottom to seal the gap. If you're working in an open-plan space, use plastic sheeting and painter's tape to create a temporary barrier and quarantine the area. This prevents cross-contamination and keeps the problem right where it is.
Proper ventilation is a bit of a balancing act. You need fresh air, but you don't want strong drafts blowing spores everywhere. Open a window in the room you’re cleaning, but make sure all interior doors and HVAC vents are closed off first.
This focused approach ensures that while you're treating one spot, you aren't accidentally creating a new problem somewhere else.
Gathering Your Cleaning Tools
Having all your tools ready will make the whole process run smoothly. The last thing you want is to leave the contained area mid-job because you forgot something.
Your toolkit should include:
- Empty Spray Bottles: You'll need at least one for your natural mould killer.
- Microfibre Cloths: These are fantastic for wiping surfaces after treatment because they do a great job of trapping tiny particles.
- Scrub Brushes or Scouring Pads: For stubborn mould on hard surfaces like tile and grout, a bit of elbow grease goes a long way.
- A Bucket: Always handy for rinsing cloths or mixing a larger batch of your cleaning solution if needed.
With your gear on, the area contained, and your tools at the ready, you are now fully prepared to tackle that mould safely and effectively.
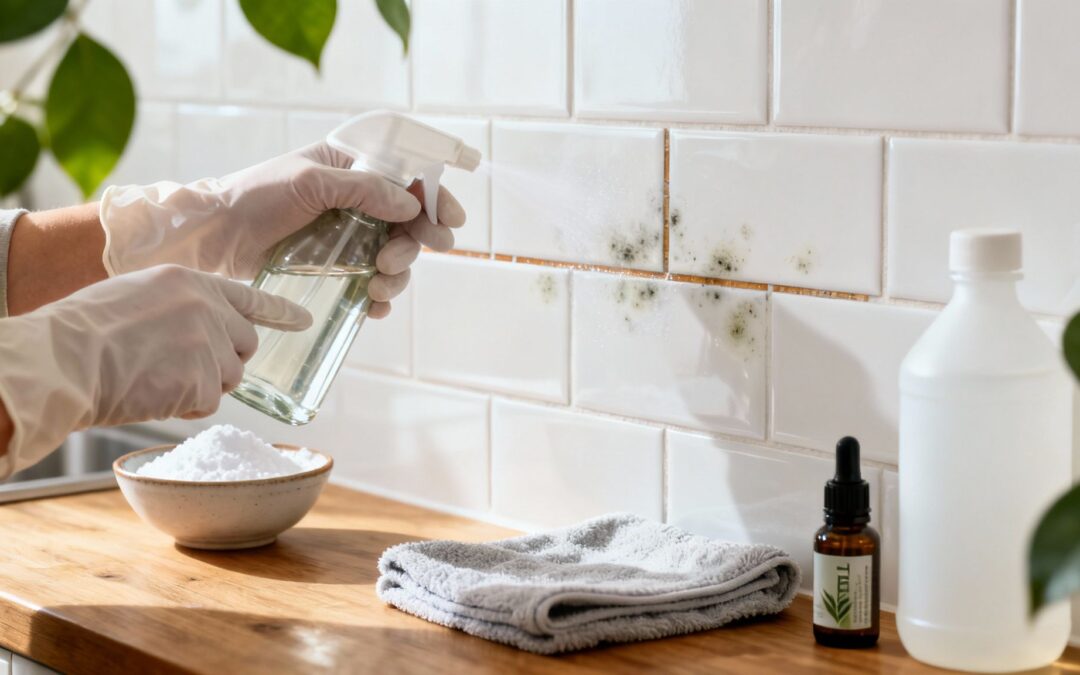
Right, you're all prepped and ready to go. Now, let's mix up some mould-fighting solutions. You don't need a cupboard packed with harsh chemicals to get the job done. In fact, some of the most powerful natural mould killers are probably sitting in your kitchen pantry right now.
These aren't just old wives' tales—there's real science behind why these simple ingredients work so well. Understanding what makes each one effective will help you pick the right recipe for the job, whether you're dealing with a bit of mildew on the bathroom grout or a more stubborn patch in a damp corner.
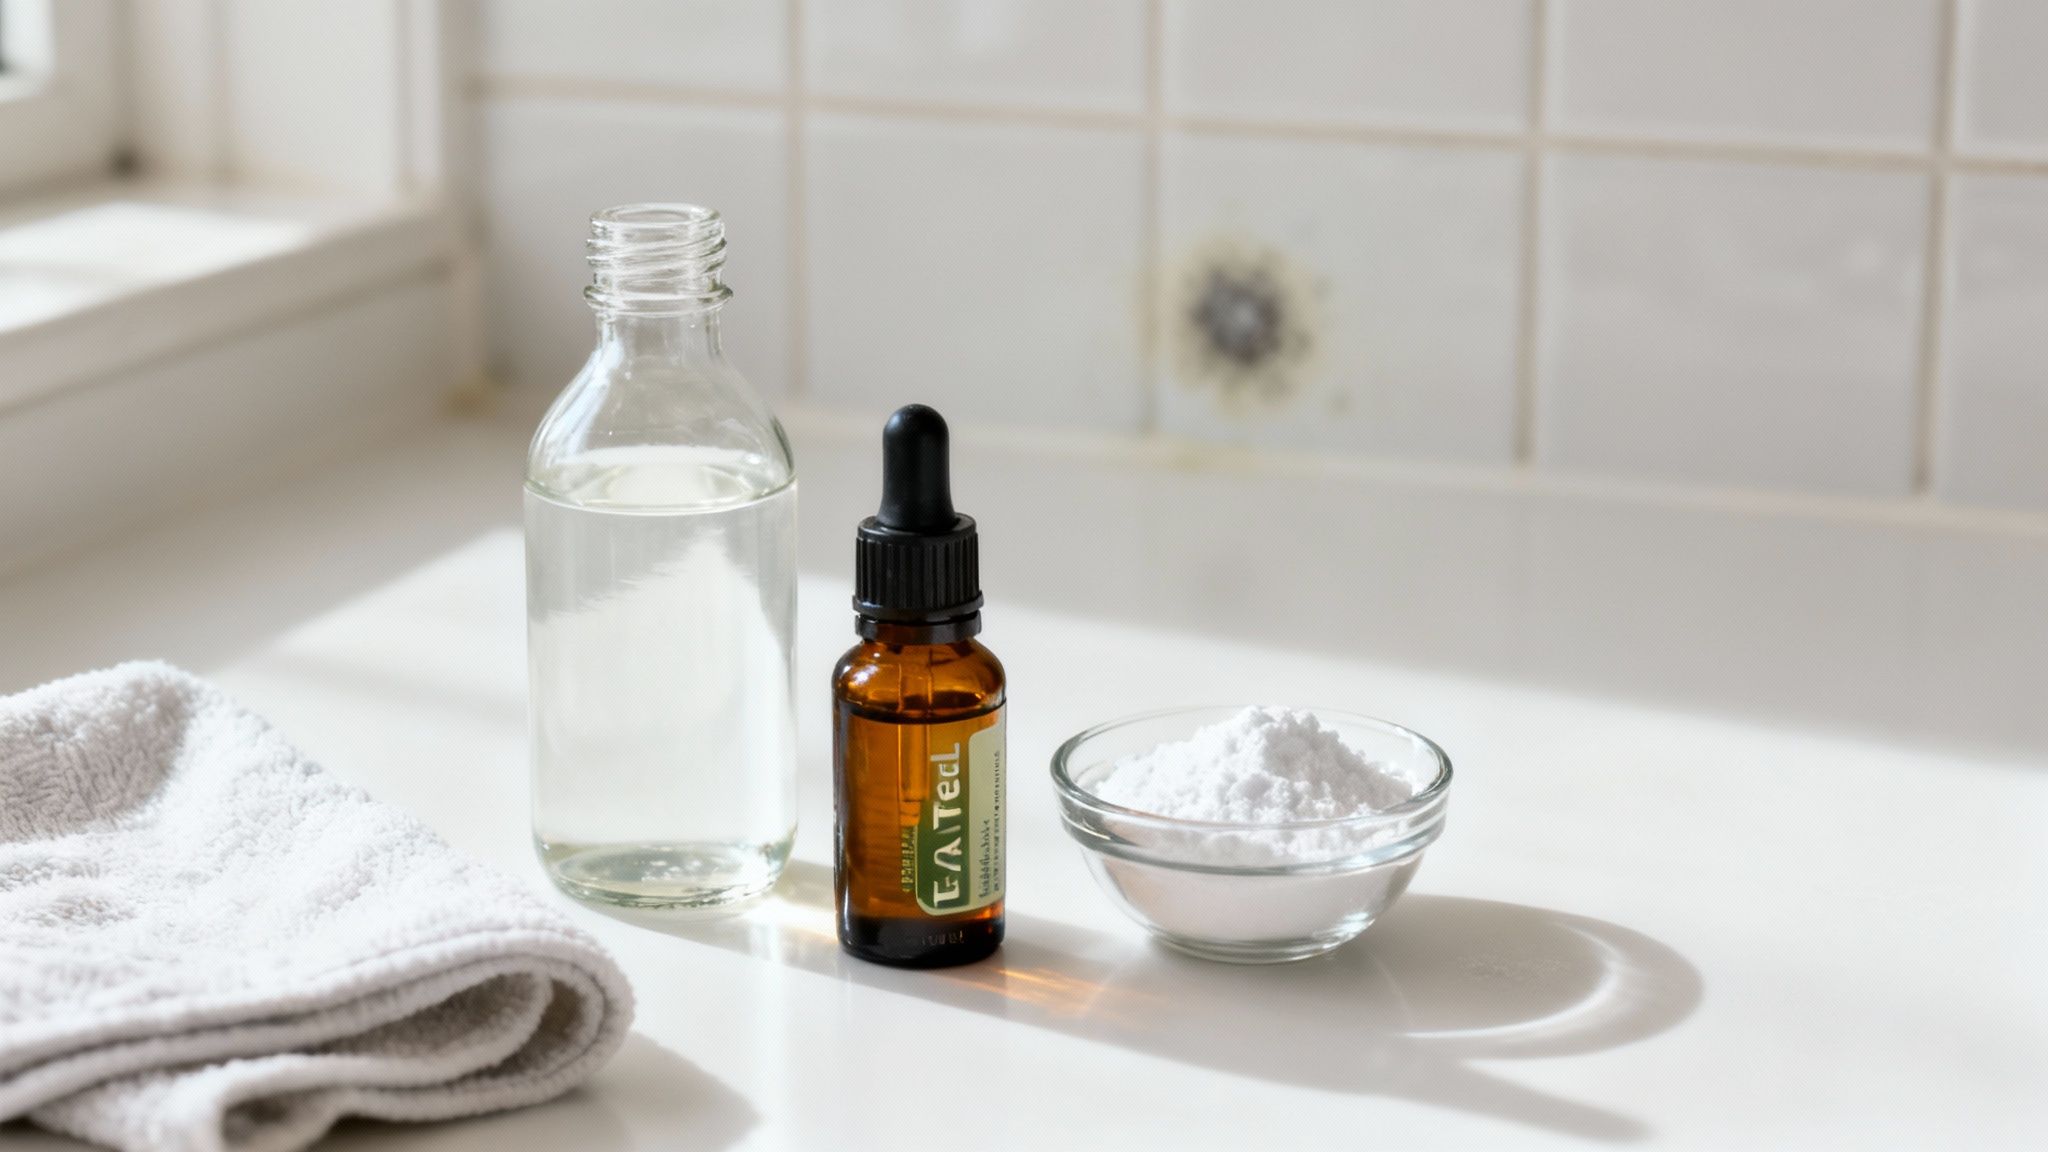
The Powerhouse: A Simple White Vinegar Solution
If you’re going to use just one thing, make it plain white vinegar. It's easily the most effective natural mould killer you can find, hands down. Its magic comes from acetic acid, which is strong enough to seep into porous surfaces like plasterboard and wood to kill the mould's root system.
This is where it really outshines bleach. Bleach often just whitens the surface stain, leaving the roots untouched and ready to regrow. Vinegar gets to the source.
For this recipe, you literally only need two things:
- Undiluted white distilled vinegar (look for about 5% acidity)
- An empty spray bottle
That’s it. Just pour the vinegar straight into the spray bottle. Don't be tempted to add water, as that will only dilute its strength and make it less effective. This single-ingredient spray is your go-to for most common household mould problems.
As more people look for non-toxic alternatives, natural solutions like undiluted white vinegar and tea tree oil are becoming the standard. They effectively kill mould spores without leaving behind harsh chemical residues. You can find more great insights on non-toxic mould removal from the experts at That Cleaning Crew.
The Heavy-Hitter: Tea Tree Oil Mould Spray
Tea tree oil is a potent natural fungicide. While it costs a bit more than vinegar, a little goes a very long way. Its powerful anti-mould properties make it perfect for those really persistent problem spots. It's also a great choice if you just can't stand the smell of vinegar.
To mix up this heavy-hitting spray, grab:
- Two teaspoons of high-quality tea tree oil.
- Two cups of water.
- An empty spray bottle.
Combine the oil and water in the bottle and give it a really good shake. Because oil and water don’t mix, you’ll need to shake it vigorously before each use to make sure it's properly combined. You can spray this directly onto mould and just leave it to do its work—no rinsing required.
The Finisher: Baking Soda Abrasive Paste
Vinegar and tea tree oil are brilliant for killing the mould itself, but sometimes you need a bit of muscle to scrub away the stains and residue left behind. That's where baking soda comes in. It’s a mild abrasive that can lift stubborn spots without scratching most surfaces.
Think of it as your second step. First, kill the mould with vinegar. Then, scrub away the evidence with baking soda.
Pro Tip: This is a classic one-two punch for mould removal. The vinegar handles the kill, and the baking soda handles the clean-up. Using them together ensures you're not just killing the mould, but also physically removing the dead spores and stains.
Creating a paste is incredibly simple:
- Mix one part baking soda with one part water in a small bowl.
- Stir it up until you get a thick, spreadable paste.
Apply this paste directly to the stained area, let it sit for a few minutes, and then use a scrub brush to gently work away the discolouration.
How to Use Your Natural Solutions Like a Pro
Mixing the recipes is half the battle; knowing how to apply them correctly is the other half. Your technique will change based on the surface you're cleaning and how bad the mould is.
Let's say you have a small patch of mildew on your bathroom tiles. You’d completely saturate the area with your white vinegar spray and let it sit for at least one hour. This dwell time is non-negotiable. It gives the acetic acid enough time to penetrate and kill the mould right down to the root. After an hour has passed, give it a good scrub with a brush and rinse it all down with water.
Now, imagine you’ve found a recurring mould spot on a painted window sill. For something like that, I’d reach for the tea tree oil spray. Lightly mist the area, let it air dry completely, and then repeat the process the next day. This gentle, repeated application is great for killing mould without stripping the paint.
With any application, patience is your best friend. Let the natural killer do its job before you start scrubbing. Rushing this step is the single most common mistake people make, and it's almost always why the mould comes back. And always, always finish by making sure the area is bone dry to stop new growth in its tracks.
How to Treat Mould on Different Surfaces
Mould doesn’t play by one set of rules. It pops up wherever there’s a hint of moisture, and each surface you find it on needs a slightly different battle plan. A one-size-fits-all approach just won’t cut it.
What’s perfectly safe for your bathroom tiles could ruin your sofa, so adapting your method is the key to using a natural mould killer successfully. The strategy you choose comes down to one simple thing: is the surface hard and non-porous, or is it soft and absorbent? Think of it like cleaning up a spill—you wouldn't use a sopping wet cloth on a wooden floor, and the same logic applies here.
This quick visual guide shows you how to choose your approach based on the mould you're facing.
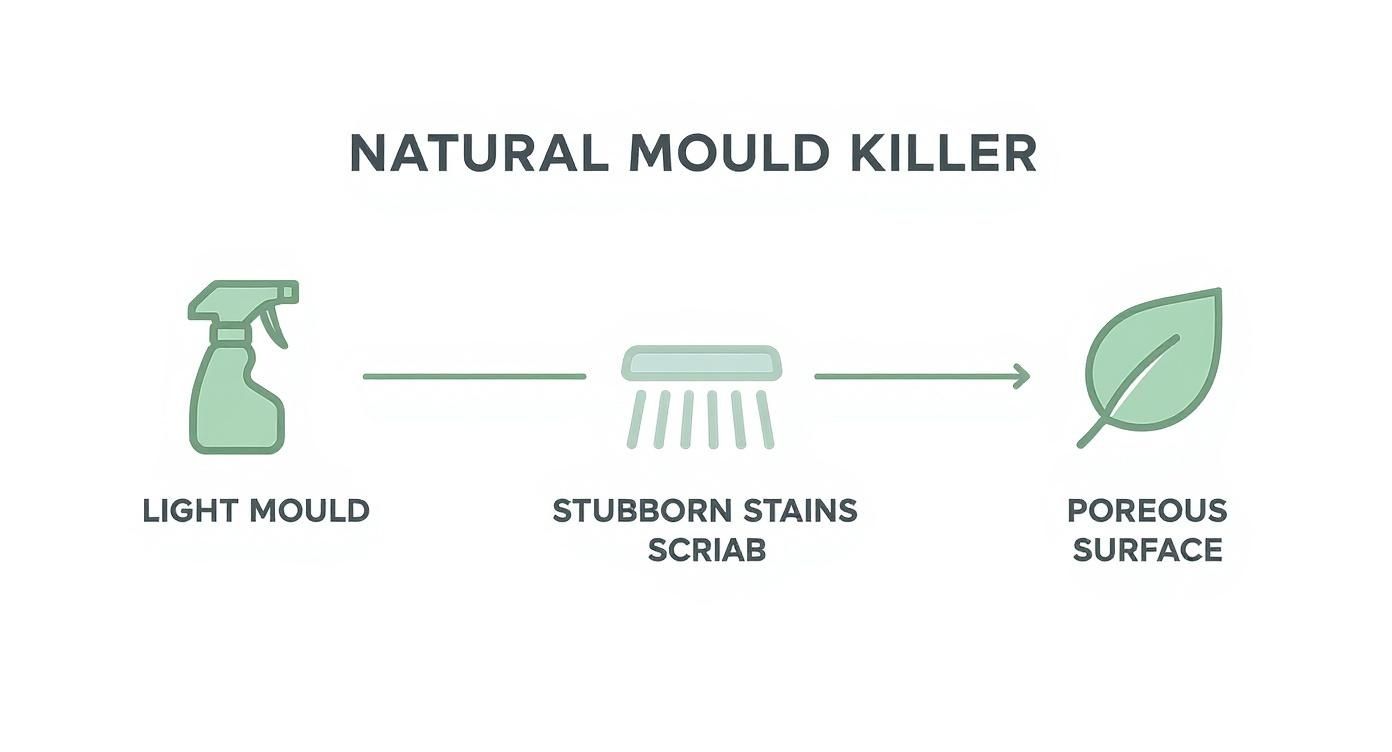
As you can see, a simple spray-and-wait method is often enough for light mould. But for stubborn stains or porous surfaces, you'll need a more hands-on scrubbing or blotting technique.
To make things even easier, here's a quick reference guide to help you choose the most effective and safest natural mould killer for different areas in your home.
Best Natural Solution by Surface Type
| Surface Type | Recommended Natural Killer | Application Tip | Caution |
|---|---|---|---|
| Bathroom Tile & Grout | Undiluted White Vinegar | Spray generously, let sit for one hour, then scrub with a stiff brush. | Avoid on unsealed natural stone like marble. |
| Carpets & Rugs | Tea Tree Oil Spray | Mist lightly and blot gently. Never saturate the fibres. | Always do a spot test in a hidden area first. |
| Upholstery | Vinegar or Tea Tree Oil Spray | Lightly spray and blot with a dry microfibre cloth. | Test for colourfastness on an inconspicuous spot. |
| Mattresses | Tea Tree Oil Spray | Mist very lightly, then vacuum thoroughly once dry. | Ensure complete drying to prevent moisture buildup inside. |
| Painted Walls | Tea Tree Oil Spray | Mist on and let it air dry. No rinsing needed. | Test on a small patch; vinegar can sometimes dull paint finishes. |
| Wood Surfaces | Tea Tree Oil Spray | Spray lightly, let sit for an hour, then wipe clean and dry fully. | Vinegar is too acidic for most wood finishes. |
This table should give you a solid starting point, but let’s dive into the specifics for each surface.
Tackling Hard Surfaces Like Tile and Grout
Bathrooms and laundries are prime real estate for mould, especially in the grout lines between tiles. Luckily, these hard, non-porous surfaces are relatively straightforward to clean because the mould can't penetrate very deeply. Your undiluted white vinegar solution is the perfect tool for this job.
Start by generously spraying the vinegar directly onto the mouldy tile and grout. You want to see it coated. Let it sit for at least one full hour—this gives the acetic acid enough time to get to work and kill the mould spores at the root.
After it has soaked, it's time for some elbow grease. Use a stiff-bristled brush and a bit of your baking soda paste to scrub the area firmly. You’ll see the mould and stains start to lift almost immediately. Rinse everything thoroughly with warm water, then dry it completely with a microfibre cloth.
A critical mistake people make is not drying the area properly after cleaning. Any lingering moisture is an open invitation for mould to return, sometimes within days. Use a fan or open a window to ensure everything is bone dry.
Treating Porous Surfaces Like Carpets and Upholstery
Soft, porous surfaces like carpets, rugs, and upholstery are much trickier. The mould's roots, or hyphae, can grow deep into the fibres, making it incredibly difficult to remove completely. If you get too aggressive with scrubbing or oversaturate the fabric, you can damage it and actually make the problem worse by adding more moisture.
For these delicate materials, the "blot and dry" method is your best bet.
- Vacuum First: Before you apply any liquid, use a vacuum cleaner with a HEPA filter to carefully go over the affected area. This is a crucial step that removes loose surface spores without sending them airborne.
- Apply Your Solution Sparingly: Lightly mist the area with either your vinegar or tea tree oil spray. The key word here is mist. Avoid soaking the fabric; you only want to dampen it just enough for the solution to work.
- Blot, Don't Rub: After letting the solution sit for an hour, gently blot the area with a clean, dry microfibre cloth. Rubbing will only push the mould deeper into the fibres and potentially damage the material.
- Dry Thoroughly: This is the most important step. Aim a fan directly at the damp spot or use a hairdryer on a low, cool setting to speed things up. The area must be completely dry to the touch before you consider the job done.
And remember, always perform a spot test on a hidden area of the fabric first. The last thing you want is to trade a mould stain for a discolouration patch.
Dealing With Painted Walls and Wood
Painted walls and wooden surfaces require a careful, gentle approach. While vinegar is a fantastic mould killer, its acidity can sometimes damage certain paint finishes or waxed wood surfaces. Because of this, the tea tree oil spray is often a safer starting point for these materials.
Always begin with a spot test in an inconspicuous corner. Apply a small amount of your chosen solution, let it dry, and check back in 24 hours. If there's no damage or discolouration, you're good to go.
For painted walls, just lightly mist the mouldy patch and let it air dry. There’s no need to rinse it off; leaving the solution on the surface provides ongoing protection against regrowth. For wood, spray lightly and wipe it away with a clean cloth after about an hour, then make sure the surface is completely dry.
Special Considerations for Other Areas
Mould can pop up in some unexpected places, each demanding its own strategy. For example, the rubber seal on your front-loading washing machine is a classic mould hotspot. You can keep it clean by wiping it down regularly with a cloth dampened with vinegar.
Another challenging spot is inside air conditioning units or ductwork. If you notice a persistent musty smell whenever your system runs, it could be a sign of a hidden mould problem. When tackling mould in tricky areas like air ducts, you can find more detailed guidance on the signs of mold in air ducts and how to remove it. This is often a job best left to professionals due to the complexity and the risk of spreading spores throughout your home.
No matter the surface, the core principles never change: kill the mould at its source, physically remove the residue, and dry the area completely to stop it from coming back.
Drying and Long-Term Mould Prevention

Successfully knocking out a mould outbreak with a natural killer is a huge win, but the job isn't quite finished yet. Think of it this way: you’ve removed the unwelcome guest, and now you need to change the locks to make sure it can’t get back in. The next crucial phase is all about drying the area completely and shifting your focus to stopping mould from ever returning.
Mould absolutely thrives on moisture. Any dampness left behind after cleaning is just an open invitation for it to regrow, sometimes within a couple of days. This is where so many DIY efforts fall short. Simply wiping a surface isn't enough; you have to pull the moisture out of the air and the material itself.
The Immediate Drying Process
Your first priority after cleaning is to get the treated area bone dry, and fast. Lingering moisture is the enemy. Your goal is to create an environment so inhospitable that any leftover microscopic spores have zero chance of taking hold again.
Here’s how to create an effective drying zone:
- Get the Air Moving: Use fans to push air across the cleaned surface. If you’ve just treated a patch of carpet, for example, point a fan directly at the spot to turbocharge evaporation.
- Pull Out the Humidity: A dehumidifier is your best friend here. Pop one in the room and set it to a low humidity level (ideally between 30-50%) to actively suck moisture out of the air.
- Bring in Fresh Air: If the weather is on your side, throw open the windows to let fresh, dry air in and help carry all that dampness out.
This combination of air movement and dehumidification is the one-two punch that ensures a deep, thorough dry, not just a surface-level one.
Shifting to a Proactive Prevention Mindset
Once everything is completely dry, your focus has to switch from reactive cleaning to proactive prevention. Mould is almost always a symptom of an underlying moisture problem. Unless you fix the source, it will always come back. The long-term goal is to make your home a no-go zone for mould growth.
This means you need to become a bit of a moisture detective. Hunt down the root causes of dampness in your home and eliminate them. It’s all about creating a balanced indoor ecosystem where mould simply can’t get what it needs to survive.
The most effective mould prevention strategy isn't about constant cleaning; it's about controlling your home's environment. By managing humidity and fixing moisture sources, you take away mould's most critical lifeline.
Adopting this mindset will save you countless hours of scrubbing down the track.
Your Long-Term Prevention Checklist
Making a few key changes to your home and daily routines can dramatically lower the risk of mould making a comeback. It’s less about one big fix and more about consistent, small actions that add up.
1. Control Indoor Humidity
Keep your home’s relative humidity below 50%. Use a dehumidifier in naturally damp spots like basements, laundries, and bathrooms, especially during the wetter months. A cheap little device called a hygrometer can help you keep an accurate eye on the levels.
2. Improve Your Home's Ventilation
Good airflow is essential for whisking away moist air before it has a chance to condense on cool surfaces. Key preventative measures include improving indoor ventilation by opening windows and using exhaust fans to limit moisture accumulation, which is a primary driver of mould growth. This approach is part of a wider public health strategy that focuses on creating living conditions where mould cannot thrive, a vital consideration in Australia's varied climate. Discover more insights on how ventilation impacts mould growth from That Cleaning Crew.
3. Address Moisture Sources Immediately
Don't ignore the small leaks. Regularly check under sinks, around toilets, and near appliances for any signs of drips or water damage. A tiny, slow leak is often a bigger mould risk than a major flood because it can go unnoticed for weeks, creating the perfect hidden spot for mould to flourish. Fix any issues as soon as you find them.
Even though a good natural mould killer is great for small, surface-level jobs, you need to know when you’re out of your depth. Some mould problems are just too big, complex, or dangerous to handle yourself. Pushing on can seriously risk your health and cause major damage to your home. It's vital to recognise the signs that an infestation has gone beyond a simple weekend project.
The easiest sign to spot is the sheer size of the mould patch. If it covers more than one square metre, it’s time to call in the professionals. Trying to clean an area that large on your own almost guarantees you'll release a massive cloud of spores into the air, creating a much bigger contamination problem that DIY methods simply can't handle.
When the Problem Is More Than Skin Deep
Sometimes, the most dangerous mould is the kind you can't even see. If you’ve got a persistent, musty smell that you just can’t track down, that's a huge red flag. It often means mould is hiding away inside your walls, under the floorboards, or deep within your air conditioning system.
These hidden infestations are impossible to fix with a spray bottle and a cloth. They demand specialised equipment to find and remove the source without wrecking your home's structure.
A musty smell with no visible source is your home’s alarm bell. Ignoring it allows the hidden mould to continue degrading your air quality and potentially damaging the structural integrity of your property from the inside out.
For ongoing or hidden mould issues, especially if you're worried about what's in the air you're breathing, getting a professional mold VOC testing done can uncover dangers you'd otherwise never know were there.
Understanding the Professional Approach
When you bring in the experts, you’re not just paying for a clean-up; you’re investing in a safe, systematic process. Professional remediation is a different ball game. It involves setting up containment zones to stop cross-contamination, running HEPA-filtered air scrubbers to snatch spores out of the air, and safely removing contaminated materials like plasterboard or insulation.
Mould remediation services are a crucial part of keeping Australian homes healthy. The cost for professional mould removal can fall anywhere between AUD 50 and AUD 6,000, which really depends on how bad the infestation is and the scope of work needed.
So, if you're looking at a large patch of mould, dealing with the aftermath of significant water damage, or just have that gut feeling there’s a hidden issue, step back. Making the call to a professional is the smartest and safest move for your home and your family.
For stubborn mould and deep-seated grime in your carpets, rugs, or upholstery that DIY methods can't shift, the team at Right Price Carpet Cleaning is here to help. Our professional steam cleaning services can restore your home’s soft furnishings, removing hidden allergens and leaving them hygienically clean. Get an instant quote online today
Recent Comments