



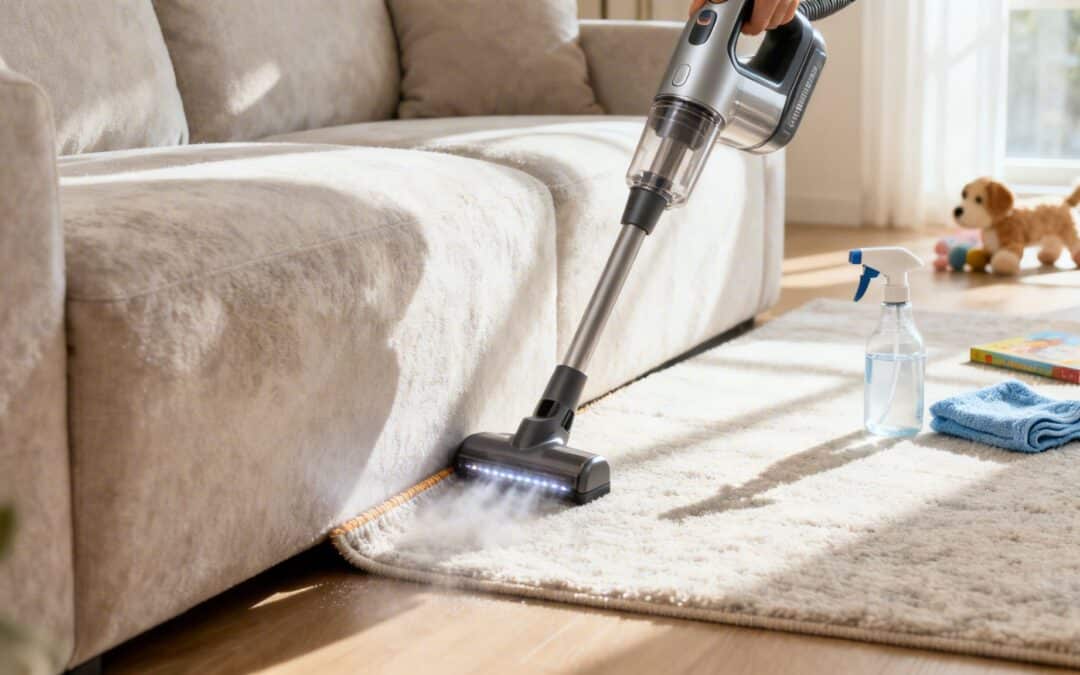
A proper rug and couch cleaning routine is one of the best things you can do for your home. It goes far beyond just making things look nice; it’s about creating a healthier, fresher space and protecting the furniture you’ve invested in.
Why Rug and Couch Cleaning Is More Than Just a Chore

Let’s be real for a moment. Your couch and rugs are the epicentre of daily life. They’re where you collapse after work, where the kids build their pillow forts, and where your furry friends have their favourite nap spots. All that living—from spilled drinks to muddy paws—leaves its mark.
Over time, your soft furnishings essentially become giant air filters. They trap an incredible amount of dust, pet dander, pollen, and grime that you bring in from outside. A quick pass with the vacuum helps, of course, but it barely scratches the surface. Research has shown that a typical carpet can hold up to four times its own weight in dirt, and a huge chunk of that is completely invisible.
This build-up isn’t just unsightly; it directly impacts your home's air quality.
The Hidden Impact on Your Home
The real problem with all that trapped dirt is that you end up breathing it in. Every time someone plops onto the sofa or walks across the rug, microscopic allergens and bacteria are kicked up into the air. For the 20% of Australians who deal with allergies, this can turn their home into a minefield of triggers, leading to constant sneezing, itchy eyes, or worse.
And then there are the odours. Spills from food, drinks, and pet accidents contain bacteria that don’t simply vanish when you wipe them up. Even after a spot clean, those particles can linger deep in the fibres, causing those phantom smells that seem to reappear on humid days.
A great example is pet urine. It contains uric acid crystals that don't break down with soap and water. That’s why the smell can hang around for months—the crystals stay in the fabric and reactivate whenever there's moisture in the air.
Preserving Your Investment and Comfort
Think of regular, deep rug and couch cleaning as preventative maintenance for your furniture. It's the best way to protect your investment. By removing the tiny, abrasive dirt particles, you prevent them from grinding away at the fibres, which is what causes fabrics to look dull and wear out prematurely.
This guide is designed to give you a practical game plan for keeping your home fresh and healthy. We’ll walk you through everything you need to know, including:
- Actionable DIY tips for day-to-day upkeep.
- Simple, step-by-step instructions for dealing with common spills and stains.
- The clear signs that it’s time to call in a professional for a proper deep clean.
Don't see this as a list of chores. It's your blueprint for protecting the comfort and health of your home.
Your Pre-Cleaning Checklist and Toolkit
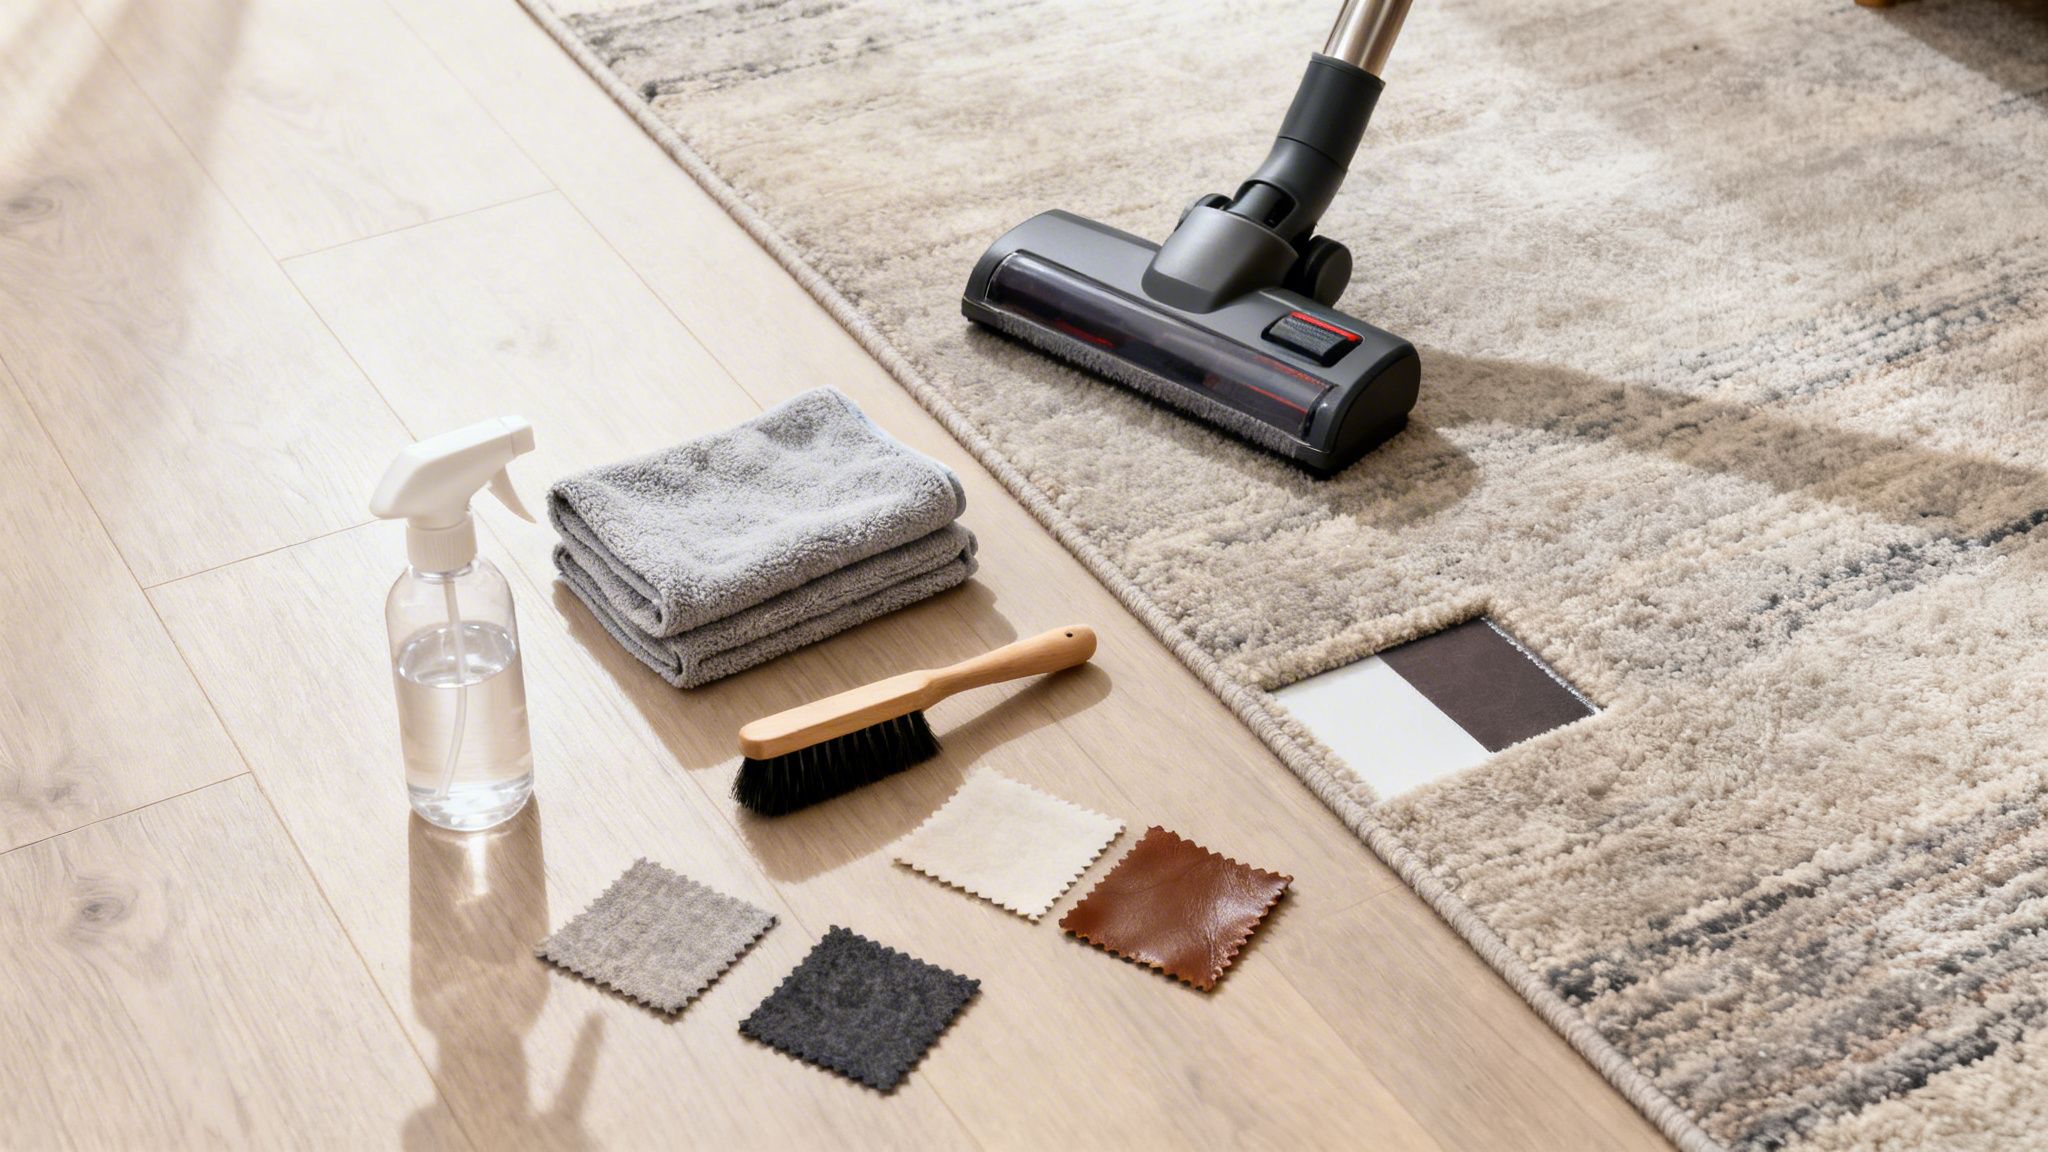
Before you even think about tackling that stain, let's talk prep. I've seen too many well-intentioned DIY clean-ups go wrong because of one simple mistake: rushing in blind. A little bit of homework now can save you from faded colours, shrunken fibres, or a permanent watermark on your favourite couch.
Think of it as your pre-flight check for a successful clean.
Know Your Fabric, Know Your Enemy
First things first: you need to know exactly what you're working with. Flip over a couch cushion or check the back of your rug for the care tag. This little label is your best friend, and it often has a cleaning code that spells out what to do.
- W: Go for it! This means it’s safe to clean with water-based solutions.
- S: Stop! This requires a solvent-based cleaner only. Water is a no-go here.
- W/S: You've got options. A combination of water and solvent cleaners can be used.
- X: Hands off. This one is vacuum only. Do not use any liquid cleaners, period.
If the tag has gone walkabout or is completely faded, you'll need to do some detective work. The table below can help you make an educated guess based on the look and feel of the material.
Knowing your fabric type is the key to choosing the right cleaning method and avoiding a costly disaster. The table below is a quick-reference guide to help you identify common materials and their cleaning needs.
Fabric Identification and Recommended Cleaning Approach
| Fabric Type | How to Identify | Recommended DIY Method | Caution Level |
|---|---|---|---|
| Polyester/Nylon | Often has a slight sheen, feels smooth. Very common in modern furniture. | Water-based cleaner (the "W" or "W/S" code). Resilient and easy to clean. | Low |
| Cotton/Linen | Feels soft, natural texture, wrinkles easily. Think of a classic cotton shirt. | Can be prone to browning or shrinkage. Use minimal water and dry quickly. | Medium |
| Wool | Coarse or soft texture, feels springy. Can smell like "wet dog" when damp. | Use a wool-safe, pH-neutral cleaner. Avoid hot water and harsh scrubbing. | High |
| Silk/Viscose | Very soft, has a distinct lustre, delicate feel. Water can leave permanent spots. | Vacuum only or call a professional. DIY liquid cleaning is extremely risky. | Very High |
Once you have a good idea of your fabric type, you can move on to gathering your tools with confidence.
Assembling Your DIY Cleaning Arsenal
You don’t need a cupboard full of fancy gadgets. A solid DIY rug and couch cleaning kit is all about having the right fundamentals. Chances are, you already own most of what you'll need.
Here’s your essential checklist:
- A powerful vacuum cleaner with an upholstery attachment is non-negotiable for pulling up loose grit and pet hair.
- White microfibre cloths are a must. Coloured cloths can bleed dye onto your furniture, especially light-coloured fabrics.
- A few empty spray bottles for mixing your cleaning solutions.
- A soft-bristled brush to gently work on stains without fraying the fibres.
- A bucket is handy for mixing a larger batch of cleaner or for your rinse water.
That’s it. With these simple items, you're well-equipped for most common cleaning scenarios.
The Golden Rule: Always Spot Test
If you take away only one piece of advice, let it be this. Never, ever skip the spot test. Before you apply any cleaning solution to a visible area, test it somewhere hidden—under a cushion, on the back of the couch, or on the underside of the rug.
Apply a tiny amount of your cleaner to the test patch. Let it sit for 10-15 minutes, then blot it firmly with a clean white cloth. Look for any colour transfer on the cloth or any changes to the fabric itself. If it looks clean and unchanged, you’re good to go.
This simple test takes five minutes but can literally save your furniture from an irreversible mistake. It's your ultimate safety net.
Finally, get your space ready. Move coffee tables and other furniture out of the way, put down some old towels to protect your floors, and crack a window for good ventilation. This not only makes cleaning easier but also helps everything dry faster, preventing that dreaded musty smell. Now you’re ready to clean like a pro.
The DIY Deep Clean Method That Actually Works
Alright, with the prep work out of the way, it's time to get down to the real business of deep cleaning. This is where we go beyond a quick surface tidy and get into the nitty-gritty. I've found that a successful DIY rug and couch cleaning job is less about raw elbow grease and more about following a smart, methodical process.
It all kicks off with the most important tool you own: your vacuum cleaner. I’m not talking about the quick five-minute once-over you do before guests arrive. A proper deep-clean vacuum is a deliberate, almost strategic, mission to pull out as much dry soil, dust, and pet hair as possible before a single drop of liquid touches the fabric.
Start with a Deep, Thorough Vacuum
Think of this first step as an excavation. It's a fact that up to 80% of the dirt hiding in your couch and rugs is actually dry, loose particulate. If you skip this, the moment you add a cleaning solution, you’re just making mud.
For your couch:
- Work in a grid pattern. Grab your upholstery attachment and go over every surface in slow, overlapping rows. Go horizontally, then do it all again vertically. This is the only way to be sure you’ve agitated and lifted dirt from every angle of the weave.
- Attack the crevices. Pull off every cushion and switch to that long, skinny crevice tool. Get right into the seams, corners, and under the frame—that’s where years of crumbs, pet hair, and lost coins love to hide.
- Flip everything over. Don’t forget to vacuum the back, the sides, and the underside of the cushions. You'd be amazed at how much dust and debris collects in these spots.
For your rugs, the same logic applies. Vacuum slowly in those overlapping lines. If your machine has a beater bar, check that it's set to the right height for your rug’s pile. You want it to vibrate the fibres to release dirt, but not so aggressively that it causes damage.
Mixing Your Fabric-Safe Cleaning Solution
Now that the dry soil is gone, we can tackle the grime that’s actually bonded to the fibres. The secret here is using a gentle but effective cleaner that’s specifically safe for your fabric type. For most common materials with a "W" or "W/S" on the care tag, a simple homemade solution works beautifully.
My Go-To All-Purpose Upholstery Cleaner:
- Mix 2 cups of distilled water (using distilled is a pro tip—it leaves no mineral spots behind).
- Add 1 tablespoon of clear dishwashing liquid.
- Stir in 1 tablespoon of white vinegar, which is a fantastic natural deodoriser and cleaning agent.
Pour your freshly made solution into a spray bottle. The vinegar works to break down light, greasy soils, while the soap helps lift everything away. If you're looking for more tips and techniques, there are some great guides online explaining how to clean upholstered furniture at home.
The Right Way to Scrub and Agitate
This is where many DIY cleans go wrong. How you apply the cleaner is just as important as what's in it. Whatever you do, never saturate the fabric. Drenching your couch or rug is a fast track to water stains, mould, and permanent damage to the padding underneath.
Instead, lightly mist one small section at a time. I recommend working in a manageable area, like a single cushion or a one-metre square of your rug. Let the solution sit for about five minutes; you need to give it time to penetrate and start breaking down the grime.
Next, grab your soft-bristled brush and gently agitate the fibres.
- Use gentle, overlapping circles to lift dirt from all sides of each fibre.
- Always tackle a stain from the outside and work your way inward. This stops you from accidentally spreading the stain and making it bigger.
- Be patient. Let the cleaner do the heavy lifting, not your arm. Scrubbing too hard will only cause pilling and premature wear on the fabric.
A perfect example is cleaning the arms of a sofa. They tend to get dark and grimy from body oils. By misting the area, letting the solution dwell for a few minutes, and then using a soft brush in those small circles, you can lift that built-up grime without fading the colour.
Rinsing and Blotting for a Professional Finish
So, you’ve lifted the dirt. The job isn’t done yet! Now you have to get both the dirt and the cleaning solution out of the fabric. Leaving soapy residue behind is one of the most common mistakes I see; it acts like a magnet for new dirt, meaning your furniture gets grubby again in no time.
To rinse properly, lightly mist the same section with plain distilled water. Again, be very conservative with the water.
Immediately follow this by blotting the area with a clean, dry, white microfibre cloth. Press down firmly, applying your body weight to absorb as much moisture and residue as possible. You should literally see the dirt transferring from the furniture onto your cloth. Keep folding and switching to a clean part of the cloth until it comes away clean.
Remember the mantra: pat, don't rub. Rubbing can force moisture deeper into the padding and mess with the fabric's texture. Once you're finished with a section, aim a fan directly at it or open some windows to get the air circulating. Good airflow is your best friend for preventing musty smells and ensuring a quick, even dry.
Tackling Common Stains and Lingering Odours
Even with the best deep cleaning habits, life inevitably happens. A guest tips over their red wine, your morning coffee takes a dive, or a greasy slice of pizza lands face-down on the couch. This is when we move from routine maintenance to emergency response, dealing with specific stains and the stubborn odours they can leave behind.
Your greatest weapon here is speed. The longer a stain sits, the deeper it bonds with the fabric fibres, making it a real headache to remove later. But if you act fast with the right technique, you can stop most common spills from becoming permanent residents. For a more detailed guide on deep cleaning your sofa, this resource on How To Clean Fabric Sofa At Home is genuinely helpful.
This flowchart gives a great visual summary of the basic DIY process for getting after those spots and stains.
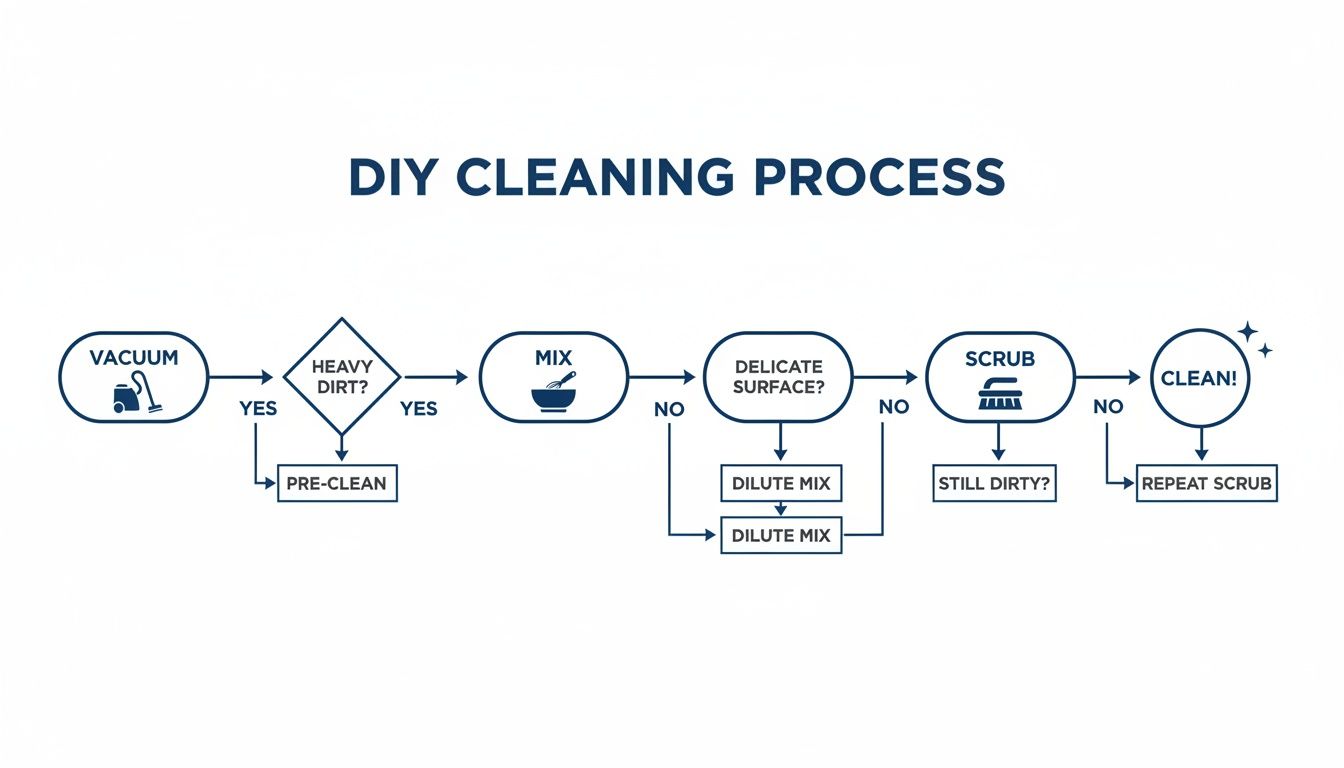
The main thing to remember is that effective cleaning isn't a single action. It's a sequence: vacuuming away loose debris, treating the spot, and gently agitating to lift the grime out.
Your Game Plan for Common Spills
Different messes call for different solutions. Here’s a quick-reference guide for some of the most common culprits you’ll face in your rug and couch cleaning battles.
- Red Wine: The classic party foul. Immediately get a dry, white cloth and blot, blot, blot to absorb as much as you can. Then, pile table salt generously over the fresh stain to create a "salt dam." The salt will actually draw the wine out of the fibres. Let it sit for 15-20 minutes, then vacuum it all up and tackle any leftover colour with a bit of dish soap and water.
- Coffee: Another daily danger. Blot the area right away. A simple mix of one part white vinegar to two parts water works wonders here. Lightly spray the stain, let it sit for a few minutes, then keep blotting with a clean, dry cloth until it disappears.
- Grease and Oil: Think pizza drips, butter, or salad dressing. First, gently scrape off any solid bits. Then, sprinkle bicarb soda or cornflour over the oily spot to soak it up—give it at least 30 minutes. Vacuum it away, and then treat what's left with a tiny dab of clear dish soap and water, blotting until it’s gone.
Here's the golden rule for any stain removal: always blot, never rub. Rubbing just grinds the stain deeper into the fabric and can damage the fibres, leaving a fuzzy, worn-out patch. Always work from the outside of the stain inwards to keep it from spreading.
Dealing with Stubborn Pet Stains and Odours
Now for the big one: pet accidents. These are in a league of their own. The visible spot is one thing, but the real challenge is the uric acid in pet urine, which standard cleaners just can't break down. Those uric acid crystals are what cause that awful, persistent smell that seems to magically reappear on humid days.
With pet ownership booming in Australia—we're talking an estimated 29 million pets—the need for effective cleaning has never been greater. It’s no surprise the residential sector is driving the carpet cleaning market. Carpets can trap up to four times their own weight in dirt, and with nearly 20% of Aussies suffering from allergies, keeping things clean is about more than just looks.
A simple bicarb soda paste can be a great first line of defence for fresh accidents. Just mix bicarb soda with a little water until you have a thick paste. Spread it generously over the whole area and be patient as it dries. As it dries, it pulls the moisture and odour-causing acids out of the fabric. Once it’s completely dry and crusty, just vacuum it all up.
For older or more stubborn pet stains, you need to bring out the big guns: an enzyme cleaner. These products are fantastic because they contain beneficial bacteria that literally eat the organic matter in the stain, destroying the odour at its source.
Know When to Fold 'Em: Set-In Stains
While DIY methods are brilliant for fresh spills, you have to be realistic about old, set-in stains. If a mark has been on your couch for months, or if you're working with a delicate fabric like silk or viscose, getting too aggressive with scrubbing can cause irreversible damage.
Sometimes a gentle DIY attempt is a good first step, but it’s crucial to know when to stop.
If your initial efforts aren't making a dent, it’s a clear sign the stain has bonded too deeply with the fibres. At this point, calling a professional for rug and couch cleaning isn't giving up—it's the smartest move you can make to avoid setting the stain forever.
Knowing When to Call in the Professionals
Look, we’re all for rolling up our sleeves and tackling a bit of DIY cleaning. It's perfect for routine upkeep and dealing with those "oops" moments right after they happen. But there comes a point where even the most determined home cleaner has to call for backup.
Bringing in a professional for your rug and couch cleaning isn’t about admitting defeat. It’s a smart move to protect your investment and get a level of clean that rental machines simply can't deliver. Sometimes, it’s not just a better option—it’s the only one that makes sense.
Scenarios That Demand Expert Attention
From my experience, certain jobs are instant red flags for DIY attempts. If you find yourself in any of these situations, it's time to put down the supermarket cleaner and pick up the phone.
- Delicate or Unidentified Fibres: If your rug is silk, viscose, or jute, step away from the water. The same goes for any fabric tag with an "X" code, which means vacuum only. These materials can be permanently damaged by water, leading to ugly browning, texture changes, or even disintegration.
- Extensive Water Damage: A burst pipe or an overflowing bath is a true emergency. To prevent mould from taking hold and causing serious damage to your floors and furniture, you need industrial-strength extraction equipment and powerful air movers—fast. This is not a job for a few towels and a fan.
- Stubborn, Set-In Stains: Just found a mystery stain from who-knows-when? Or that red wine spill from a year ago is still faintly staring back at you? Old stains have chemically bonded to the fibres. Trying to scrub them out yourself will likely just wear down the fabric and make things worse.
- Valuable or Antique Pieces: When it comes to an heirloom rug or a pricey designer couch, the risk of a DIY disaster is just too high. A professional understands the precise cleaning agents and pH levels needed to care for these items without causing damage.
In these cases, the expertise of a trained technician isn't a luxury; it’s your best insurance policy.
The Power of Truck-Mounted Steam Cleaning
You might be wondering what a professional service like Right Price Carpet Cleaning can do that a rental machine can't. Honestly, the difference is night and day, and it all comes down to the equipment. Our powerful truck-mounted steam cleaning systems are the industry gold standard for good reason.
A portable rental unit you'd get from the shops uses lukewarm water and pretty weak suction. Our truck-mounted systems, on the other hand, super-heat water to over 90°C. This high-temperature steam blasts deep into the fibres to sanitise and dissolve grime, while incredible vacuum power pulls out nearly all the moisture, along with the dirt, allergens, and old soap residue.
This process gives you a much deeper, healthier clean and dramatically cuts down on drying time. A DIY job can leave your couch or rug damp for 24 hours or more, but our method usually has them dry in just a few hours.
Deciding between a weekend DIY project and calling in a professional can be tough. This table breaks down what you can realistically expect from each.
DIY Cleaning vs Professional Truck-Mounted Service
| Feature | DIY Cleaning | Right Price Professional Cleaning |
|---|---|---|
| Cleaning Power | Low-pressure, lukewarm water. Struggles with deep-set dirt. | High-pressure, high-heat steam (90°C+) dissolves grime and sanitises. |
| Extraction | Weak suction leaves behind significant moisture and residue. | Powerful truck-mounted vacuum extracts most moisture for fast drying. |
| Effectiveness | Good for surface-level cleaning and fresh, minor spills. | Removes deep-set stains, allergens, bacteria, and odours. |
| Drying Time | 24+ hours, risking mould and mildew growth. | Typically 2-6 hours, depending on fabric and ventilation. |
| Risk of Damage | High risk of over-wetting, colour bleeding, and fibre damage. | Low risk. Technicians are trained to handle all fabric types. |
| Convenience | Requires you to pick up, use, clean, and return the machine. | We handle everything. Just book a time that suits you. |
| Cost | Lower upfront cost, but potential for costly damage repair. | Higher initial investment for guaranteed, superior, and safe results. |
While DIY has its place for light maintenance, when you need a true deep clean that restores and protects your furniture, a professional service is the clear winner.
Why Choosing a Local Melbourne Expert Matters
Here in Australia, the carpet cleaning industry is a big deal—expected to be worth over $611.5 million by 2026. In a market this large, with no single giant calling all the shots, it’s the local, family-owned businesses that truly stand out with genuine care and expertise. For a deep dive into the industry, you can explore a detailed market analysis from IBISWorld.
When you choose a local Melbourne team like Right Price Carpet Cleaning, you’re getting more than just a quick clean. You’re getting a partner who cares about your home.
We believe in honest, flat-rate pricing with no surprise fees. Our technicians are fully trained and police-checked for your peace of mind, and we back our work with a 100% satisfaction guarantee. If you’re not completely happy, we’ll make it right. That’s the difference you get when you work with a trusted local expert.
Right, you’ve put in the hard work and your rugs and couches are looking fantastic. The big question is, how do you keep them that way? The secret isn't about doing a massive clean every month; it's about weaving small, simple habits into your regular routine.
Think of it as protecting your investment. A little bit of attention on a regular basis goes a long way in preventing the daily grind of dust, crumbs, and tracked-in dirt from setting in. It’s the difference between a quick touch-up and a major rescue mission down the track.
A Simple Rhythm for Lasting Freshness
The best approach is a mix of your own upkeep and calling in the pros when needed. This simple rhythm keeps your furniture looking its best year-round, without adding a huge list of chores to your weekend.
Weekly: Get the vacuum out. Make this a non-negotiable, especially for high-traffic spots. Don't forget to use the smaller attachments to get right into the couch seams and under the cushions—that's where all the crumbs and pet hair love to hide.
Monthly: Give your couch cushions a quick flip and rotation. This simple move helps them wear evenly and stops one spot from getting all the traffic. If you've got leather, a quick wipe-down with a proper conditioner keeps it from drying out and cracking.
Annually: Book a professional deep clean. For most homes, once a year is the perfect schedule. However, if you've got a busy household with kids, pets, or anyone with allergies, you might want to consider making that a six-month affair.
Honestly, a little prevention is worth a pound of cure. Consistent, small actions are what stop that heavy build-up of grime that slowly wears down and discolours your fabrics.
Smart Prevention Tips
Beyond a cleaning schedule, a few clever tricks can make a massive difference. High-quality doormats at every entrance can trap an incredible amount of dirt before it even has a chance to get near your rugs.
If your furniture is new or you've just had it professionally cleaned, think about using a fabric protector spray. It forms an invisible shield that buys you precious time by making liquids bead up on the surface, giving you a chance to blot them away before they soak in.
Finally, locking in that annual professional service is a key part of your long-term plan. It's interesting to note that efficiency benchmarks from the Australian Taxation Office show that expert cleaning businesses are built to be lean and effective. This allows them to invest in serious gear, like truck-mounted steam cleaners. These powerful machines can cut cleaning time by up to 30% compared to portable units, all while offering transparent, flat-rate pricing.
This partnership—your regular care and an annual professional rug and couch cleaning—is the ultimate formula for a fresh, healthy, and comfortable home.
Got Questions About Rug and Couch Care? We've Got Answers
When it comes to looking after your furniture and rugs, you want clear, honest advice. After years of cleaning homes across Melbourne, we've heard just about every question there is. Here are straightforward answers to the ones that come up most often.
How Often Should I Get My Furniture Professionally Cleaned?
That really depends on your household. For most homes, a professional deep clean every 12 to 18 months is a good rule of thumb. This keeps the slow build-up of dust, dirt, and allergens from getting out of hand.
However, if you've got a busy home with pets, small kids, or family members who suffer from allergies, you'll want to shorten that timeframe. We recommend a clean every 6 to 12 months in these cases. It makes a huge difference to your home's hygiene and keeps the air quality much fresher.
Is Steam Cleaning Safe for All Types of Fabric?
This is a great question, and the honest answer is no. While hot water extraction (what most of us call steam cleaning) is fantastic for durable synthetic fabrics like polyester and many natural ones like cotton and wool, it’s not a one-size-fits-all method.
Some materials just can't handle the heat or moisture.
- Delicate fabrics like silk, viscose, and some unique antique rugs need a much gentler touch. Using steam on them can cause irreversible damage like shrinkage or water-marking.
- Our approach is always safety-first. Before we start any job, our technicians do a full fabric inspection. This isn't just a quick glance; we identify the fibre type to choose the safest, most effective cleaning method for your specific piece. This guarantees a brilliant result without any risk.
Can You Guarantee You'll Remove Every Single Stain?
We'd love to say yes, but no honest cleaning company can guarantee 100% removal for every stain. Our truck-mounted gear is incredibly powerful, but some stains are just plain stubborn. Success really comes down to a few key things: the type of stain, the fabric it’s on, and—most importantly—how long it's been sitting there.
What we do promise is our 100% satisfaction guarantee. If a stain is treatable and you’re not completely happy with the result, we’ll come back and tackle it again for free. Your satisfaction is what matters most to us.
For professional rug and couch cleaning across Melbourne, Right Price Carpet Cleaning can help.
Recent Comments