
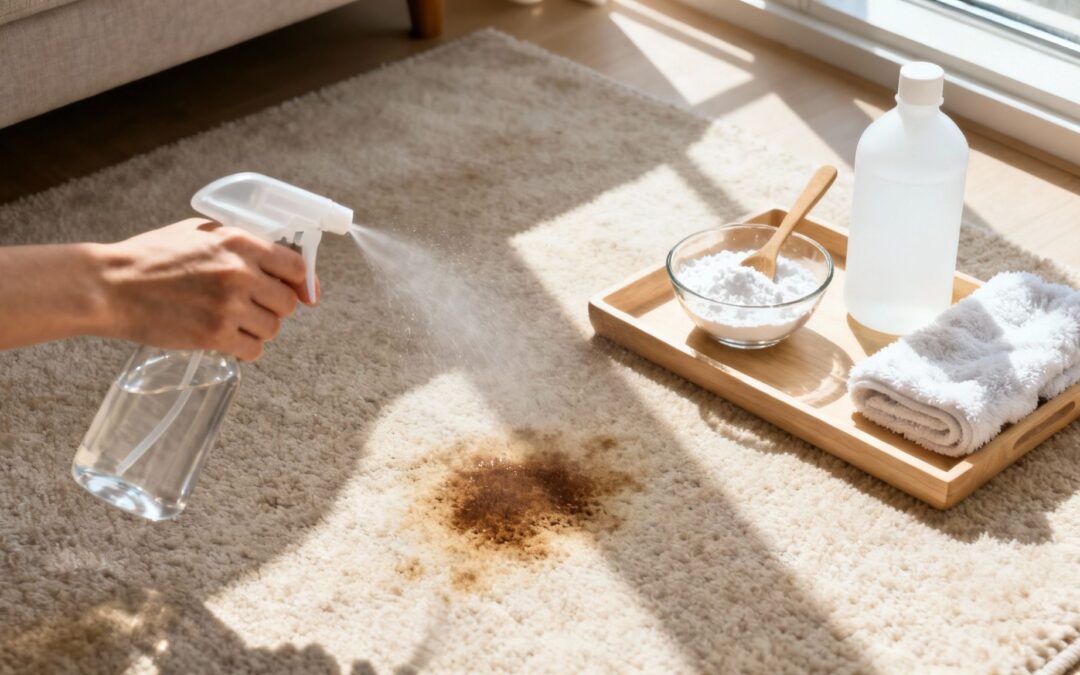
A simple, go-to homemade carpet cleaner usually involves nothing more than mixing equal parts white vinegar and water in a spray bottle. Add a few drops of clear dish soap, give it a shake, and you've got a fantastic solution for tackling common household spills without reaching for harsh chemicals.
Why DIY Carpet Cleaner Recipes Are So Popular
When a muddy paw print suddenly appears on the living room rug or a splash of coffee mars the floor, your first thought is probably to find something that works—and works fast. That urgency is exactly why so many people turn to a homemade carpet cleaner recipe.
The appeal is pretty straightforward. You can tackle a mess the moment it happens using simple, non-toxic ingredients you almost certainly have in your kitchen pantry already.
The Appeal of Simplicity and Savings
The motivation behind going the DIY route usually boils down to a few key factors that just make sense for homeowners and renters alike.
- Cost-Effectiveness: Let's face it, commercial carpet cleaning solutions can be surprisingly expensive. A homemade alternative using vinegar and baking soda costs next to nothing to make, which adds up to significant savings over time.
- Ingredient Control: More and more, people are cautious about the chemicals they bring into their homes. DIY recipes give you complete transparency, so you know exactly what you’re using around your family and pets.
- Immediate Availability: There’s no need for a last-minute dash to the shops. When a spill happens, you can mix a fresh batch of cleaner in minutes and get to work on the stain before it has a chance to set.
But the convenience of DIY solutions can sometimes hide potential problems. For example, in Melbourne's rental market, where over 30% of households are renters, homemade recipes are a popular, budget-friendly choice. Yet, applying them incorrectly or using the wrong formula can lead to hidden costs, sometimes exceeding $69 per session just to fix the damage. You can learn more about the real costs of DIY carpet cleaning.
The real power of a homemade cleaner isn't just its cleaning ability, but the satisfaction that comes from solving a problem with your own two hands. It’s about self-reliance and resourcefulness.
While the benefits are clear, it’s crucial to approach DIY cleaning with the right know-how. A poorly chosen recipe can lead to discolouration, a sticky residue that just attracts more dirt, or even permanent damage to delicate carpet fibres. This guide will walk you through tested, reliable recipes and the essential techniques to make sure your efforts result in a cleaner carpet, not a costly mistake.
Gathering Your DIY Carpet Cleaning Toolkit
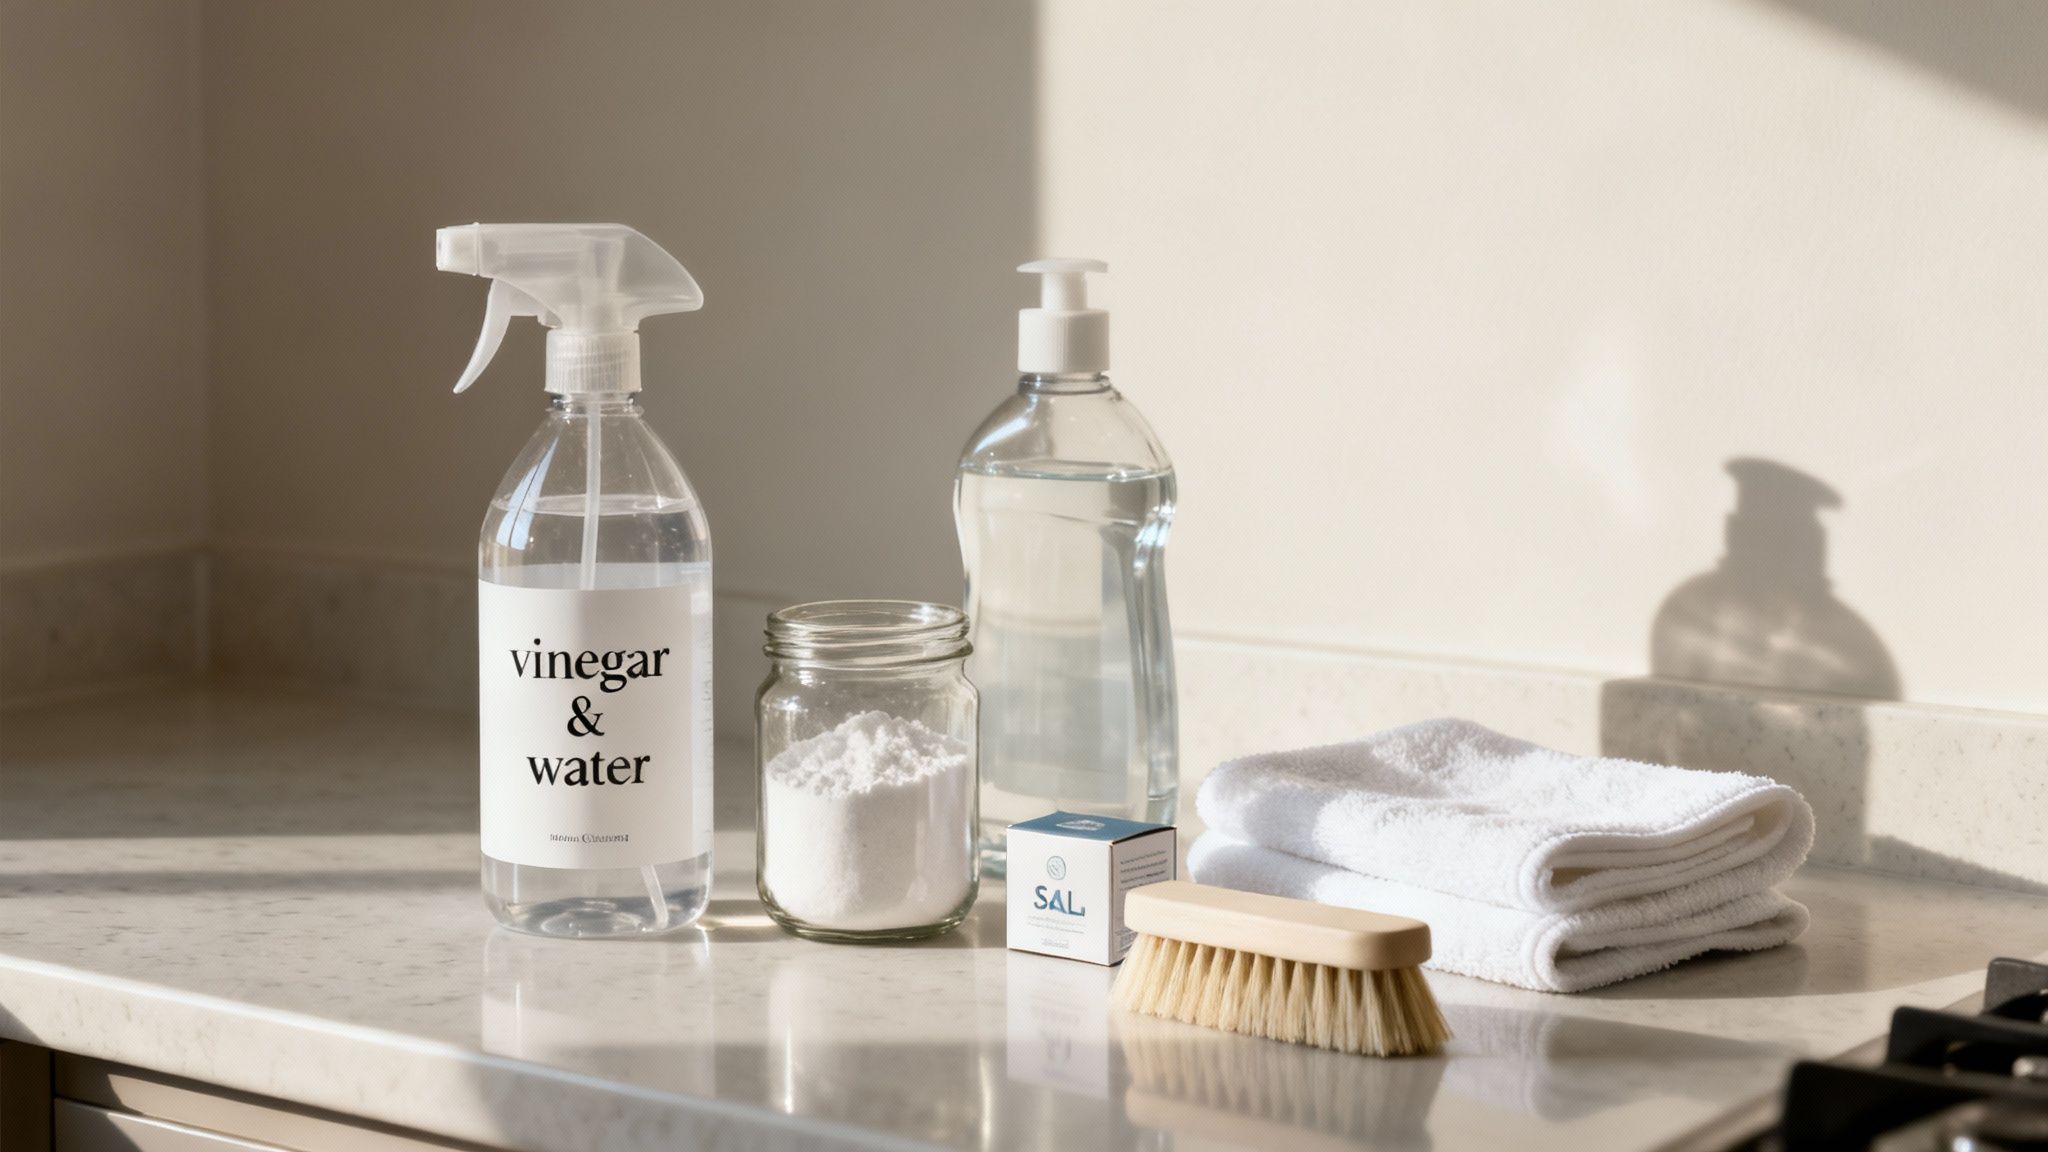
Before you even think about mixing up a homemade carpet cleaner, the first step is always getting your supplies in order. Think of it as your personal cleaning arsenal, stocked with simple but powerful items—many of which are probably already hiding in your kitchen pantry. Having everything ready to go means you can tackle a spill the moment it happens, which is half the battle.
Most of the best DIY recipes are built around a handful of core ingredients. Each one has a specific job, whether it's lifting stains, killing odours, or refreshing your carpet fibres without leaving behind any sticky residue.
Your Core Cleaning Ingredients
Distilled White Vinegar: This is your acidic powerhouse. The acetic acid in vinegar is brilliant for breaking down everyday dirt and grime, making it much easier to lift out of the carpet pile. Crucially, always stick to clear distilled white vinegar. Darker types like apple cider vinegar can actually stain light-coloured carpets.
Baking Soda (Bicarbonate of Soda): Famous for its incredible ability to absorb odours, bicarb soda is a must-have for tackling lingering smells from pets, food, or just general mustiness. It also acts as a gentle abrasive, helping to loosen dirt when you use it as a paste or sprinkle it on dry.
Clear Dish Soap: Just a few drops of a simple, clear, pH-neutral dish soap will act as a surfactant. In plain English, that means it helps water break through oily or greasy stains that would otherwise just bead up on the surface. Make sure you avoid any soaps with dyes, bleach, or moisturisers, as these can discolour your carpet or leave a sticky film that attracts even more dirt.
Salt: Good old table salt can be surprisingly useful. When you combine it with other ingredients, it helps to soak up liquid from fresh spills and gives you a bit of extra scrubbing power for those tougher, ground-in messes.
If you want to add a final touch, a few drops of an essential oil like lavender or lemon can be mixed into your solution. It won't add much cleaning power, but it will leave behind a pleasant, fresh scent.
To make sense of what each ingredient does, here’s a quick breakdown.
Your DIY Carpet Cleaning Ingredients Explained
| Ingredient | Cleaning Action | Best For | Important Cautions |
|---|---|---|---|
| White Vinegar | Mild acid, disinfectant, deodoriser | General grime, light stains, neutralising pet odours | Only use clear vinegar. Can damage natural stone if spilled. |
| Baking Soda | Mild alkali, abrasive, deodoriser | Absorbing odours, lifting greasy spots, light scrubbing | Can leave a white residue if not vacuumed up thoroughly. |
| Clear Dish Soap | Surfactant (breaks surface tension) | Oily and greasy stains (food, lipstick) | Use only 1-2 drops. Too much will leave a sticky residue. |
| Salt | Abrasive, absorbent | Soaking up fresh liquid spills (like red wine), scrubbing | Coarse salt is more effective for scrubbing than fine table salt. |
| Essential Oils | Scenting agent | Adding a fresh fragrance to your cleaning solution | Use sparingly. Some oils can be toxic to pets, especially cats. |
Understanding these roles helps you see why certain recipes work so well—it’s all about combining their strengths to tackle specific types of messes.
Essential Application Tools
Having the right tools is just as important as the ingredients themselves. Using the wrong equipment can make the job ten times harder or, even worse, spread the stain and make it permanent.
The goal is always to lift the stain out of the carpet, not push it deeper into the padding. Gentle blotting with the right cloth is far more effective than aggressive scrubbing, which can permanently damage carpet fibres and fray the pile.
Your basic toolkit is simple and should include:
- Spray Bottles: You’ll need at least one clean, empty spray bottle to apply your liquid cleaners evenly without soaking the carpet.
- Microfibre Cloths: Have several clean, white, or light-coloured cloths ready. Using white cloths is a non-negotiable for me—it completely removes the risk of any colour from the cloth transferring onto your carpet.
- Soft-Bristled Brush: A small brush helps you gently work the cleaning solution into the carpet fibres without being too harsh. An old toothbrush is perfect for getting into small, stubborn spots.
Three Tried-and-Tested Homemade Carpet Cleaner Recipes
Now that you've got your toolkit sorted, it's time to put those ingredients to work. The secret to tackling any spill is having the right recipe for the job. Not all stains are created equal, so a one-size-fits-all approach rarely gets the job done.
We've put together three distinct, thoroughly tested formulas designed for the most common household messes. From a simple coffee spill to a stubborn pet odour, these recipes give you a reliable starting point for almost anything life throws at your floors.
The Go-To All-Purpose Spot Cleaner
This is the recipe you'll find yourself reaching for most often. It’s perfect for everyday spills like dirt tracked in from outside, food crumbs, or general non-greasy marks. The simple combination of vinegar and water is surprisingly effective at breaking down grime without leaving behind any sticky residue that attracts more dirt later.
What You'll Need:
- 250 ml of distilled white vinegar
- 250 ml of cool water
- 1/2 teaspoon of clear dish soap (this is optional, but a great addition for slightly greasy marks)
How to Mix and Use It:
Just combine everything in a clean spray bottle and give it a gentle shake to mix. Lightly spritz the stained area—you want to dampen the fibres, not soak the carpet backing. Let it sit for about 5-10 minutes to give the vinegar time to work its magic, then blot the area firmly with a clean, dry microfibre cloth until the spot vanishes.
Pet Stain and Odour Eliminator
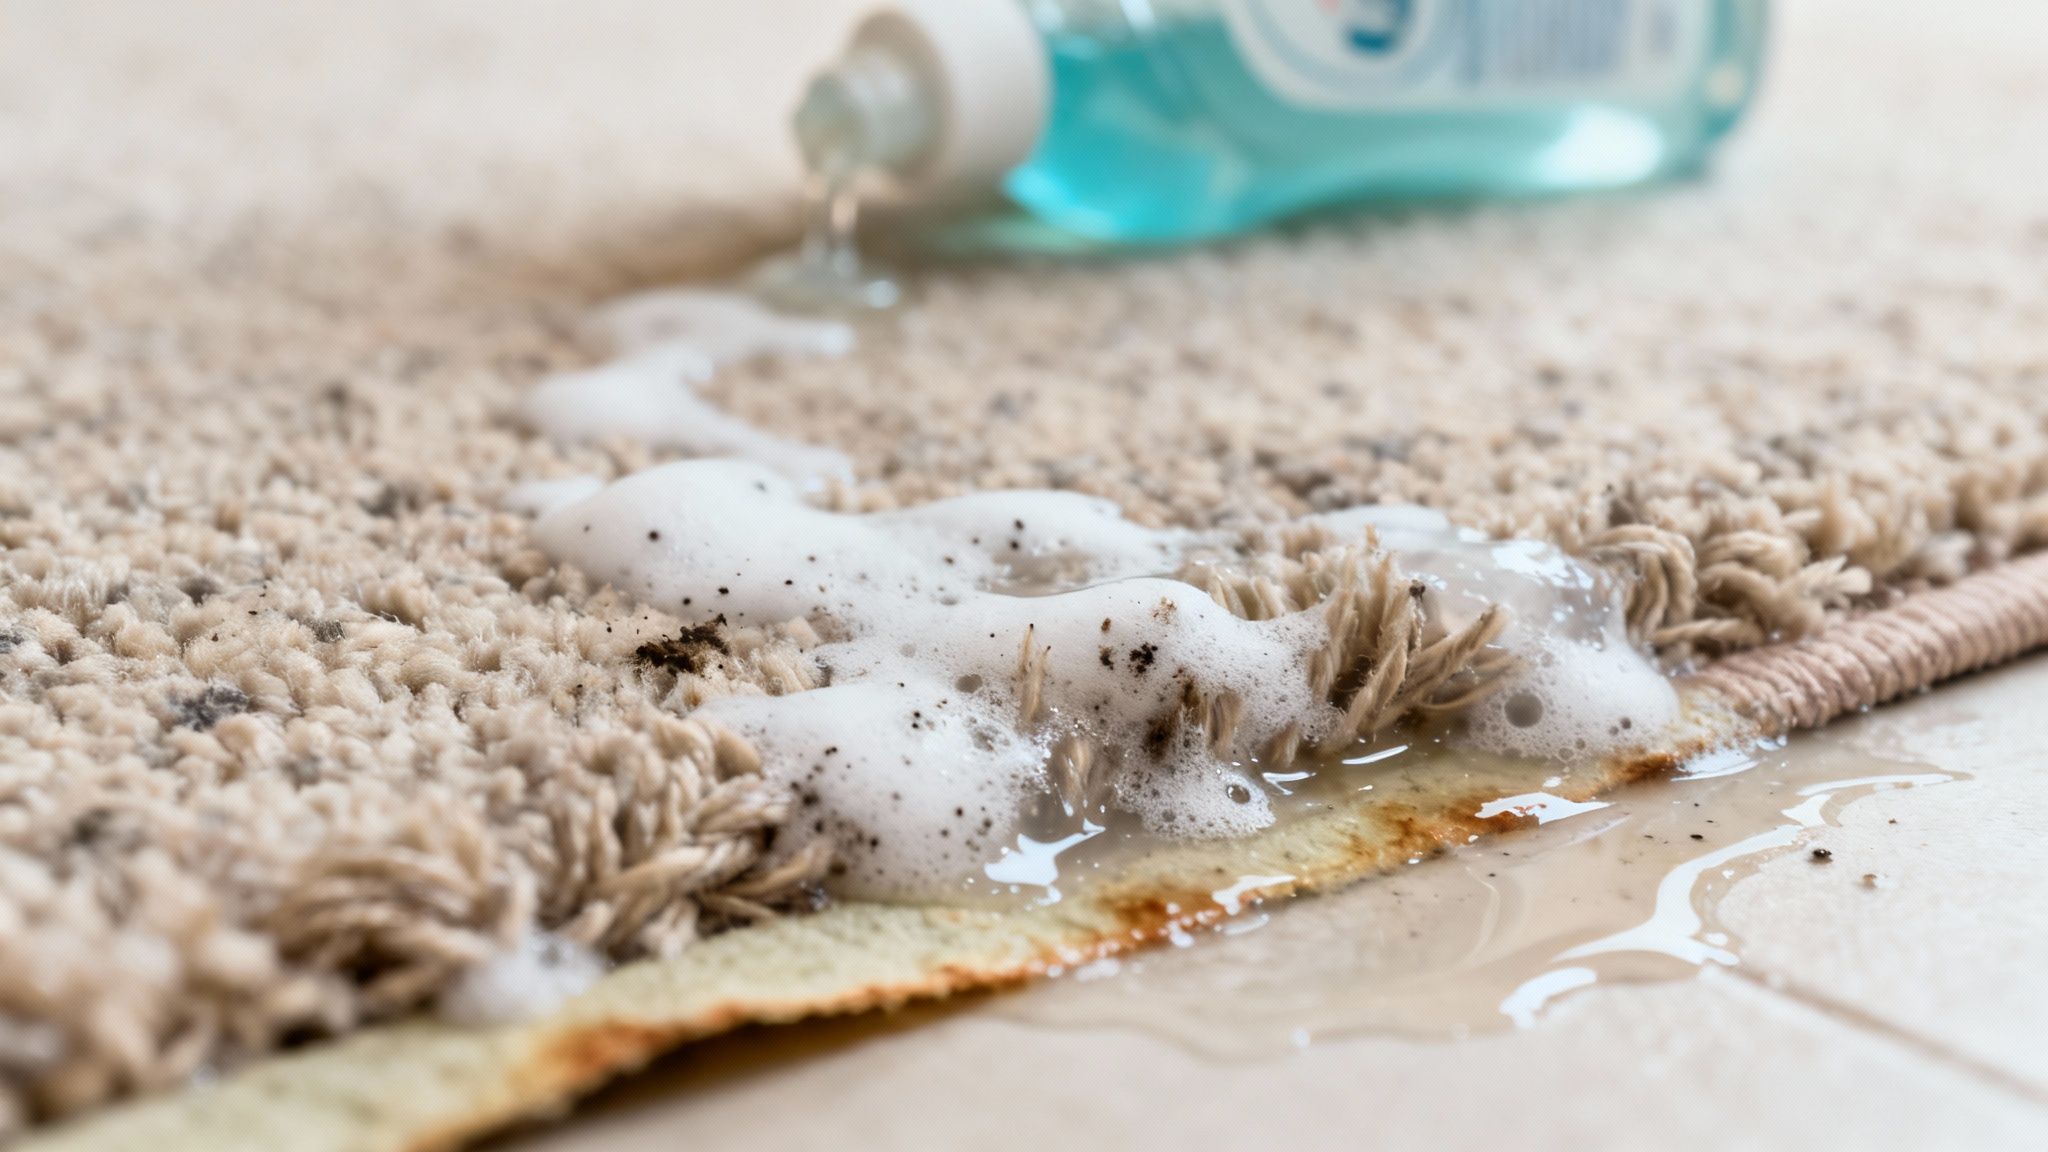
When you're dealing with pet accidents, you’re fighting two battles at once: the visible stain and that lingering odour. This recipe uses the fizzing chemical reaction between baking soda and vinegar to lift the stain from the fibres while the baking soda works to absorb the smells.
First, Grab Your Ingredients and Get to Work:
Start by thoroughly blotting up any fresh liquid with a clean cloth or paper towel. Next, sprinkle a generous layer of baking soda directly onto the stain, making sure it's completely covered. Let it sit for at least 15-20 minutes; this gives it enough time to absorb as much of the moisture and odour as possible.
Next Up, Bring in the Spray:
In your spray bottle, mix equal parts distilled white vinegar and water. After the baking soda has had its time to sit, spray the vinegar solution over it. You'll see a satisfying fizzing reaction, which is a great sign—it means the solution is actively working to lift the stain from the carpet fibres. Let the fizzing die down, then gently blot the area with a clean cloth. Once it's fully dry, just vacuum up any leftover baking soda residue.
A quick reality check: while DIY methods are a fantastic first line of defence, they do have their limits. The Australian carpet cleaner market hit USD 13.276 million in 2024, partly because of a huge surge in home hygiene awareness. However, data from Victorian cleaning firms shows that DIY mixes only properly tackle odours in 40% of cases and miss deep stains in 70% of high-traffic rugs. You can find more insights about Australia's home hygiene trends on Vocal.media.
Deep Cleaning Pre-Treatment for Machines
Planning on renting a carpet cleaning machine for a whole-room refresh? This pre-treatment formula can make a massive difference, especially in those high-traffic areas like hallways and entryways. It helps to loosen the deeply embedded dirt before you even turn the machine on, allowing for a much more effective and satisfying clean.
What to Mix for Your Pre-Treatment Spray:
- 500 ml of hot water (not boiling)
- 125 ml of distilled white vinegar
- 1 tablespoon of clear dish soap
How to Use It:
Mix the ingredients together in a large spray bottle. About 30 minutes before you start your main machine clean, lightly spray this solution onto the heavily soiled, high-traffic sections of your carpet. Don't oversaturate the area; a light mist is all you need.
This "dwell time" gives the solution a head start on breaking down the ground-in dirt, making it much easier for the machine to extract it completely. Think of it as a secret weapon for achieving professional-looking results.
How To Apply Your Homemade Cleaner Correctly
Mixing up a batch of homemade carpet cleaner is the easy part. The real magic, and where most people go wrong, is in the application. Nailing the technique is what separates a spotless result from a DIY disaster that makes things worse. Getting this right will save you from common mistakes like spreading the stain or damaging your delicate carpet fibres.
Before you do anything else, the golden rule is to always patch test. Find a hidden spot on your carpet—maybe under the sofa, inside a wardrobe, or on a spare scrap if you kept one. Dab a small amount of your cleaner on, let it sit for a few minutes, then blot it dry. Wait until the area is completely dry before checking for any colour bleeding or changes in texture. It’s a simple step that can save you a world of regret.
The Right Way to Tackle Stains
When you’re ready to go, your first instinct might be to scrub like mad. Don't. Aggressive rubbing is one of the worst things you can do—it frays the carpet fibres and shoves the stain deeper into the padding, making it almost impossible to get out.
Instead, a gentle touch is far more effective. Here’s how I approach it:
- Blot, Don't Rub: Grab a clean, white microfibre cloth and gently blot the stain. This lifts the spill up and out. Always start from the outside edge of the stain and work your way in to stop it from spreading.
- Apply Sparingly: Lightly spray your homemade solution over the area. You're aiming to dampen the fibres, not to oversaturate the carpet. Drenching the carpet can damage the backing and create a damp, musty smell that’s perfect for mildew.
- Let It Dwell: Give the solution about 5-10 minutes to work. This "dwell time" lets the active ingredients get to work breaking down the stain for you.
The most common DIY mistake I see is using way too much liquid. A soaked carpet backing can take days to dry fully, leading to musty odours and potential mould issues that are far worse than the original stain.
The infographic below gives a great visual on how the approach changes depending on whether you're doing a quick spot clean or a full deep clean.
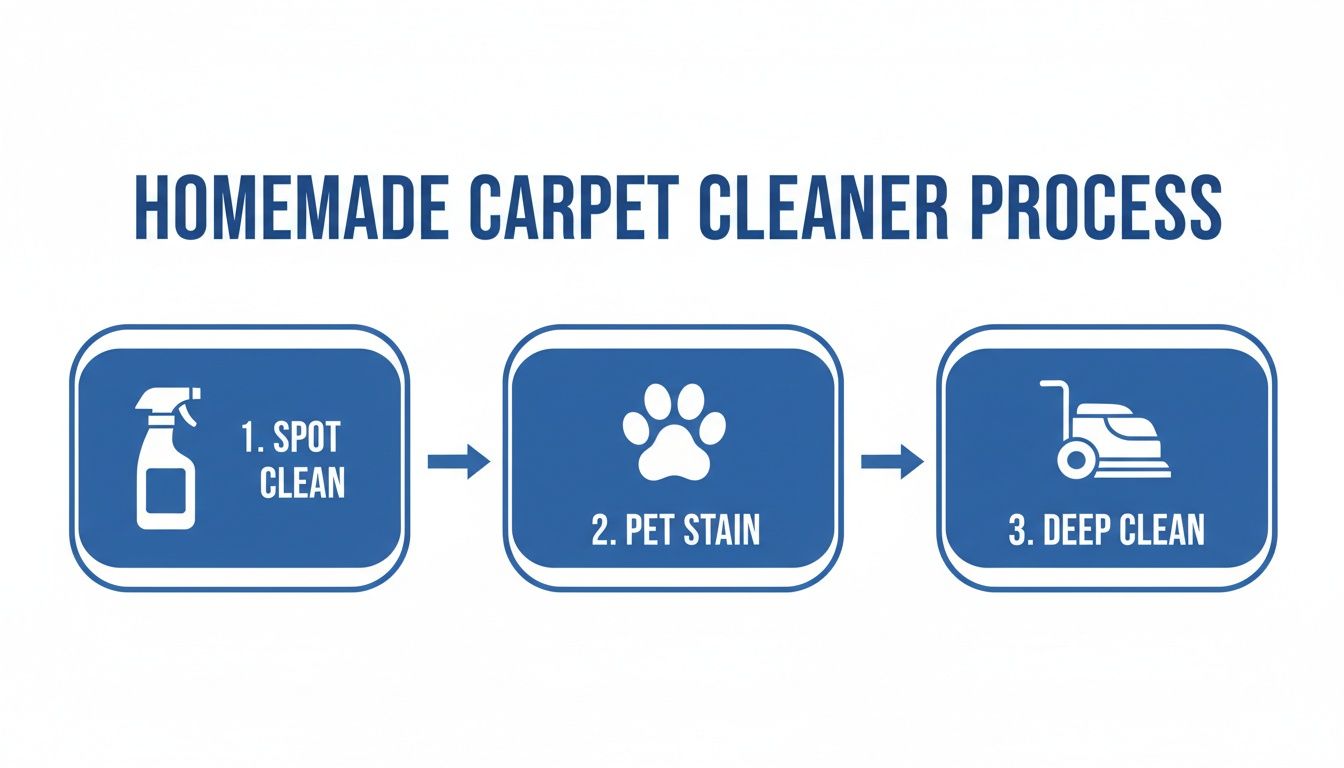
As you can see, the tool and technique should always match the mess you're tackling for the best results.
Finishing the Job Correctly
Once the solution has had time to sit, grab a fresh, dry cloth and blot the area again. This will soak up both the cleaner and the now-loosened stain.
To finish, lightly mist the spot with plain water and give it one final blot. This rinses away any leftover residue that might attract more dirt down the line. While these recipes are fantastic for most indoor carpets, you might also want to learn how to clean indoor-outdoor rugs, as they often require a completely different set of techniques.
Common DIY Mistakes That Can Ruin Your Carpet
While a homemade carpet cleaner can be a real lifesaver for small spills, even the best intentions can sometimes go wrong. It’s easy to make a simple mistake that leads to a much bigger problem than the original stain, sometimes even causing permanent damage.
One of the most frequent errors I see is leaving behind a soapy, sticky residue. This almost always happens when too much dish soap is thrown into the mix. That residue becomes a dirt magnet, causing the exact same spot to get filthy again much faster than the rest of the carpet.
The Dangers of Over-Wetting
Perhaps the single biggest risk with any DIY carpet cleaning job is using too much liquid. It’s a common assumption—more solution equals a deeper clean, right? Unfortunately, that couldn't be further from the truth.
When you completely saturate a spot, that moisture doesn’t just sit on the surface. It soaks right through the carpet fibres and into the padding and even the subfloor beneath. This trapped moisture creates the perfect breeding ground for mould and mildew, which leads to those awful musty smells and can seriously harm your home's air quality.
"The goal is to dampen the fibres, not drown the backing. Once moisture gets into the carpet padding, it can take days to dry completely, and by then, the damage is often done."
Choosing the Wrong Ingredients for Your Carpet Type
Not all carpet fibres are created equal, and using the wrong homemade cleaner can be a very costly mistake. Natural fibres like wool and silk are especially sensitive to anything that messes with their pH balance.
- Vinegar on Wool: The acidity in vinegar can strip the natural lanolin oils from wool fibres. This leaves them brittle, dull, and much more likely to get damaged.
- Harsh Alkalis: On the other side of the spectrum, strongly alkaline solutions (like some ammonia-based cleaners) can cause ugly discolouration or "browning" on natural fibre carpets.
Since 2007, DIY carpet cleaning has tempted 65% of Victorian homeowners, but a professional touch often prevents over 70% of those frustrating re-soiling issues. And while homemade vinegar-bicarb blends can deodorise 60% of pet odours, they've been found to damage fibres in 30% of wool carpets, which can even void your warranty.
It’s always a good idea to be aware of the common cleaning mistakes to avoid, as many apply directly to carpet care. The golden rule is to always spot-test your solution in a hidden area to make sure you don't end up with an irreversible problem.
Of course, here is the rewritten section, tailored to your specific requirements for a human, expert-written tone and style.
Knowing When a DIY Recipe Isn't Enough
Homemade carpet cleaner recipes are fantastic for small, everyday messes. Think of them as your first line of defence—perfect for tackling a fresh coffee splash, a bit of tracked-in mud, or a minor food spill right after it happens. They’re lifesavers in those moments.
But it’s just as important to know their limits. Pushing a DIY solution on a problem it can't handle can sometimes do more harm than good, potentially setting a stain for good or just masking a deeper issue that will resurface later.
Signs You Need to Call a Professional
Sometimes, a stain or odour is just too much for a simple homemade cleaner to handle. Trying to fix these larger issues yourself often ends up being a waste of time and can even make the problem worse. Here are a few clear signs it’s time to pick up the phone and call an expert:
- Large or Set-In Stains: That big red wine spill that's had a few hours to dry, or a dark coffee stain that's spread across a noticeable area? A simple spray-and-blot approach just won’t cut it. These kinds of deep-set stains need specialised treatments and the powerful extraction only a professional machine can provide to lift the pigment without spreading it.
- Persistent Pet Odours: While vinegar and bicarb soda are great for neutralising surface smells, they simply can't reach urine that has soaked through the carpet backing and into the underlay. No amount of surface cleaning will fix that. Professional steam cleaning is the only way to genuinely flush out the source of the smell from deep within the carpet's foundation.
- End-of-Lease Cleaning: When you're trying to get your rental bond back, a DIY job is a massive gamble. Property managers have a sharp eye and expect a professional-grade clean. Only commercial equipment can restore carpets to the standard they require, and it's not worth risking your bond to save a few dollars.
The Professional Advantage
So, what’s the real difference between a DIY attempt and calling in the pros? It boils down to two things: sheer power and expertise. We use truck-mounted steam cleaning machines that get water far hotter than your tap ever could. That super-hot water, combined with high-pressure injection, doesn't just clean—it blasts away deep-seated grime and kills bacteria that homemade solutions leave behind.
But the real game-changer is the extraction. Our equipment uses incredibly powerful vacuums to pull almost all the water, dirt, allergens, and cleaning solution right out of your carpet. This means a truly deep clean and much faster drying times—something you can never replicate with a cloth and some elbow grease.
Ultimately, getting a professional clean isn't just about getting rid of one stubborn stain. It’s an investment in the life of your carpet, protecting its look and feel while creating a genuinely healthier environment for your home.
Your Questions About Homemade Cleaners, Answered
When you're mixing up your own carpet cleaner, a few questions always seem to pop up. Here are some straightforward answers to the most common queries we get, clearing up any confusion so you can get cleaning with confidence.
Can I Use Any Old Dish Soap in My Recipe?
It's tempting to grab whatever is by the sink, but no, you shouldn't use just any dish soap. It’s best to stick with a clear, pH-neutral liquid without any added bleach, heavy dyes, or moisturisers.
Using the wrong kind—or even just a little too much of the right kind—can leave behind a sticky film. That residue is a magnet for dirt, meaning your freshly cleaned spot will get grubby again much faster. A few drops is all it takes.
How Long Should I Leave Vinegar and Baking Soda on the Carpet?
For most everyday spills and minor stains, 15 to 30 minutes is the sweet spot. You want to let the mixture sit and work its magic until all the fizzing has stopped.
Once the bubbling action is over, you can start gently blotting the area with a clean, damp cloth to lift the stain and the solution. The key is to avoid letting it dry completely on the fibres, as this can leave a powdery residue that’s a pain to vacuum up later.
Expert Tip: That fizzing you see is the chemical reaction doing the heavy lifting, breaking down grime and pushing it up out of the carpet fibres. Once the fizz dies down, the main cleaning action is finished.
Are Homemade Carpet Cleaners Safe for Wool Carpets?
This is where you need to be extremely careful. Wool is a delicate natural fibre, and it can be permanently damaged by cleaners that are too acidic or too alkaline. A homemade carpet cleaner recipe that works wonders on synthetics could spell disaster for wool.
While a very heavily diluted white vinegar solution might be okay, you must perform a spot test in a hidden area first—think under a sofa or inside a closet. Honestly, for any valuable or antique wool rugs, calling in a professional is always the safest bet to prevent irreversible damage.
For those stubborn, deep-set stains that DIY solutions just can't shift, it's time to trust the experts. At Right Price Carpet Cleaning, our professional steam cleaning breathes new life into your carpets, removing allergens and protecting your investment. Get your instant online quote today!
Recent Comments