
Having the right gear for cleaning shower tiles is what separates a frustrating hour of scrubbing from a truly satisfying sparkle. Your toolkit doesn't need to be complicated, but it does need to be smart. Think a good stiff-bristled brush for grout, a non-scratch scrub pad for the tile faces, and high-quality microfibre cloths to nail that streak-free finish. And, of course, don't forget the basics like rubber gloves and decent ventilation.
Assembling Your Shower Cleaning Toolkit
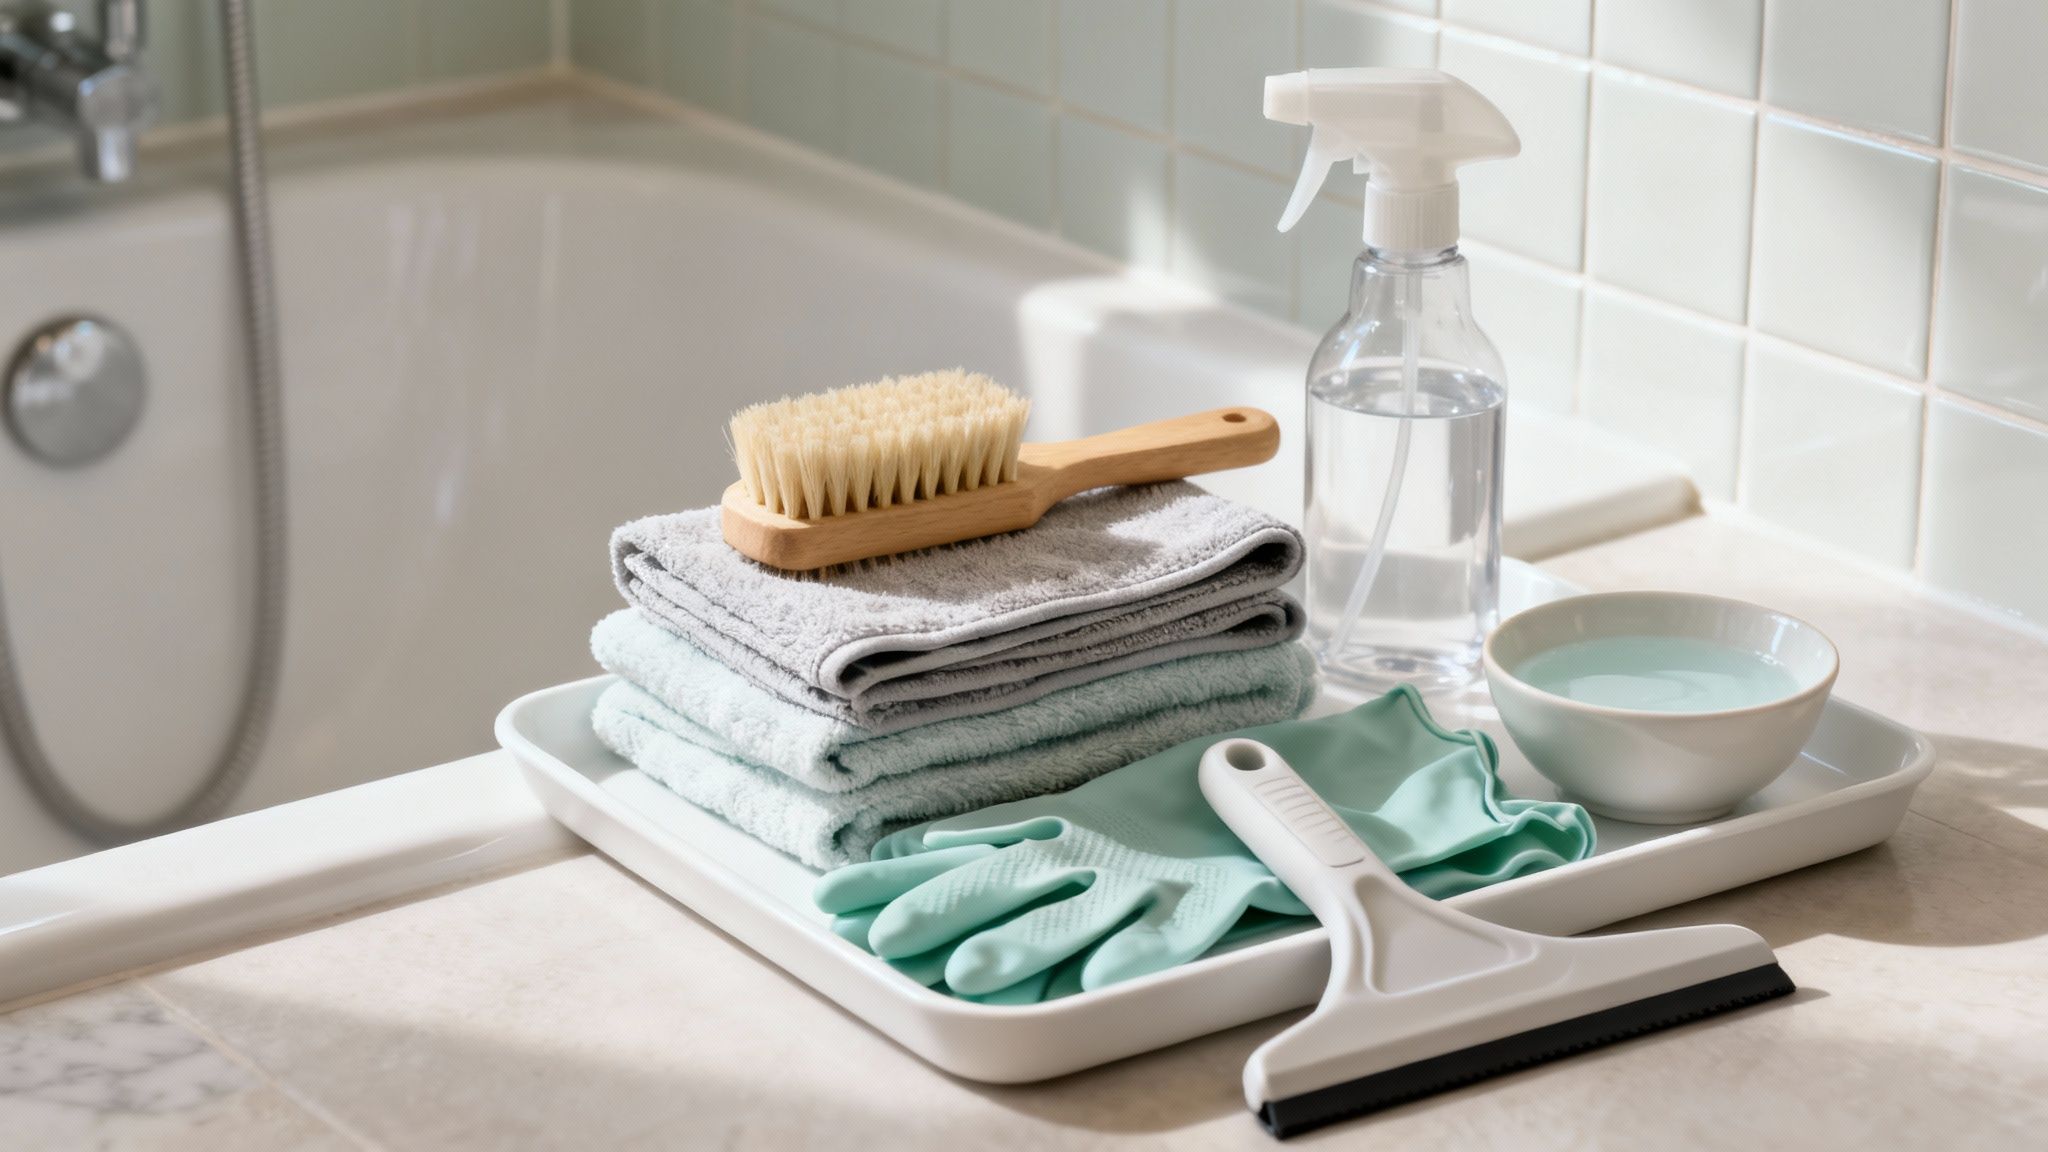
Before you even think about tackling that soap scum and mildew, getting your equipment sorted is non-negotiable. This isn't about just grabbing any old sponge from under the sink; it's about putting together a strategic arsenal that's tailored to your shower's needs. The right tools won't just get the job done better—they’ll protect your tiles from damage in the long run.
The Essential Scrubbing Duo
Your main weapons against grime are your brushes. You really need a two-pronged attack here:
- A Stiff-Bristled Grout Brush: This is your specialist tool. Its narrow head and tough bristles are built to get right into those grout lines, digging out the grime that a wider brush would just skate over.
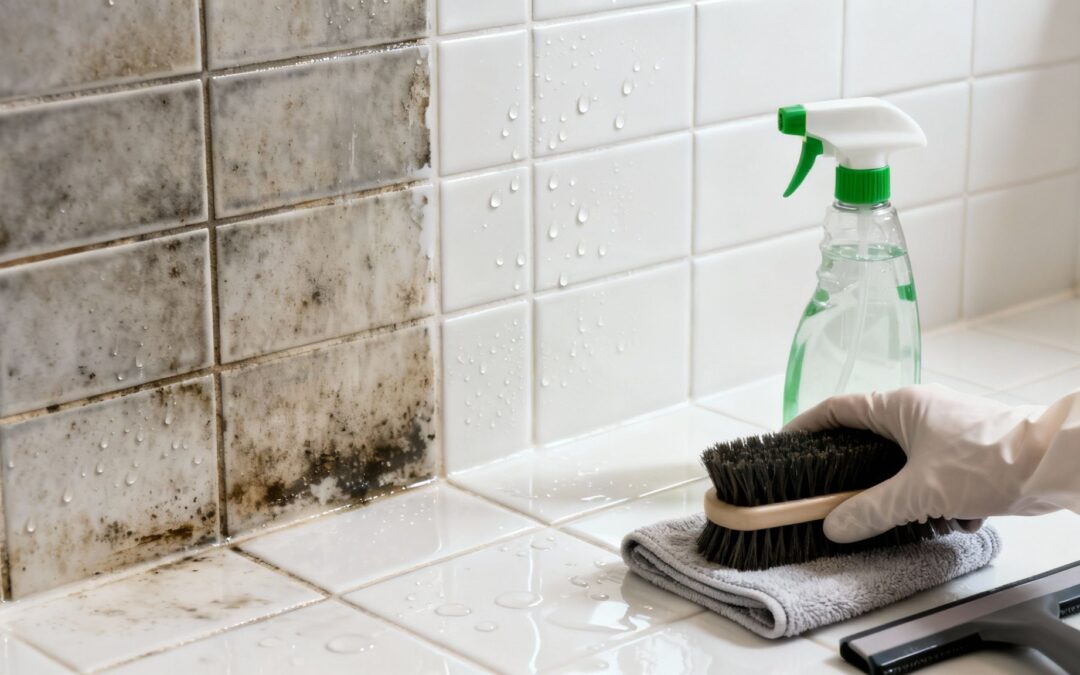
- A Non-Abrasive Scrub Brush or Pad: For the actual tile faces, you need something that's effective but won't cause harm. A medium-bristle brush or a non-scratch scouring pad will lift soap scum without dulling or scratching the tile surface, which is especially important for delicate materials like natural stone.
Using the wrong tool—like a steel wool pad on your ceramic tiles—can leave permanent scratches, so it's crucial to match the scrubber to the surface.
Pro Tip: Got an old electric toothbrush? Dedicate a cleaning head to it, and you've got a powerhouse for stubborn grout stains. The rapid vibrations do most of the hard work for you, saving your elbows a lot of grief.
Tools for a Flawless Finish
Scrubbing is only half the job. If you're after that pristine, streak-free look, the finishing tools are what get you over the line.
High-quality microfibre cloths are an absolute must. They're way more absorbent than old cotton rags and are designed to lift away residue and moisture without leaving annoying lint behind. It's a good idea to use one cloth for wiping down the cleaning solutions and a second, completely dry one for polishing surfaces like your tapware and glass screen.
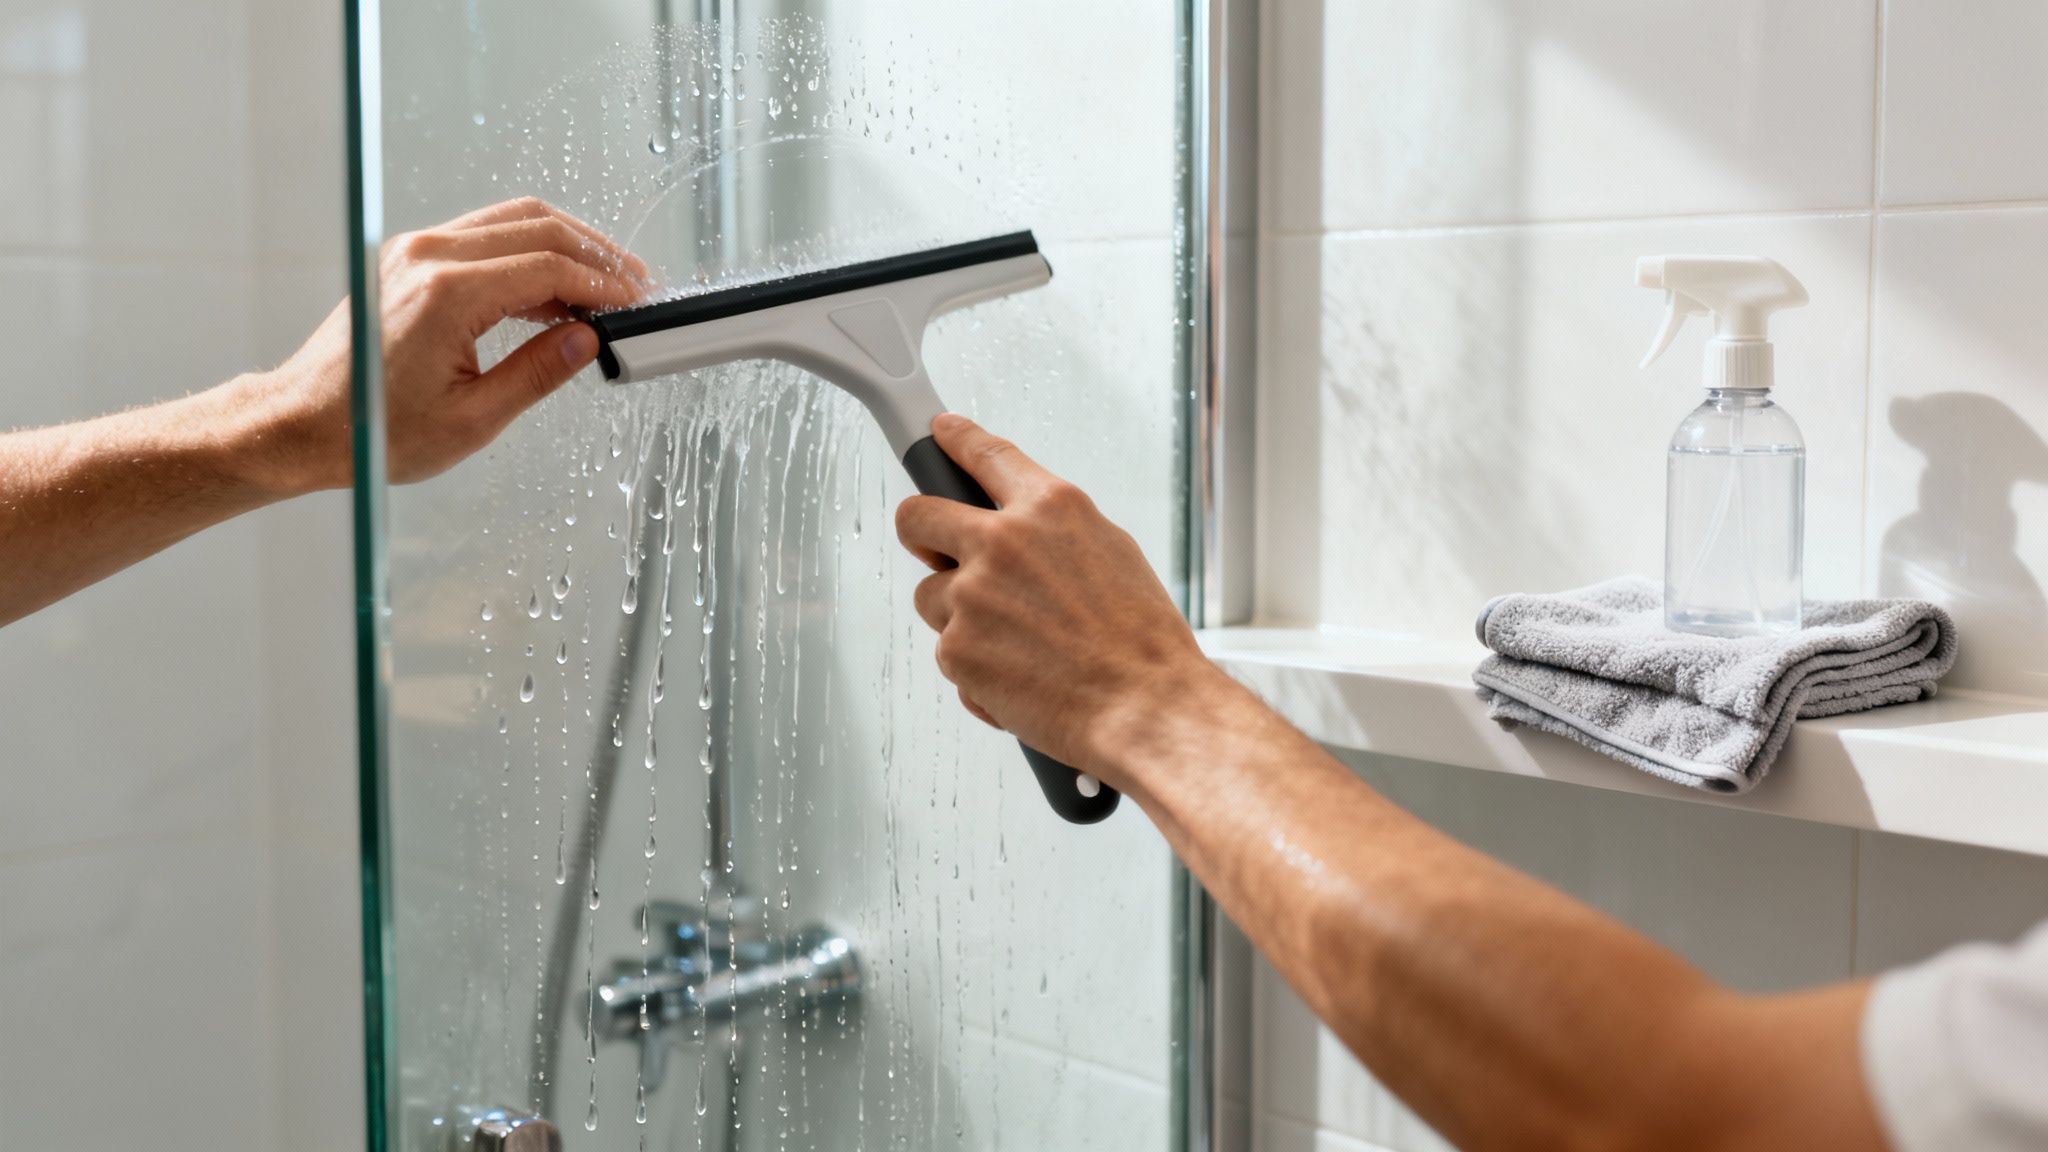
Finally, don't underestimate the humble squeegee. It is, without a doubt, your best mate for daily maintenance. A quick 30-second wipe-down after each shower stops water spots and soap scum from ever getting a foothold, which drastically cuts down on how often you need to do a deep clean. It's the single most effective preventative tool you can own.
Right, before you even think about grabbing a scrub brush, let's talk prep work. Jumping straight into scrubbing is a classic rookie mistake. It's a bit like trying to paint a wall without dusting it first—you just end up pushing grime around instead of actually getting rid of it.
Taking a few minutes to get the area ready is the secret sauce for a truly effective, long-lasting clean. It means your cleaning solutions can get straight to work on the stubborn soap scum and mildew, rather than fighting through a layer of loose hair and surface dirt.
Clear the Decks Completely
First things first: get everything out of the shower. And I mean everything. Shampoo bottles, conditioner, soap bars, loofahs, razors, shower caddies—the lot. It might feel like a hassle, but these items are perfect hiding spots for mould and mildew, which absolutely love those damp, dark corners.
Just think about the grimy ring that forms under a shampoo bottle; it's often the toughest spot to clean. By clearing the space entirely, you get unobstructed access to every single tile and grout line. This is how you achieve a uniform clean, leaving no sneaky spots for the next wave of grime to set up camp.
A quick pro-tip: don't just dump everything on the floor outside the shower. That's a trip hazard waiting to happen. Move it all to a different room or a dry countertop to give yourself a safe and totally clear workspace.
Create a Safe Cleaning Environment
Proper ventilation is non-negotiable, even if you're using gentle, eco-friendly solutions. Any cleaner can create fumes in a small, enclosed space like a bathroom. Here in Melbourne, the humidity already gives mould a head start, and poor airflow during cleaning just makes things worse.
- Open a Window: Even cracking it open a little makes a huge difference.
- Turn on the Exhaust Fan: Switch it on before you start, keep it running while you work, and leave it on for at least 20 minutes after you’re done. This helps clear the air and, just as importantly, dries out the surfaces.
This simple step is all about protecting your lungs, but it also speeds up the drying process. That’s key to stopping mildew from making an instant comeback.
Finally, give the whole shower a quick pre-rinse with warm water. This simple blast washes away loose hair and debris, setting the stage for a much deeper, more effective clean.
Matching Your Cleaning Method to Your Tile Type
Not all tiles are created equal, and using the wrong cleaning solution on your shower can be a fast track to irreversible damage. Think of it like laundry—you wouldn't wash delicate silk with the same harsh detergent you use on grubby work clothes. The same principle applies here; matching the cleaner to the material is crucial for preserving its beauty and integrity.
Using an acidic cleaner like vinegar on natural stone, for instance, can etch the surface and leave dull, permanent marks. On the flip side, a gentle pH-neutral cleaner might not be strong enough to tackle the baked-on soap scum you often find on durable porcelain tiles. It’s all about cleaning smarter, not harder.
Safely Cleaning Ceramic and Porcelain Tiles
Ceramic and porcelain are the workhorses of the bathroom world. They're tough, non-porous, and can stand up to most cleaning challenges, which is why they’re so popular in Melbourne homes. For routine cleaning, a simple mix of warm water and a few drops of dish soap is usually all you need to cut through daily grime.
For more stubborn soap scum or hard water deposits, you can safely bring in a slightly acidic solution. A 50/50 mix of white vinegar and water in a spray bottle is a fantastic, budget-friendly option. Just spray it on, let it sit for 10-15 minutes to dissolve the buildup, then scrub gently with a soft brush before rinsing it all away. Knowing the best practices for maintaining subway tiles and other specific types is key, as different finishes can have unique needs.
Protecting Natural Stone Surfaces
If your shower features natural stone like marble, travertine, limestone, or slate, your cleaning approach needs to be far more delicate. These materials are porous and chemically sensitive, especially to acids.
Crucial Takeaway: Never use vinegar, lemon juice, or any acidic or abrasive commercial cleaners on natural stone. These products react with the calcium carbonate in the stone, causing etching—a dulling of the surface that looks like a permanent water spot. It can only be fixed by professional polishing.
Instead, you must stick to a pH-neutral cleaner specifically formulated for stone. These are gentle enough to remove dirt and soap scum without damaging the stone or its sealant. Always look for products that explicitly state they are "safe for natural stone." When you clean, use a soft cloth or sponge and avoid aggressive scrubbing to protect the delicate surface from scratches.
To make it easier, here's a quick-reference guide to help you pick the right cleaner and avoid costly mistakes.
Safe Cleaning Solutions for Your Shower Tiles
| Tile Type | Safe Cleaners to Use | What to Absolutely Avoid |
|---|---|---|
| Ceramic & Porcelain | Mild dish soap, 50/50 vinegar & water mix, most commercial tile cleaners. | Harsh abrasive powders, steel wool (can scratch glaze). |
| Natural Stone | pH-neutral stone cleaners, warm water with a soft cloth. | Vinegar, lemon juice, bleach, ammonia, abrasive scrubbers. |
| Glass Tiles | 50/50 vinegar & water mix, commercial glass cleaners, microfibre cloths. | Abrasive cleaners, scouring pads (will cause scratches). |
This table should help you choose with confidence, ensuring you protect your investment while getting a great clean.
Handling Glass and Other Speciality Tiles
Glass tiles bring a beautiful, reflective quality to a shower, but they can be magnets for water spots and soap scum. The key here is using a non-abrasive approach that delivers a streak-free shine.
- Best Solution: A simple spray of equal parts water and white vinegar is perfect for cutting through buildup on glass.
- Technique: After spraying, wipe it all down with a high-quality microfibre cloth. Don't be afraid to apply a little elbow grease.
- Final Polish: Grab a second, completely dry microfibre cloth and buff the tiles to a brilliant shine. This final step is what removes any lingering streaks.
This two-cloth method is a game-changer. It ensures you’re lifting the dirt with the first wipe and polishing to a perfect, crystal-clear finish with the second.
Conquering Grout Stains, Mould, and Mildew
Even after you’ve made your shower tiles sparkle, discoloured grout and stubborn patches of mould can make the whole space feel grimy. These aren’t just cosmetic issues; mould and mildew are living organisms that thrive in the damp, humid environment of a typical Melbourne bathroom.
Grout is naturally porous, making it a magnet for dirt, soap scum, and moisture—the perfect breeding ground for mould. What starts as a small dark spot can quickly spread, leaving behind unhealthy black or pink stains. The key is to act fast with a targeted approach that kills the problem at its source.
Your First Line of Defence: A DIY Grout Paste
For everyday grout stains and light discolouration, you don’t always need harsh chemicals. A simple, powerful paste made from household items is surprisingly effective and much gentler on your surfaces.
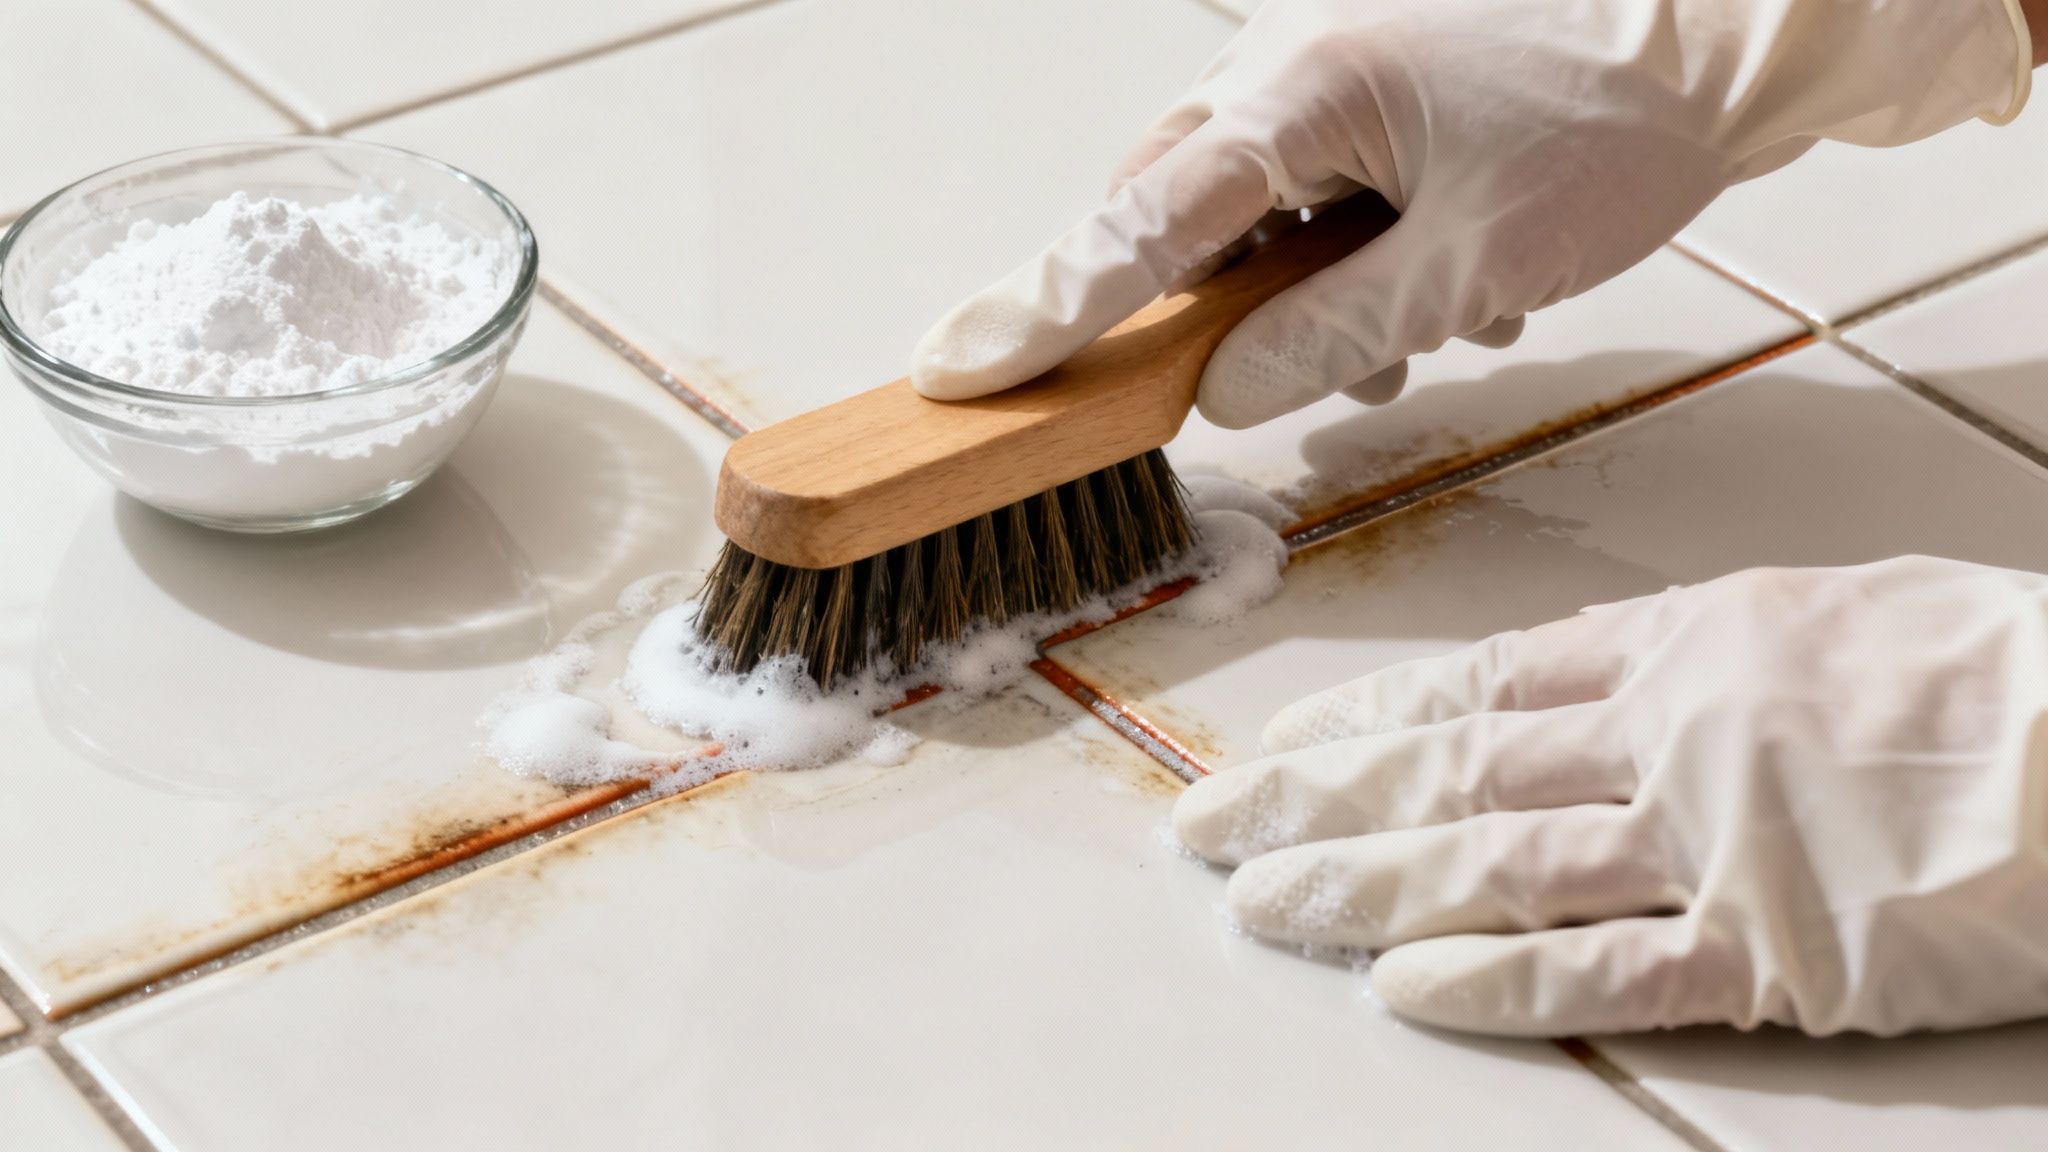
Mix baking soda with a bit of water until you get a thick paste, about the consistency of toothpaste. Using a gloved finger or a small spatula, apply it directly onto the grout lines. Let it sit for at least 15-20 minutes. This dwell time is crucial—it gives the baking soda a chance to get to work, breaking down and lifting the grime.
Now for the elbow grease. Grab a stiff-bristled grout brush and scrub in small, circular motions. You'll be amazed at how this simple paste can brighten up your grout. When you’re done, just rinse the whole area thoroughly with warm water.
Escalating the Attack on Stubborn Mould
Sometimes, baking soda just isn't enough to beat established mould, especially those stubborn black spots that keep coming back. When you're facing a more serious infestation, you need something that will kill the spores for good, not just bleach the surface.
Hydrogen peroxide is the perfect next step. You can find a standard 3% solution at any chemist or supermarket. For the best control, pour it into a spray bottle and target the affected grout lines directly.
Let the hydrogen peroxide bubble and fizz on the grout for about 10-15 minutes. That fizzing is a good sign—it means it's actively killing mould and bacteria. After it's had time to work, give it a good scrub with your grout brush and rinse everything clean.
If the mould still won't budge, it’s time to bring in a commercial mould and mildew remover. These products are formulated with powerful fungicides designed to penetrate deep into the grout. When using them, make sure the bathroom is extremely well-ventilated. Open the windows, run the exhaust fan, and always wear protective gloves and eyewear. The goal here is total eradication, so it doesn't come back.
A Simple Maintenance Routine That Actually Works
The real secret to a shower that always looks sparkling isn't spending hours scrubbing it into submission. It’s all about consistency and a little bit of smart prevention. A proactive approach stops soap scum and mildew from ever getting a proper foothold, which saves you a world of effort down the track. This is about working smarter, not harder.
The single most powerful habit you can get into is a daily wipe-down. I'm not talking about a deep clean here; this is a quick, preventative move that takes less than 60 seconds. By getting rid of the excess moisture, you're literally robbing mould and mildew of the damp home they need to grow.
A quick daily squeegee session can eliminate up to 90% of the water that leads to ugly soap scum and hard water spots. It’s the best thing you can do to keep your shower looking fantastic with minimal effort.
Your Weekly Refresh Ritual
To back up your daily wipe-down, a simple weekly spray is all it takes. This quick ritual deals with any residue that might be thinking about forming, keeping your tiles and grout in top shape without needing any elbow grease.
- Spray and Sit: Once a week, give your tiles and grout a light mist with a gentle, pH-neutral daily shower cleaner. If you'd rather go the DIY route, a diluted white vinegar solution works wonders on ceramic and porcelain.
- A Quick Wipe: Let the cleaner sit for a few minutes while you brush your teeth, then just give it a quick wipe with a microfibre cloth.
This five-minute weekly task is your best defence against grime. For most Melbourne homes, this routine is more than enough to keep your shower looking great and will seriously extend the time between deep cleans. By staying on top of it, the job of cleaning shower tiles becomes a minor chore instead of a major project.
Knowing When to Call in the Pros
Even with the best intentions and a whole lot of elbow grease, there comes a point where scrubbing just doesn't cut it anymore. Sometimes, years of grime, deeply embedded mould, or grout lines that are permanently discoloured are simply beyond the reach of household cleaners.
This is when knowing the limits of your own efforts and calling in a professional becomes a smart investment in your home, not a sign of defeat.
Recognising the signs that you need expert help is key. If you find mould creeping back just weeks after a thorough clean, it's a sure sign the problem is rooted deep within the porous grout where topical treatments can't reach. Likewise, grout that stays dark and dingy no matter how hard you scrub is a clear indicator that the discolouration is permanent and needs professional restoration.
The Power of a Professional Deep Clean
When your shower tiles are past the point of a DIY fix, looking into professional cleaning services can save you a world of time and frustration. They bring in high-pressure steam and specialised equipment that achieves results simply impossible with a scrubbing brush and a bottle of cleaner.
A professional service brings a few game-changers to the table:
- High-Pressure Steam Cleaning: This is the big one. This method blasts hot vapour deep into the pores of your grout, killing mould spores at their source and lifting out years of embedded grime and soap scum.
- Specialised Alkaline Solutions: Pros use powerful, yet tile-safe, solutions that dissolve stubborn body oils and soap residue without a hint of damage to your surfaces.
- Grout Sealing: After that deep clean, most services will re-seal your grout lines. This creates a protective barrier that stops future stains in their tracks and makes your own cleaning routine so much easier.
Making a Smart Investment in Melbourne
For those of us here in Melbourne, professional shower tile cleaning typically costs between $10 to $28 per square metre. For a standard bathroom deep clean using powerful truck-mounted steam gear, you're usually looking at a total cost of $200-$400.
While it’s an upfront cost, think of it this way: this service doesn't just get rid of stubborn grime more effectively. It can also extend the life of your tiles by up to 5 years by preventing grout degradation.
When you stack that up against the cost of retiling—which averages around $60 per square metre in Melbourne—the long-term savings are obvious, especially in our humid climate. You can learn more about local tile and grout cleaning costs to see how it all compares.
Ultimately, calling a professional isn't admitting defeat; it's a strategic move. It restores your shower to a like-new condition, improves hygiene by eradicating deep-set mould, and protects the long-term value of your bathroom.
Got Questions About Cleaning Your Shower? We've Got Answers
To wrap things up, let's go through some of the most common questions that pop up when you're elbow-deep in shower grime. Getting these right can save you a whole lot of time and, more importantly, prevent accidental damage to your tiles.
One of the biggest questions I hear is about cleaning frequency. For an average household, a proper deep clean every 2-4 months is a solid rule of thumb. But that’s not set in stone. If your shower sees a lot of daily traffic or you notice that dreaded mould making a comeback, you might need to step it up to every 6-8 weeks.
Common Cleaning Conundrums
A major point of confusion often revolves around vinegar. It's a fantastic, cheap cleaner for standard ceramic and porcelain, but it’s definitely not a one-size-fits-all solution.
Critical Safety Tip: Never, ever use vinegar on natural stone like marble, travertine, or slate. Its acidity will literally eat into the surface, causing permanent dulling and damage that only a professional can fix. For these delicate materials, always stick to a pH-neutral cleaner.
Another frequent question is how to stop mould from returning for good. Look, the battle against mould is really a battle against moisture. Your best defence is to create an environment where it simply can't survive.
- Boost the Airflow: Always run your exhaust fan while you shower and leave it on for at least 20-30 minutes afterwards. This simple habit pulls all that humid, steamy air straight out of the room.
- Wipe It Down: The single most effective thing you can do is give the walls and floor a quick wipe-down with a squeegee or microfibre cloth after every use. It takes 30 seconds, but it stops mould spores from finding a damp place to call home.
By making these simple habits part of your routine, you shift from constantly fighting grime to preventing it from ever getting a foothold. It makes the whole cleaning process far less of a chore.
Ready to see your shower tiles and grout restored to their former glory without all the back-breaking work? The team at Right Price Carpet Cleaning uses powerful, truck-mounted steam cleaning technology that blasts away the deep-set grime and mould that DIY methods just can't touch. Get a sparkling clean shower and protect your investment. Find out more and get your instant quote for professional tile and grout cleaning in Melbourne today.
Recent Comments