



Curtains endure more wear than is commonly realized. They sit there day after day catching cooking odours, road dust, pet dander, pollen and the fine grime that drifts through Melbourne homes with the seasons. Then one morning the room feels flat, the fabric looks tired, and there’s that faint stale smell you can’t quite place.
That’s usually when people start wondering whether they need new curtains. In many cases, they don’t. Cleaning curtains with steam cleaner can lift dust, freshen fabric and improve the feel of the whole room without taking everything down and sending it away.
The key is using the right method on the right fabric. A light pair of sheers in a dry bedroom is one job. Heavy thermal drapes in a damp corner window are another. Melbourne’s mix of dry heat, cool winters and changing humidity makes that distinction matter more than most generic cleaning guides admit.
Revitalise Your Home with Freshly Steamed Curtains

Curtains don’t have to look filthy to be dirty. A lot of the problem sits in the fibres. Dust settles into folds, allergens build up near the hemline, and odours hang around long after the source is gone. That’s why a room can look tidy but still feel stale.
Steam cleaning helps because it refreshes fabric while it’s hanging. You’re not dragging panels down, stuffing them into a machine and hoping they come back the same size. You’re applying controlled heat and moisture where it’s needed, then letting the curtains dry in place.
For Melbourne homes, that matters. Dust, pollen and traffic grime don’t stay outside for long. According to ABS data cited here, 68% of Melbourne households reported improved indoor air quality after professional steam cleaning of soft furnishings, including curtains, and the same source notes that 1 in 5 residents suffer from asthma or allergies. That makes curtain cleaning more than a cosmetic job.
What steam cleaning does well
- Lifts surface grime: Steam loosens dust and light residue sitting in the weave and along pleats.
- Freshens odours: Curtains often hold onto cooking smells, closed-room mustiness and everyday household air.
- Improves presentation: Steaming relaxes creases and helps curtains hang cleaner and neater.
Practical rule: If the room smells better and feels lighter after the curtains are cleaned, that isn’t your imagination. Dirty fabric affects the whole space.
What this job needs from you
Good results come from restraint, not brute force. Most DIY mistakes happen when people over-wet the fabric, rush the prep, or assume every curtain can handle the same heat. Steam can be excellent, but only when the curtain type and the equipment match the task.
Before You Begin Assessing Curtain and Steamer Compatibility
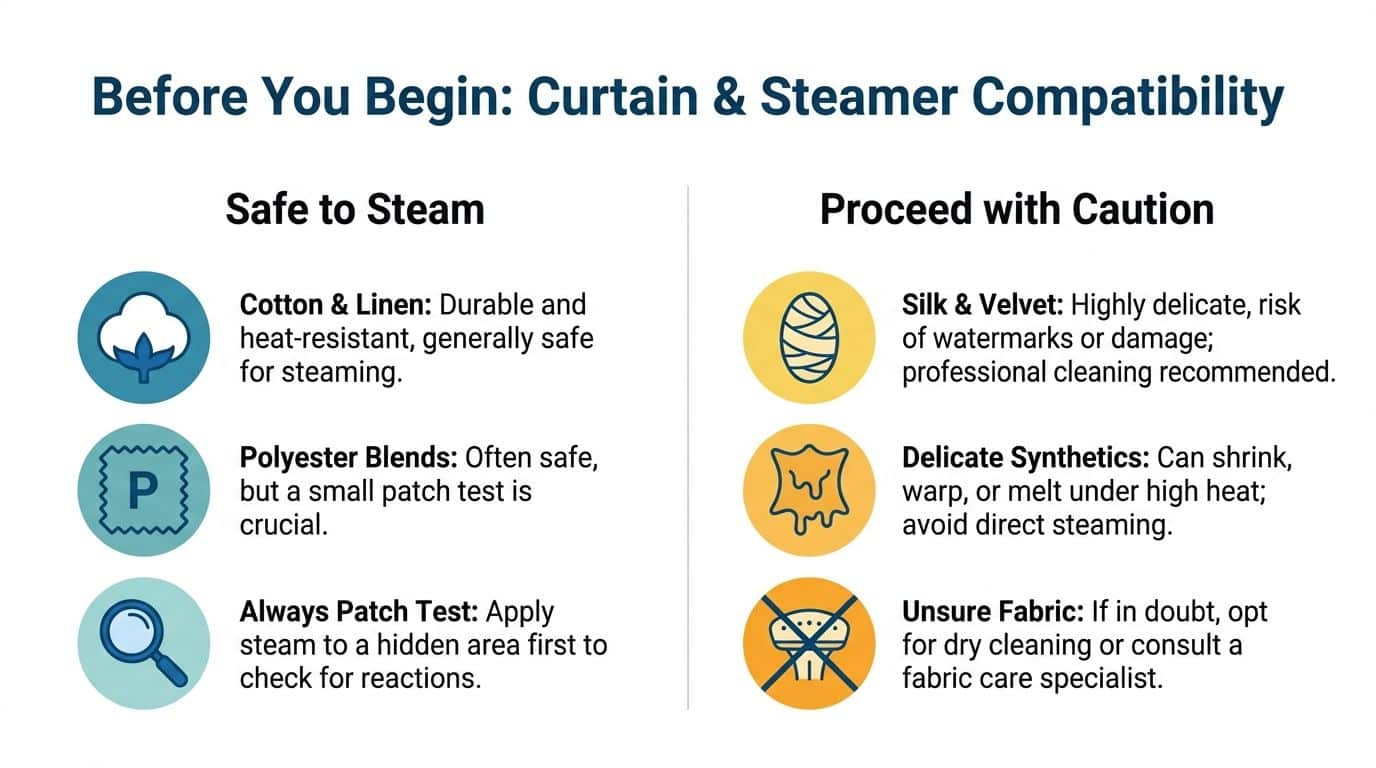
The worst time to check fabric suitability is after the first wet patch appears. Before you plug anything in, look at the label, feel the fabric, and be honest about what you’re working with.
Some curtains are forgiving. Others aren’t. Polyester blends, many cottons and some linens usually cope well with careful steaming. Delicate fabrics, lined drapes, velvet, silk and anything with adhesive-backed structure need a much more cautious approach.
Melbourne homes add another wrinkle. Blackout and thermal curtains are common, and that changes what a handheld unit can achieve. As noted in this guide on when DIY steam may not penetrate effectively on blackout and thermal curtains, some heavier curtains can hold onto deeper grime and musty smells even after steaming. That’s why it’s worth separating steam-suitable curtains from professional-only ones before you start.
Start with the care label and a patch test
If the label says dry clean only, treat that as a stop sign. Don’t try to outsmart the manufacturer with a hotter pass or less moisture.
If the fabric appears suitable for steam, do a small patch test in an unseen area. Use a brief pass, let it dry, then check for:
- Shrinkage: The panel edge may pull slightly or sit unevenly.
- Colour movement: Dark dyes and decorative trims can bleed.
- Water marking: Some fabrics show rings or uneven shading after moisture.
- Texture change: The face fabric may flatten, ripple or lose body.
If you get any of those signs, stop there.
Read the fabric, not just the label
Curtain cleaning is as much about construction as fibre type. A plain polyester sheer behaves very differently from a polyester curtain with lining, interlining or stitched pleats. The surface may look steam-safe while the inner layers hold moisture.
Watch for these red flags:
- Rubberised or coated backings: These can react badly to heat.
- Heavy blackout linings: Steam often won’t penetrate enough for a proper clean.
- Decorative trims and tapes: Glues and stitched edges may distort.
- Old sun-damaged fabric: Even gentle steam can expose weakness in brittle fibres.
Steam or See a Pro? Your Curtain Fabric Guide
| Fabric Type | DIY Steam Safe? | Key Considerations |
|---|---|---|
| Cotton | Usually, with care | Patch test first and avoid soaking seams and hems |
| Linen | Often, but cautiously | Natural fibres can react to moisture and may show marks |
| Polyester blends | Commonly suitable | Good candidate for careful steaming if the weave is stable |
| Sheers | Often suitable | Use light passes only and support the fabric if it’s fragile |
| Blackout curtains | Sometimes not ideal | Heavier build can trap odour and moisture, and steam may not penetrate well |
| Thermal curtains | Often better for professional cleaning | Multiple layers make drying and deep cleaning harder |
| Velvet | No, in most home setups | Pile can crush or mark easily |
| Silk | No | High risk of watermarks and distortion |
| Unknown fabric | Treat as unsafe | If you can’t identify it, don’t experiment on the full panel |
Handheld steamer versus professional equipment
Realistic expectations are necessary. A home garment steamer or small handheld unit is fine for refreshing light curtains. It helps with surface dust, odour reduction and crease release. It does not behave like commercial extraction equipment.
A professional system applies heat more consistently, cleans deeper into the fabric and removes moisture more effectively. That matters on lined curtains, rental properties, family homes with pets, or rooms where odour has built up over time.
If your goal is “make these look nicer”, DIY may do the job. If your goal is “clean them properly”, equipment limits matter.
The Step-by-Step Steam Cleaning Technique
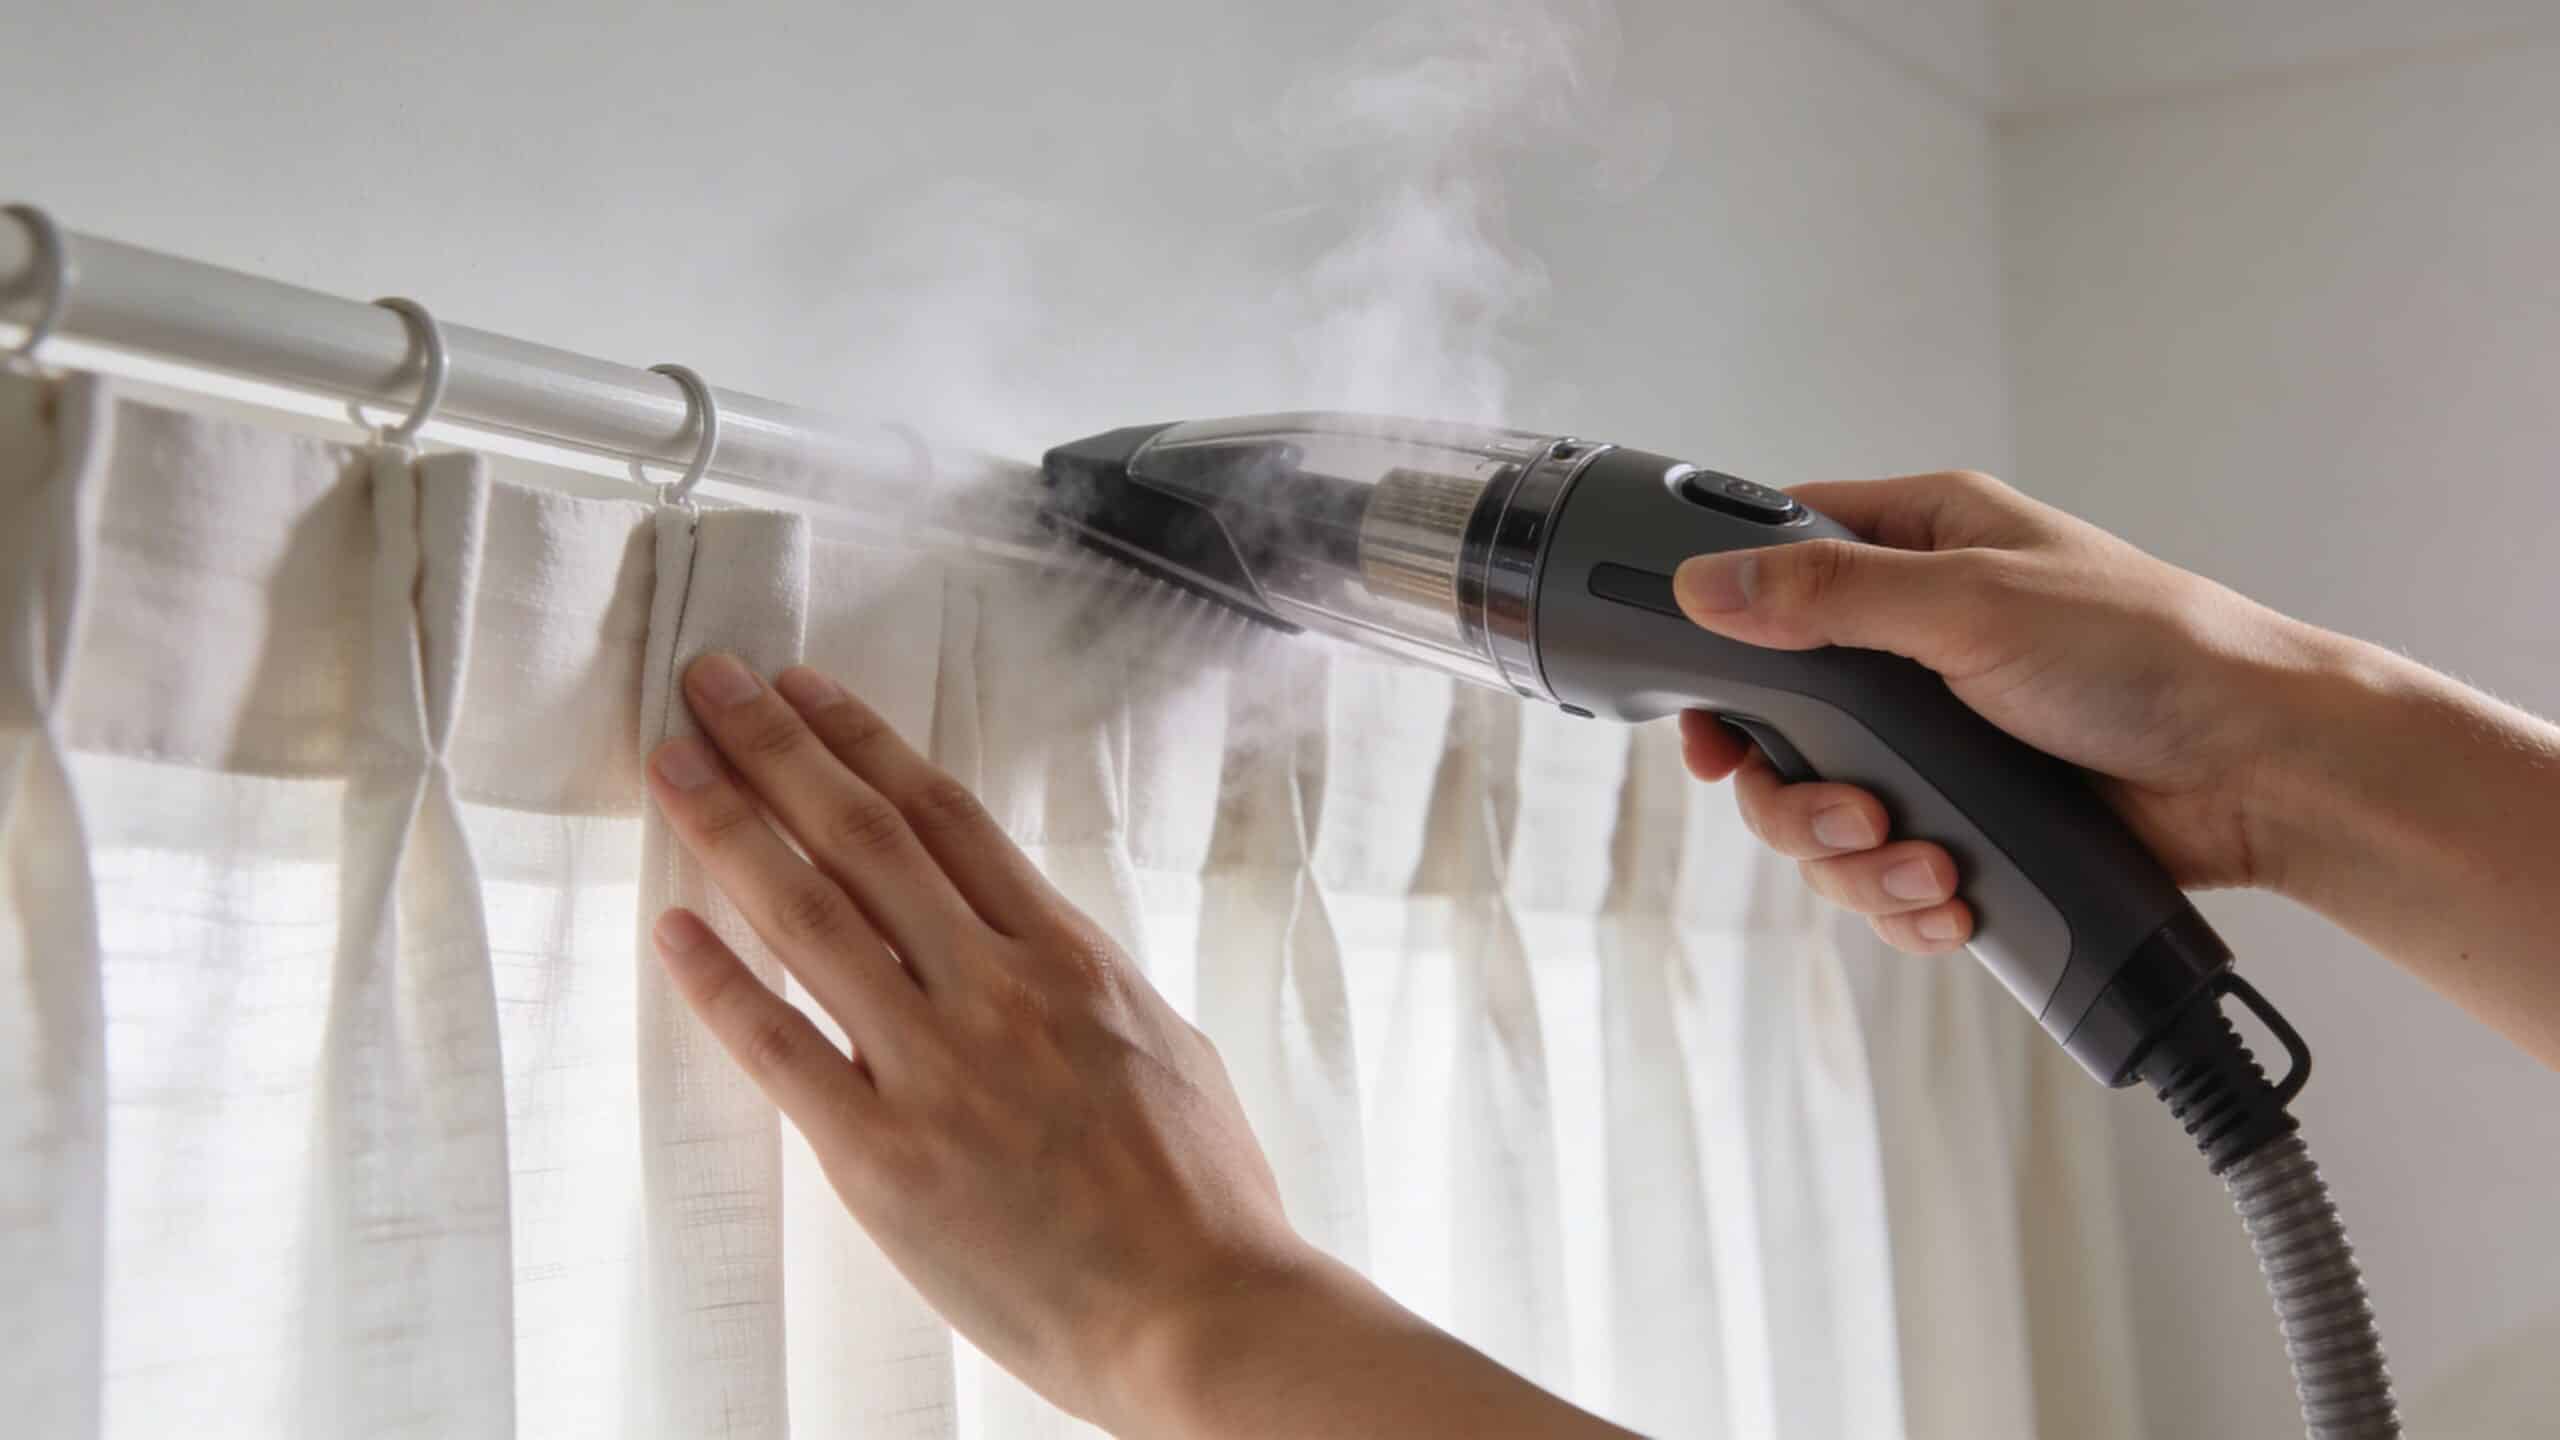
Technique decides whether the curtains come up fresh or end up patchy. The biggest mistake isn’t using too little steam. It’s skipping prep and then pushing damp dust around the fabric.
A proper curtain steam clean happens in phases. Prep first. Controlled passes second. Detail work last.
Phase one prep the fabric properly
Before any steam touches the curtain, vacuum it thoroughly. This is not a token once-over. It’s a real dust removal step.
A thorough pre-vacuum with an upholstery attachment can remove 70 to 80% of surface dust, according to this guide on curtain steam cleaning technique and nozzle distance. That matters because loose dust plus moisture turns into smearing, especially on pale fabric and along folds.
Use the upholstery head or a soft brush attachment. Work from top to bottom. Give extra attention to:
- Header tape and pleats: Dust packs in tightly here.
- Leading edges: These catch airborne grime.
- Bottom hems: This area traps settled dust and pet hair.
- Behind the curtain: The window-facing side often gets ignored.
If the curtain is close to the floor, support the fabric with your free hand as you vacuum so you’re not dragging it.
Phase two set up the steamer correctly
Fill the steamer, let it heat fully, and attach a clean cloth-covered or fabric-safe nozzle if your machine uses one. Don’t start while it’s still sputtering water.
Hold the nozzle 5 to 10 cm from the fabric and work in top-to-bottom passes, which the same source associates with a 99.9% bacteria kill rate when done correctly and without over-saturating the material. That spacing is the sweet spot for most suitable curtains. Too close and you risk wet patches. Too far and you’re just blowing warm vapour around.
Phase three steam in controlled vertical sections
Don’t wave the head randomly across the curtain. Divide the panel into narrow vertical lanes and complete one lane before moving to the next.
This keeps coverage even and helps you track moisture.
- Start at the top: Gravity helps you here. Dust and condensed moisture move down, not up.
- Move steadily: Keep the pass smooth. Don’t stop in one spot unless you’re deliberately softening a crease.
- Overlap lightly: A small overlap prevents striping.
- Check the back of the fabric: If it feels wet rather than lightly warm and damp, slow down less and increase drying airflow.
Detail work where grime hides
Curtains rarely soil evenly. The dirtiest points are usually the folds, the edges and the lower section.
For pleats and gathered headings, gently open the fold with one hand and pass the steam along the inner edge. Don’t jam the nozzle in close. You want heat contact, not a blast of condensed water.
On the hemline, use shorter passes. This area often holds the most dust and can take longer to release odours.
Keep the curtain hanging naturally while you work. Pulling it tight can create stretch marks in delicate fabric and makes water spotting harder to judge.
What to do if the curtain starts looking too damp
Stop immediately and let airflow catch up. Open windows if conditions suit, and run fans across the room. The answer isn’t “one more pass to fix it”.
If you notice any of these signs, pause:
- Dark wet bands
- Water droplets on the surface
- Heavy fabric clinging together
- A stronger musty smell as moisture builds
That last one is common with curtains that already hold old dust or humidity. A handheld steamer can wake up the odour without removing the deeper cause.
Keep expectations sensible
A handheld unit can refresh suitable curtains well. It can also pair nicely with other fabric care around the home. If you’re already tackling lounges, dining chairs or padded bedheads, it helps to understand how steam behaves across different materials. This practical guide to steam cleaning upholstery at home and professionally is useful for judging what responds well to a DIY refresh and what needs deeper extraction.
For curtains, the rule is simple. If the fabric looks cleaner, hangs better and dries quickly, you’re on the right track. If it stays damp, smells stronger or still looks grubby in the fold lines, the steamer has probably reached its limit.
Tackling Stains and Ensuring a Perfect Finish
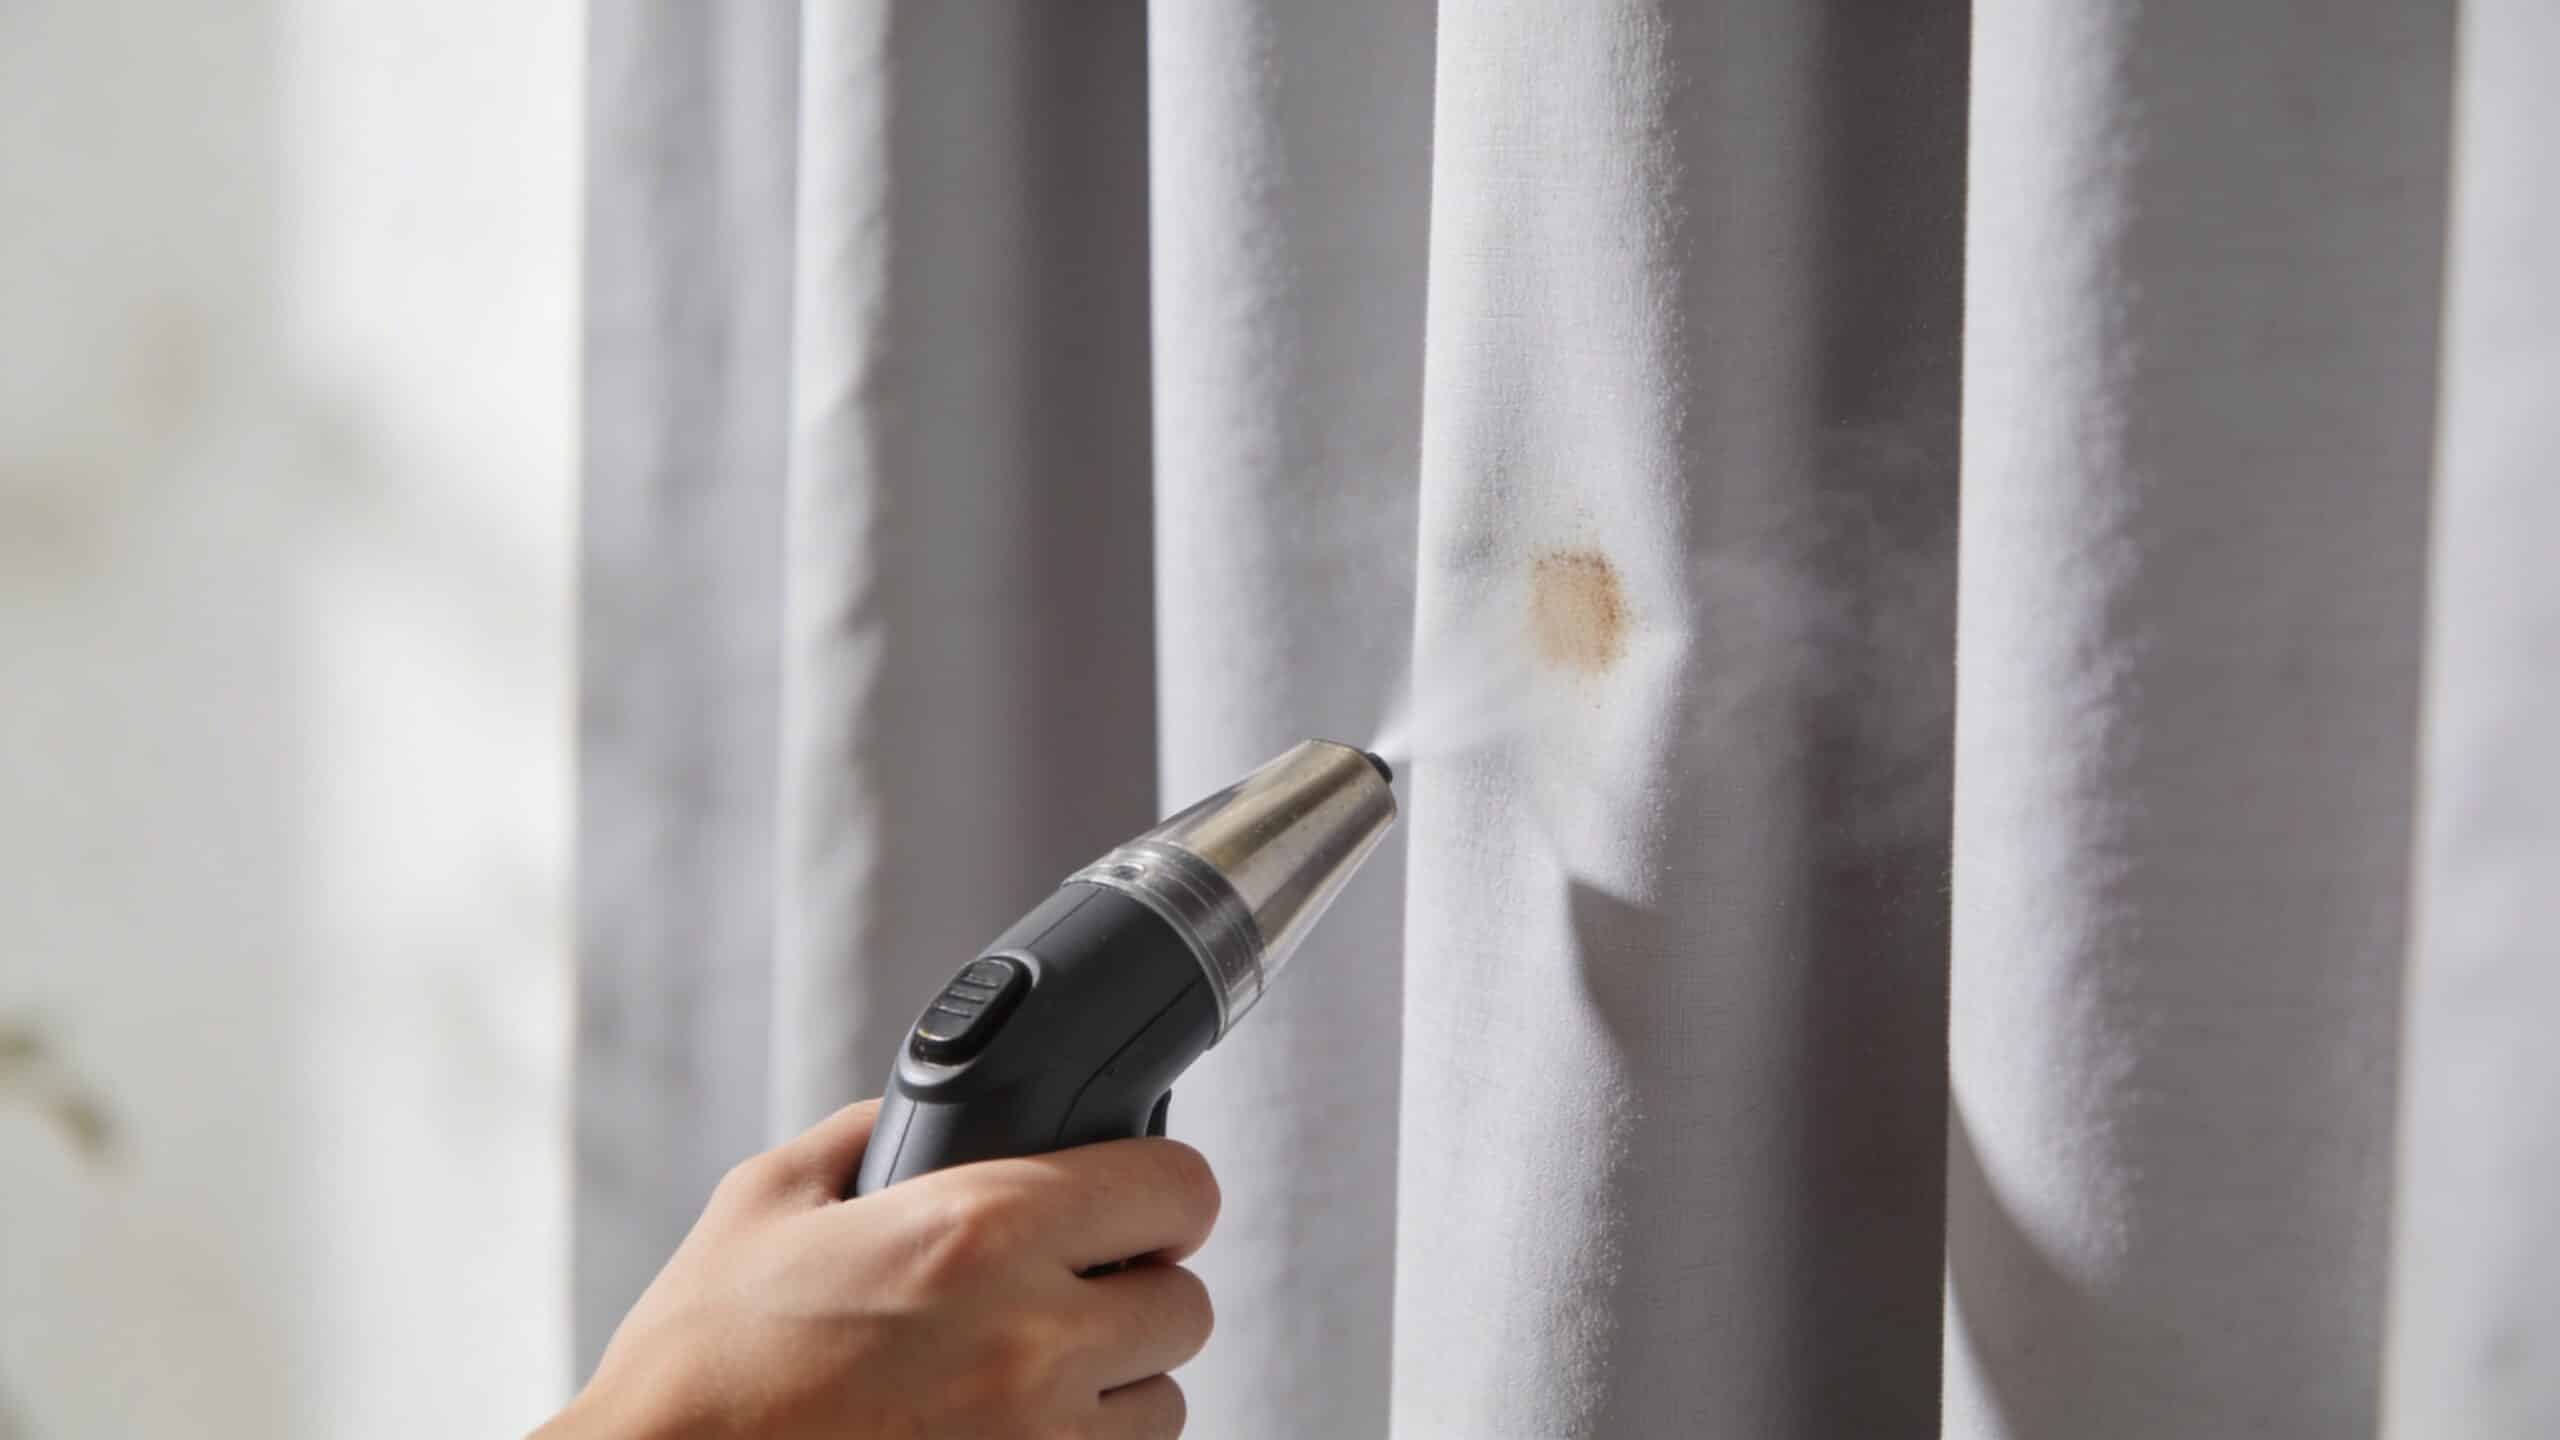
Steam freshens well, but it doesn’t solve every mark by itself. Light dust film usually lifts. Fixed stains are a different story. Water spots, oily fingerprints near the edge, and old splash marks often need pre-treatment before you even think about steaming.
That’s where a gentle approach matters. Curtains don’t respond well to aggressive scrubbing. You’re trying to loosen the stain without roughing up the fibres or creating a bigger ring around it.
A simple pre-treatment that works on many common fabrics
For polyester and cotton-blend curtains, baking soda is a practical first step on light staining. According to this curtain care guide on baking soda pre-treatment and drying with open windows, spot-treating stains with baking soda before steaming can boost stain lift by 75%, and proper drying with open windows is critical to prevent mildew.
Use a small amount on the stained area first. Let it sit briefly, then remove the residue gently before steaming. Don’t grind it into the fabric. Don’t over-wet it into a paste unless the fabric has already passed your patch test.
Good candidates for this method include:
- Dusty edge marks
- Light splash residue
- Faint handling marks
- Mild stale odour zones near the hem
Not good candidates include unknown stains, grease-heavy marks, mould spotting or anything that has already bled in colour.
Fixing the finish, not just the stain
Even when the fabric is clean, the final result can still look rough if the curtain dries unevenly. Many DIY jobs fail at the finishing stage. The cleaning is acceptable. The finish isn’t.
For a neater outcome:
- Straighten the pleats by hand: Do this while the curtain is still slightly warm.
- Let the panel hang freely: Don’t tie it back until fully dry.
- Check the hemline: If one area is still damp, leave airflow on it longer.
- Look side-on in daylight: Watermarks and patchiness are easier to spot from an angle.
If you care about shape and presentation, it also helps to understand broader fabric treatment habits across window coverings. The Drapery Company has a useful guide on achieving safe, spotless results when cleaning fabric window treatments that reinforces the same principle: treat the material gently, and respect its construction.
Drying is not optional
Melbourne’s cooler months can turn a decent steam clean into a mildew problem if the room stays closed up. Drying needs active help. Open windows when conditions allow. Use fans. Create airflow across the curtain, not just upward from the floor.
This matters most when:
- The curtain is lined
- The room gets little sun
- The window area already feels damp
- The fabric is heavy or layered
The curtain should feel dry all the way through, not just on the face fabric. If the back still feels cool and damp, keep air moving.
Dealing with lingering odour after steaming
If the curtain smells cleaner at first but mustiness returns as it dries, moisture has probably activated deeper contamination in the fabric or around the window area. In that situation, surface steaming won’t be enough on its own.
It’s often worth checking the broader room conditions too. If stale air keeps returning, this practical read on how to get rid of musty smell in house can help you work out whether the smell is coming from soft furnishings, poor airflow or hidden dampness nearby.
When DIY Is Not Enough The Professional Advantage
A handheld steamer has its place. It’s useful for light maintenance, mild odours and regular freshening on suitable curtains. But there’s a line where DIY stops being efficient and starts becoming risky.
That line usually shows up when the curtain is thick, lined, badly stained, affected by persistent odour, or slow to dry. It also shows up when the homeowner wants a real clean rather than a surface refresh.
Signs you should stop and call a professional
Some problems don’t respond well to home steaming at all. Others may respond a little, then come back because the cause is still sitting deeper in the fabric.
Watch for these situations:
- Heavy blackout or thermal curtains: These often need more heat penetration and better moisture control than a handheld unit can provide.
- Set-in staining: Old spills, pet accidents and traffic grime around sliding doors usually need stronger cleaning and extraction.
- Musty curtains in damp rooms: Steam alone can wake up the smell without removing what’s causing it.
- Visible mould or suspicious spotting: That needs a cautious professional approach, not repeated home steaming.
- Delicate or expensive fabric: One wrong pass can cost more than the cleaning would have.
What professional truck-mounted cleaning changes
The biggest difference isn’t just power. It’s the combination of heat, pressure and extraction.
Professional systems clean deeper into the fabric and remove far more of the loosened contamination and moisture. That’s why they tend to produce a cleaner finish and a faster return to normal use.
In practical terms, professional curtain steam cleaning in Melbourne is often the better choice when you need:
- A deeper hygienic clean
- Better odour removal
- Less risk of over-wetting
- Quicker drying
- A stronger result on heavier curtains
For many homes, that last point decides it. Thick curtains can hold moisture for too long if they’re treated lightly but repeatedly.
Why the superior extraction matters
DIY steamers mostly apply heat and moisture. They don’t extract in the same way a truck-mounted setup does. That’s why homeowners often say, “They looked better for a day, then the smell came back.”
Extraction changes the result because it pulls out what the steam has loosened. That includes suspended soil, residues and excess moisture. On heavier curtains, that can be the difference between a clean fabric and a damp one.
A deep clean isn’t just about what goes into the curtain. It’s about what comes back out.
It also makes more sense for whole-home fabric care
Once people start looking closely at curtains, they often realise the same room has dusty blinds, marked upholstery or neglected window fittings. Each surface needs a different method.
If you’re cleaning across multiple window treatment types, it helps to know where steam is appropriate and where dry detailing is better. For hard window coverings, this guide on how to clean plantation shutters is a good contrast because shutters need a completely different approach from fabric drapes.
For curtains specifically, professional assessment matters most when the fabric type, lining and room conditions make the job less predictable. If you want a closer look at what that process involves, this page on professional curtain cleaning methods gives a clear overview of why fabric type and moisture control matter so much.
Frequently Asked Questions About Steam Cleaning Curtains
Can all curtains be steam cleaned?
No. Some can be safely refreshed with careful steaming. Others shouldn’t be touched with a home steamer at all. Care labels, fabric construction, lining and age all matter. If the curtain is silk, velvet, heavily lined, coated, sun-damaged or unknown, caution is the right call.
Will steam cleaning shrink curtains?
It can, if the fabric isn’t suitable or if too much heat and moisture are applied. Natural fibres and poorly stabilised fabrics are the usual trouble spots. That’s why patch testing matters. It’s also why people get into strife when they assume every panel can be treated like a basic sheer.
Is steam cleaning enough to remove musty smells?
Sometimes, for mild stale odour caused by surface dust. Not always, for deeper mustiness linked to dampness, old contamination or heavy linings. If the smell returns after drying, the curtain probably needs deeper cleaning or the room itself has a moisture issue that needs attention.
Should curtains be taken down first?
In many cases, no. One of the practical benefits of cleaning curtains with steam cleaner is that the fabric can stay hanging, which reduces handling and helps maintain shape. That said, some curtains clean better off-site or under controlled professional conditions, especially if they’re delicate or heavily soiled.
Steam cleaning or dry cleaning?
It depends on the fabric and the goal. Steam cleaning is often a good option for refreshing suitable household curtains and improving how they look and smell. Dry cleaning is the safer route for fabrics that can’t tolerate moisture or heat. If the label calls for dry cleaning, follow it.
Can steam remove mould from curtains?
Surface steaming is not the right answer for mould-affected curtains. Mould is a separate issue from everyday dust and odour. If you see spotting or smell persistent dampness around the curtain and window area, treat it as a specialised problem. The safe response is assessment first, not repeated DIY passes.
How often should curtains be cleaned?
That depends on the room, the fabric and what the curtain is exposed to. Homes with pets, traffic dust, open windows, cooking exposure or allergy concerns usually need more regular attention. As a practical habit, light maintenance between deeper cleans helps prevent the fabric from getting to the point where it feels heavy, stale or discoloured.
If your curtains need more than a light refresh, Right Price Carpet Cleaning offers professional steam cleaning across Greater Melbourne using truck-mounted equipment that delivers deeper cleaning, faster drying and a cleaner finish on fabric surfaces. For homeowners, renters, property managers and NDIS clients who want reliable service without the guesswork, they’re a solid local option.
Recent Comments