
You’re usually not thinking about shower grout sealer until the grout starts looking tired. The corners go dark, the joints stay damp longer than they should, and the bathroom picks up that stale smell that says moisture is hanging around where it shouldn’t. In Melbourne, that’s common. Generic advice from overseas often tells people to seal and forget about it for years. That’s not how most local showers behave.
The problem usually isn’t just the sealer. It’s the combination of humidity, daily steam, soap residue, and grout that was never cleaned thoroughly enough before sealing. A sealer can only protect what it can soak into. If the grout is loaded with residue or still holding moisture, the job won’t last.
Why Sealing Shower Grout is Non-Negotiable in Melbourne
Melbourne showers cop a hard life. Even a neat bathroom can have grout lines that are absorbing moisture every day. That’s why people often notice the same pattern. The tiles still look decent, but the grout starts showing black marks, patchy discolouration, or a chalky crust near the floor line.
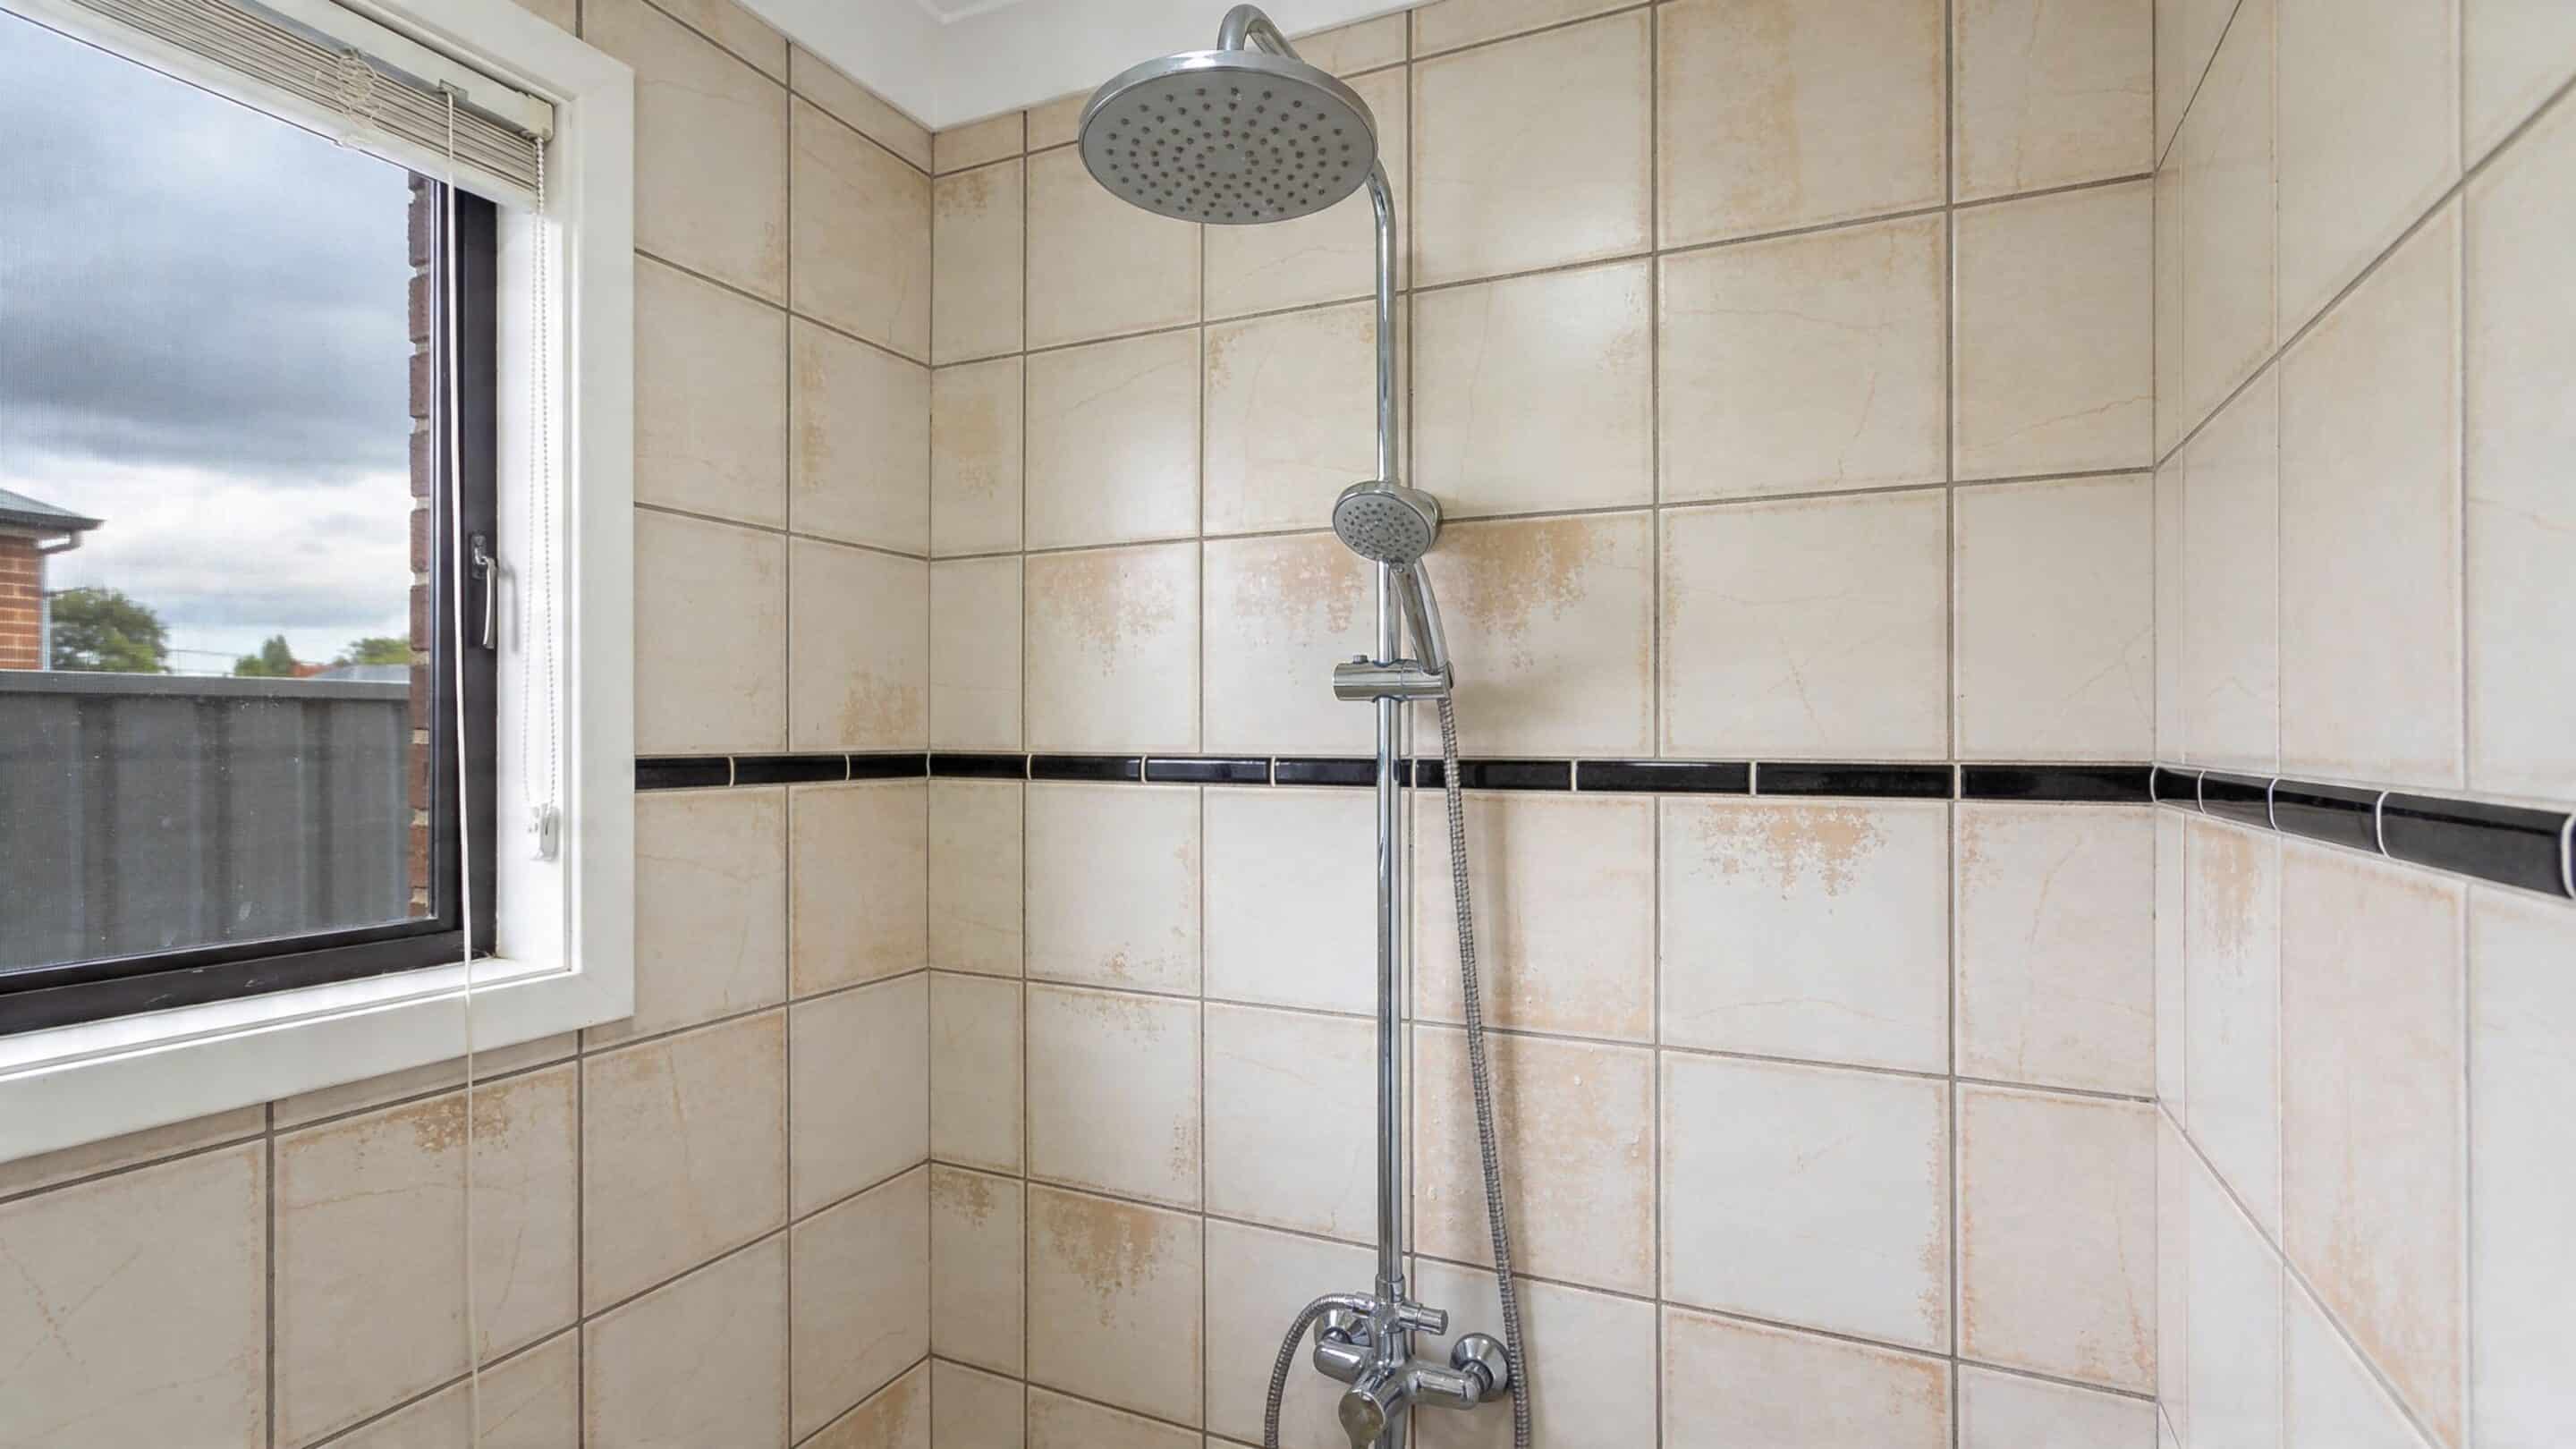
Melbourne humidity changes the timeline
A lot of online advice says resealing can wait 1 to 3 years, but Melbourne’s conditions shorten that window. Data cited in this review of grout sealing myths notes Melbourne’s average annual humidity sits at 60 to 70%, and in high-use bathrooms that can push resealing into the 6 to 12 month range. The same source also cites a 2024 CHOICE Australia review of 15 sealers, where only 40% maintained water repellency after 6 months simulated exposure in humid conditions.
That lines up with what happens in real homes. A busy family shower used morning and night doesn’t age like a spare ensuite. Steam sits on the surface, soap film builds up, and the grout never gets a proper chance to stay dry for long.
It’s not just about appearance
Once water starts getting into grout consistently, the problem moves past cosmetics. Dark grout lines are one warning sign. Loose joints, powdery grout, and moisture migration are the bigger issue. If water keeps travelling beyond the shower area, you can end up dealing with damaged plaster, swollen skirting, or leaks showing up in rooms below. If you’re already seeing signs beyond the bathroom itself, this guide on shower leaks through the ceiling gives a useful overview of what that can look like.
Practical rule: If shower grout stays dark long after the shower is off, don’t assume it only needs a scrub. It may already be taking in water too easily.
Why mould keeps returning
Homeowners often say, “I cleaned it last week and it’s black again already.” That usually means the grout is still porous and contaminated below the surface. You can improve the look temporarily, but if moisture keeps feeding the problem, the stains come back.
If you’re dealing with recurring bathroom growth, it helps to understand the cleaning side before sealing. This guide on how to eliminate bathroom mold explains why the source of moisture matters more than surface wiping.
Sealing matters because it turns grout from a sponge into a protected surface. In Melbourne, that isn’t optional maintenance. It’s part of stopping a damp shower from becoming a repair job.
Choosing Your Weapon Selecting the Right Grout Sealer
A lot of shower sealing jobs go wrong before the bottle is even opened. The wrong product gets picked, the label promises “wet area protection,” and six months later the grout is still holding moisture, marking up, or growing mould again around the corners.
In Melbourne, that choice matters more than generic DIY advice suggests. Bathrooms here often stay damp for longer, especially in cooler months and in homes with weaker ventilation. A sealer for a splashback or a dry tiled floor is not automatically suitable for a shower.
For shower grout, a penetrating sealer is usually the better option. It sinks into the grout and helps reduce water uptake below the surface. That is what you want in a wet area. A surface coating can look protective on day one, but inside a working shower it often wears unevenly, turns patchy, or starts failing at the joints first.
Penetrating versus topical
Topical sealers still have uses on some decorative tiled surfaces, but they are rarely my first pick for a shower cubicle. Shower grout needs protection that stays in the grout, not a film that sits on top and takes the daily punishment.
| Sealer Type | How it Works | Best For | Pros | Cons |
|---|---|---|---|---|
| Penetrating sealer | Soaks into grout pores and lines the capillaries below the surface | Shower walls, shower floors, wet bathroom areas | Keeps a more natural look, better for moisture-prone areas, usually less likely to peel | Prep has to be right or it won’t penetrate properly |
| Topical sealer | Forms a coating on the surface of grout | Decorative areas or low-moisture zones | Can change appearance quickly and give visible coverage | Poor fit for many showers, can wear unevenly, can leave a patchy finish if applied badly |
Water-based or solvent-based
After that, the next decision is usually water-based or solvent-based. Both can work, but neither fixes poor prep, damp grout, or contamination left in the joints.
Water-based products are often easier to use in a small bathroom and usually have less odour. Solvent-based products can penetrate well, but they need careful handling and good ventilation. The label matters less than the fit for the job. For a shower, the safer bet is a premium penetrating sealer made for wet areas, especially one based on silane or siloxane chemistry.
Those products are popular for a reason. They are designed to soak in rather than sit on the surface, which suits shower grout far better in a humid Melbourne bathroom.
What actually decides whether the sealer lasts
Product choice is only half the job. I’ve seen expensive sealers fail because the grout still had soap residue, old cleaner build-up, or moisture trapped below the surface. That is why professional pre-cleaning makes such a difference. Steam cleaning or deep grout cleaning removes what normal scrubbing leaves behind and gives the sealer a clean path into the joint.
If the grout still looks dark, chalky, or stained, sort that out first with a proper shower grout cleaning process. Sealer protects clean, sound grout. It does not rescue failing grout.
Check these points before you buy:
- Grout condition: Cracked, loose, or missing grout needs repair first.
- Tile type: Porcelain, ceramic, natural stone, and textured feature tiles all behave differently around the grout line.
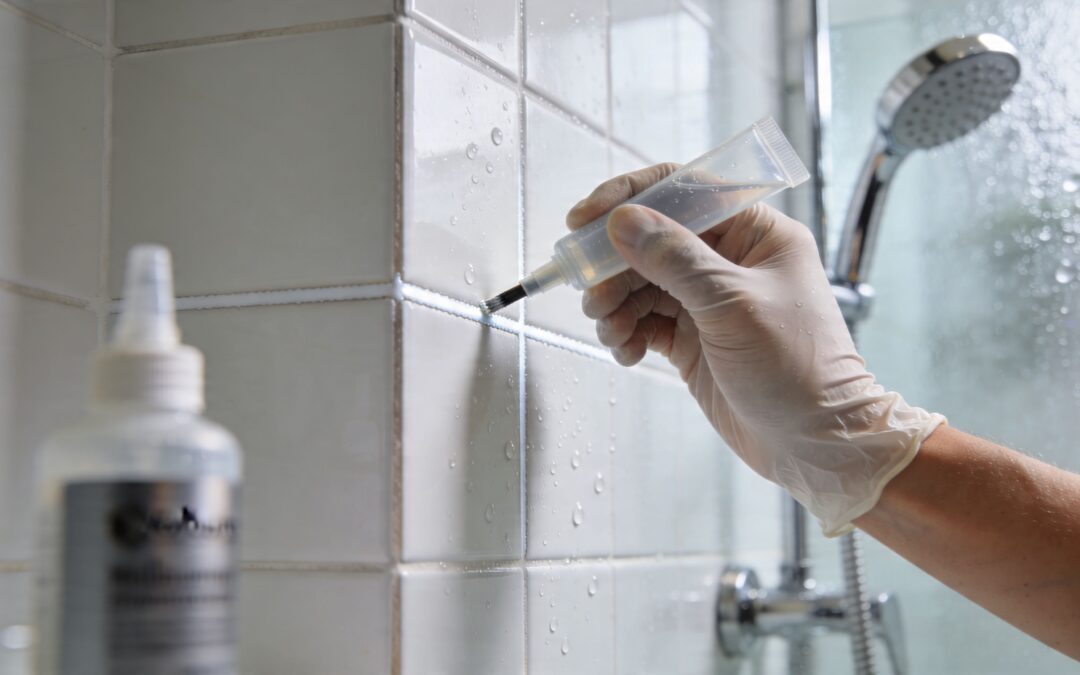
- Application control: In tight shower recesses, a brush applicator is often more reliable than a spray.
- Expected finish: Penetrating sealers are meant to protect. They will not hide staining or make old grout look new.
Choose a shower grout sealer based on performance in a wet bathroom, not shelf claims. In most Melbourne showers, the best result comes from a penetrating product applied after the grout has been cleaned properly and dried fully. That is what gives the sealer a fair chance to last.
The Foundation Essential Preparation Before You Seal
A shower can look freshly cleaned in the morning and still be the wrong candidate for sealer that afternoon. In Melbourne bathrooms, that happens all the time. Humid air, limited ventilation, and old soap residue leave grout looking tidy on the surface while the joints still hold contamination and moisture underneath.
Sealing only lasts as well as the surface underneath it.
Clean for the grout, not for the tile face
Tile faces usually come up first. Grout does not. That is where DIY sealing jobs often come unstuck, especially in older Melbourne homes where showers stay damp for hours after use.
Sealer needs open, clean pores in the grout joint. If soap scum, body oils, mineral residue, or mould are still present, the product either sits too close to the surface or locks in contamination you should have removed first. The result is patchy absorption, poor water beading, and a finish that seems to fail far too early.
If the grout is already stained or you are not sure what a proper clean looks like, this guide on how to clean shower grout is a useful place to start.
What proper prep actually involves
Good prep is more than a quick scrub and a towel dry. In practice, it usually means:
- Clear loose debris first. Remove dust, hair, flaky grout, and anything else sitting in the joints.
- Match the cleaner to the problem. Soap scum, mould, and efflorescence do not respond well to the same product.
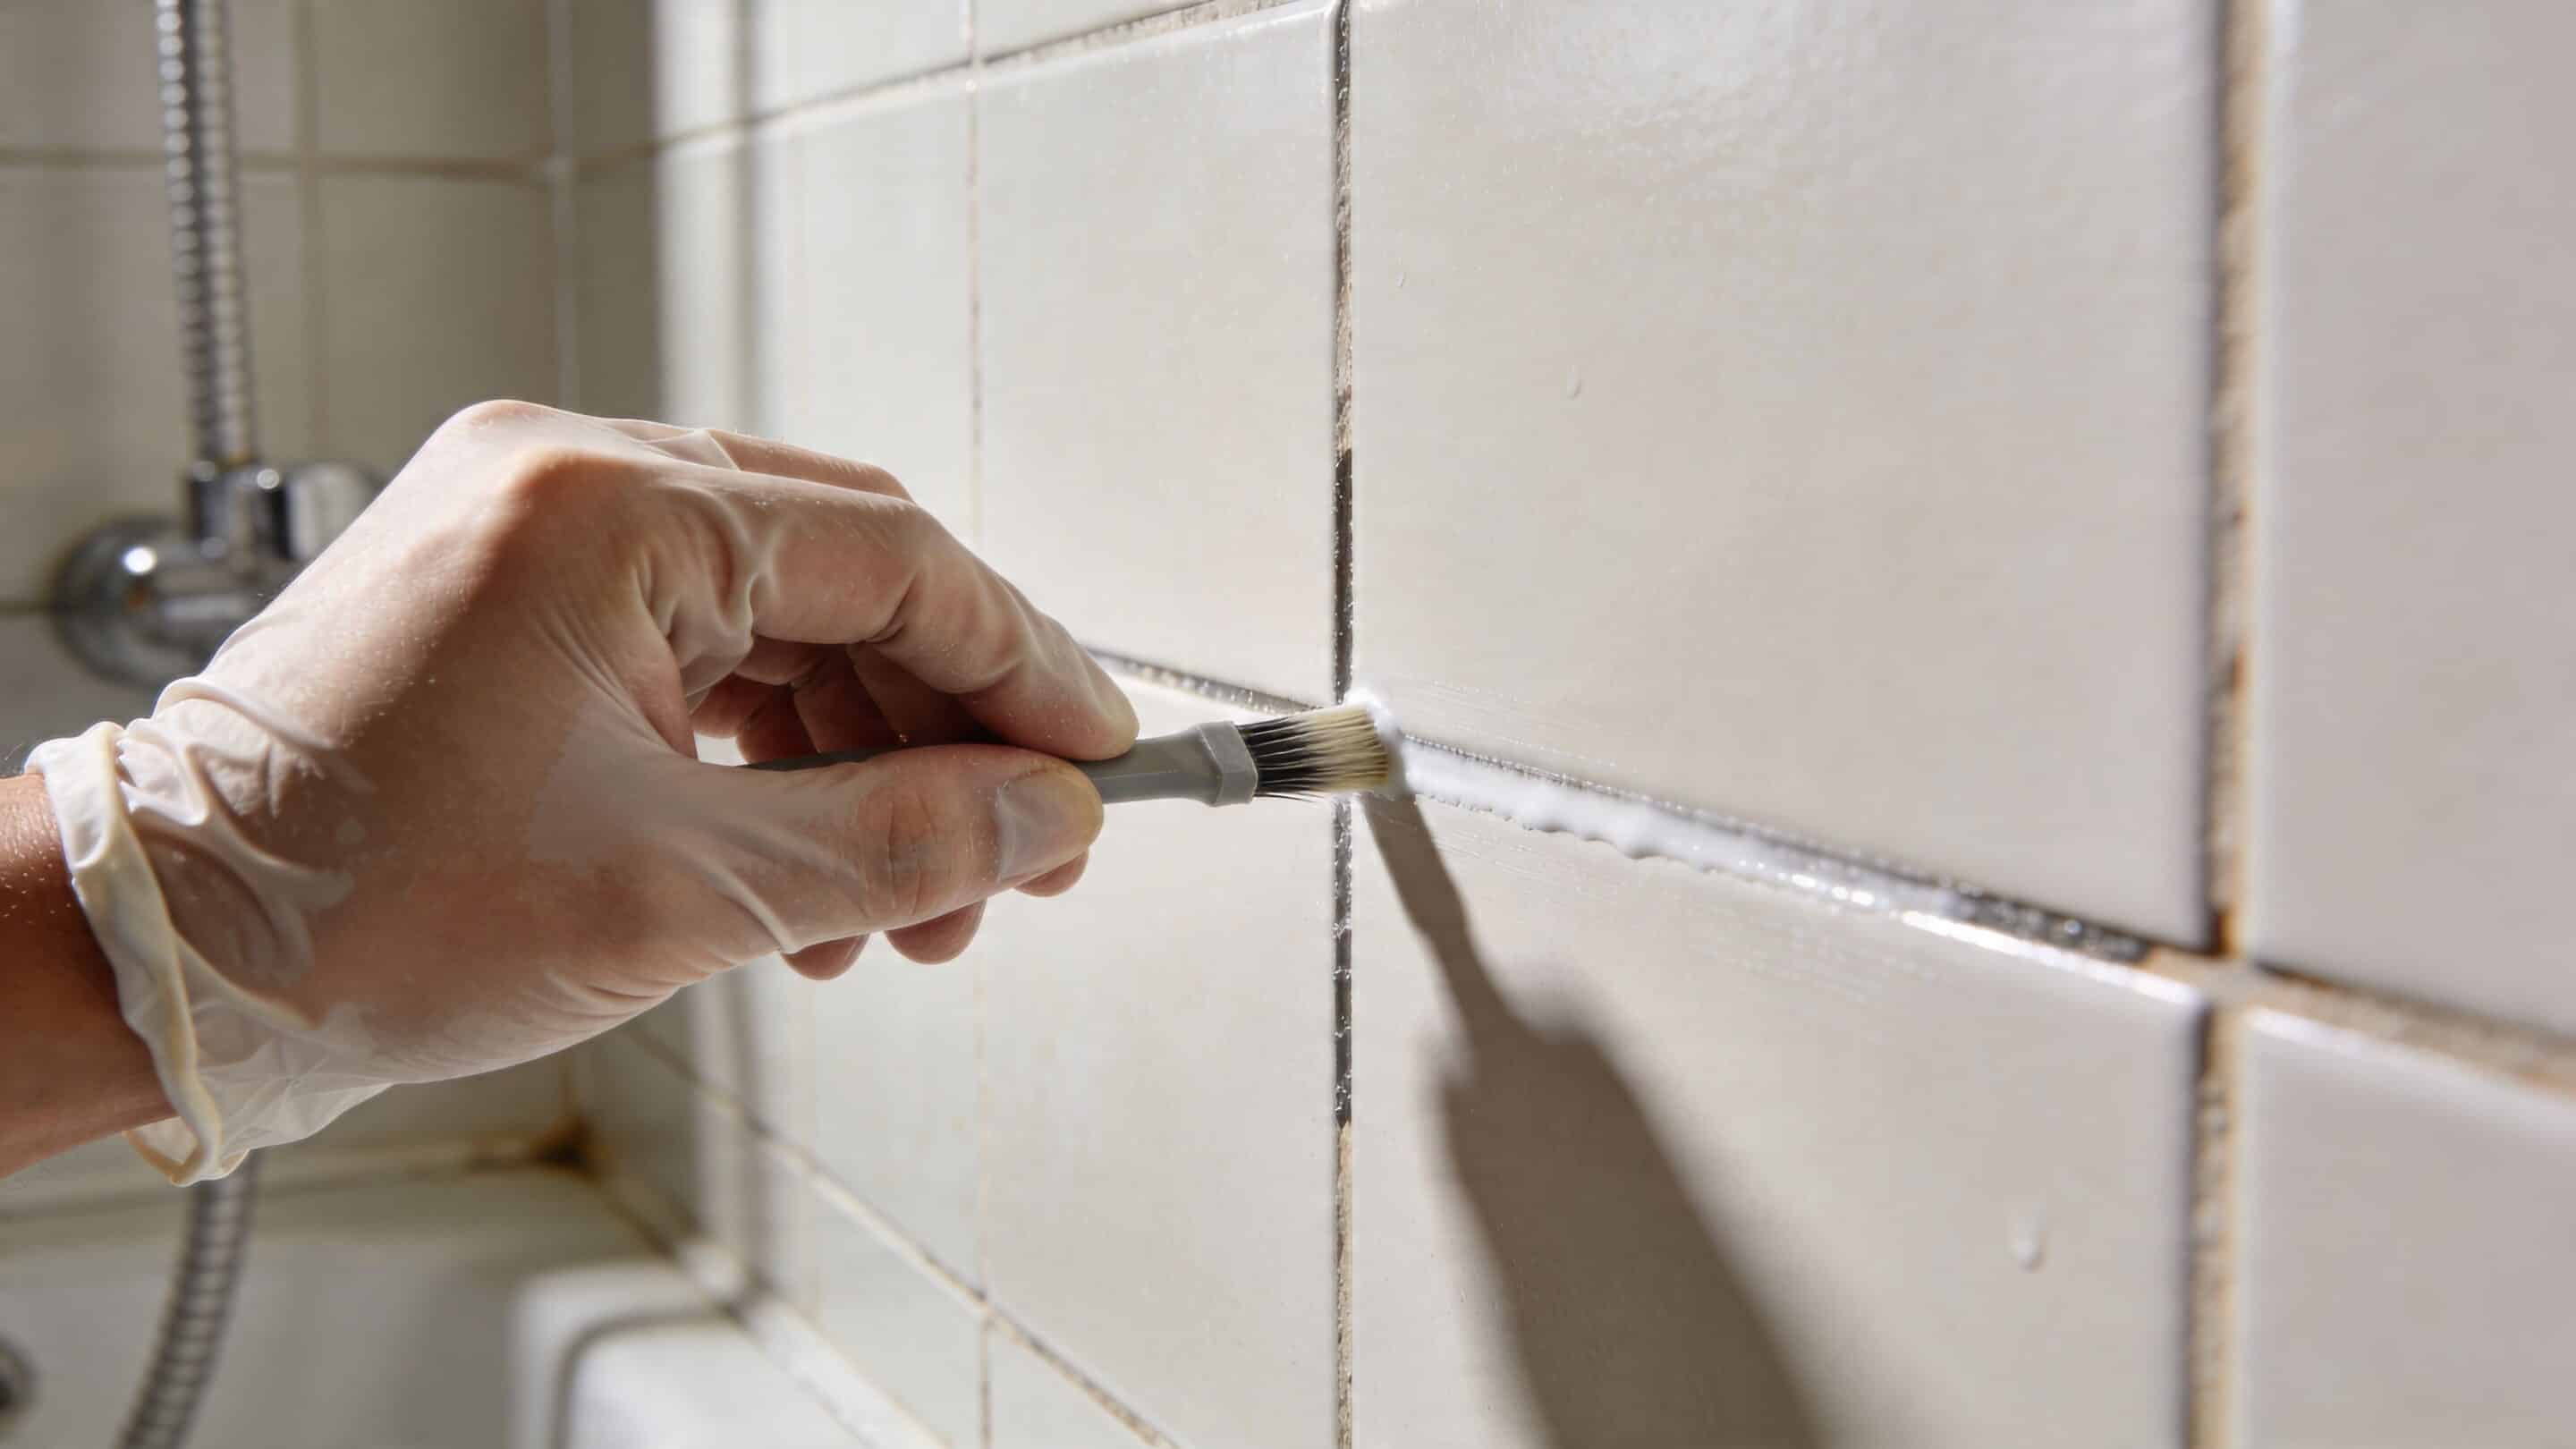
- Work the grout lines directly. A nylon grout brush gives better pressure and control than a sponge or cloth.
- Rinse properly. Cleaner residue can block absorption just as easily as grime can.
- Dry the area fully. This is the step that decides whether the sealer penetrates or disappoints.
Professional pre-cleaning often makes the difference here. Steam cleaning or deep grout cleaning can pull out residue from the pores of the grout, not just from the surface. In humid Melbourne bathrooms, that extra step gives the sealer a much better base to bond with.
Dry grout means truly dry
Freshly rinsed grout is rarely ready to seal the next day if the bathroom has poor airflow. South-facing bathrooms, small ensuites, and showers used by a full household can stay damp longer than people expect.
As a practical rule, grout should look even in colour and feel dry right through the joint, not just on top. If sections still appear darker or feel cool to the touch, wait longer. Use extraction fans, open windows where possible, and keep the shower out of use until the grout has dried properly.
I see this mistake often. The surface feels dry, the sealer goes on, and then moisture below the surface interferes with penetration. That usually shows up as uneven coverage, weak water resistance, or a seal that fades quickly.
Prep is the part people want to rush. It is also the part that gives the sealer a fair chance to last in a Melbourne shower.
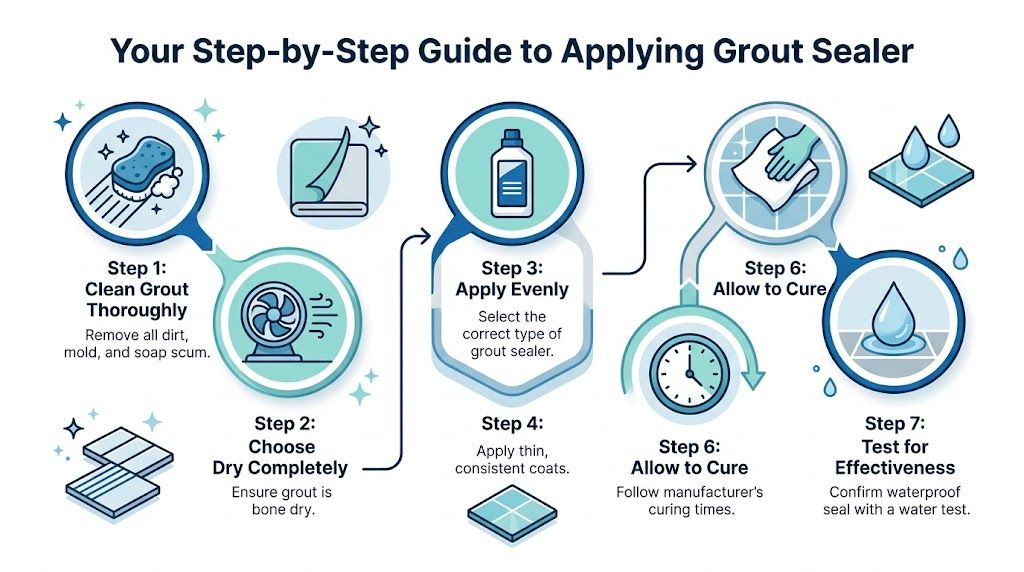
Your Step-by-Step Guide to Applying Grout Sealer
You can do every prep step properly and still get a poor result if the sealer goes on too fast, too heavy, or sits too long on the tile face. In Melbourne bathrooms, that matters more than people expect. Humid air slows drying, and any residue left behind tends to show up later as haze, streaking, or patchy protection.
Step 1 Work in sections you can actually manage
Seal one small area at a time. A single wall panel, half a shower floor, or one niche area is usually enough. That gives you time to apply evenly, watch how the grout absorbs, and wipe the tile before residue starts to dry.
Large sections cause most DIY problems. The first area starts curing while the last area is still being coated.
Step 2 Use an applicator that gives control
A small brush, bottle-tip applicator, or wheel applicator gives cleaner results than broad spraying in most showers. It is slower, but slower is often better here. You keep the product on the grout line instead of the tile face, chrome trim, glass, and silicone joints.
If you want a solid reference on technique, this guide on how to seal tile grout perfectly covers the basic application sequence well.
Start at the highest wall sections and work downward. Drips are easier to catch that way.
Step 3 Wet the grout line evenly
Run the applicator along the grout joint with enough product to wet the surface consistently. The grout should look fed, not flooded. Puddling wastes sealer and creates more wiping work.
Focus carefully on the areas that take the most punishment:
- Shower floor joints
- Lower wall lines
- Corners near the base
- Around niches, shelves, and soap ledges
These parts usually stay damp longer in Melbourne showers, especially in ensuites with weak ventilation.
Step 4 Keep the sealer on the grout for the product’s dwell time
Different sealers have different instructions, so follow the label for how long the grout should stay wet before wiping. Some joints will absorb quickly and need another light pass to keep coverage even. Older repairs and patchy grout often behave that way.
Careful observation is key. If one section drinks the product immediately and another stays shiny on top, the porosity is uneven. Treat each area based on what it is doing, not by forcing the whole shower into the same timing.
Step 5 Wipe tile faces thoroughly
Once the dwell time is up, wipe the tile surface with a clean microfibre cloth. Change cloths as they load up. Smearing sealer around with one damp rag is how haze gets left behind.
Smooth porcelain shows residue quickly. Textured tiles can hide it until the bathroom dries and light hits the surface from the side. Check from more than one angle before moving on.
Step 6 Recoat only where the grout needs it
Some grout lines will take one pass well. Others, especially older or more porous joints, may need a second light application. Apply that second coat while staying controlled. More product does not automatically mean better protection.
If the sealer is sitting on the surface instead of soaking in, stop there and wipe it off. The grout has taken what it can take.
Step 7 Inspect the whole shower before you walk away
Do a slow final check around trims, corners, tapware, and tile edges. Look for shiny spots, runs, or missed joints. A proper sealing job should leave the grout protected without leaving the tiles looking coated.
The neatest jobs usually come from a steady pace, not a fast one.
Step 8 Leave the shower out of use
Once application is finished, keep the area dry and untouched for the full cure period listed on the product. In humid Melbourne conditions, giving the sealer that uninterrupted time matters. Cutting that short is one of the quickest ways to waste a good prep job, especially after proper deep cleaning or steam cleaning has given the grout a clean surface to absorb into.
Patience is a Virtue Curing Testing and Maintenance
A freshly sealed shower can look finished long before it’s ready for water. That catches a lot of people out. The grout surface may feel dry, but the protection isn’t fully developed yet.
Respect the cure time
After application, the shower needs to stay completely dry for 72 hours, based on the curing guidance in this grout sealing guide. If water hits the grout too early, the result can be patchy repellency and a shorter service life.
That means no shower use, no rinsing walls down, and no splash exposure from nearby cleaning. In a family bathroom, it’s usually easier to plan the job before a weekend away or when there’s another bathroom available.
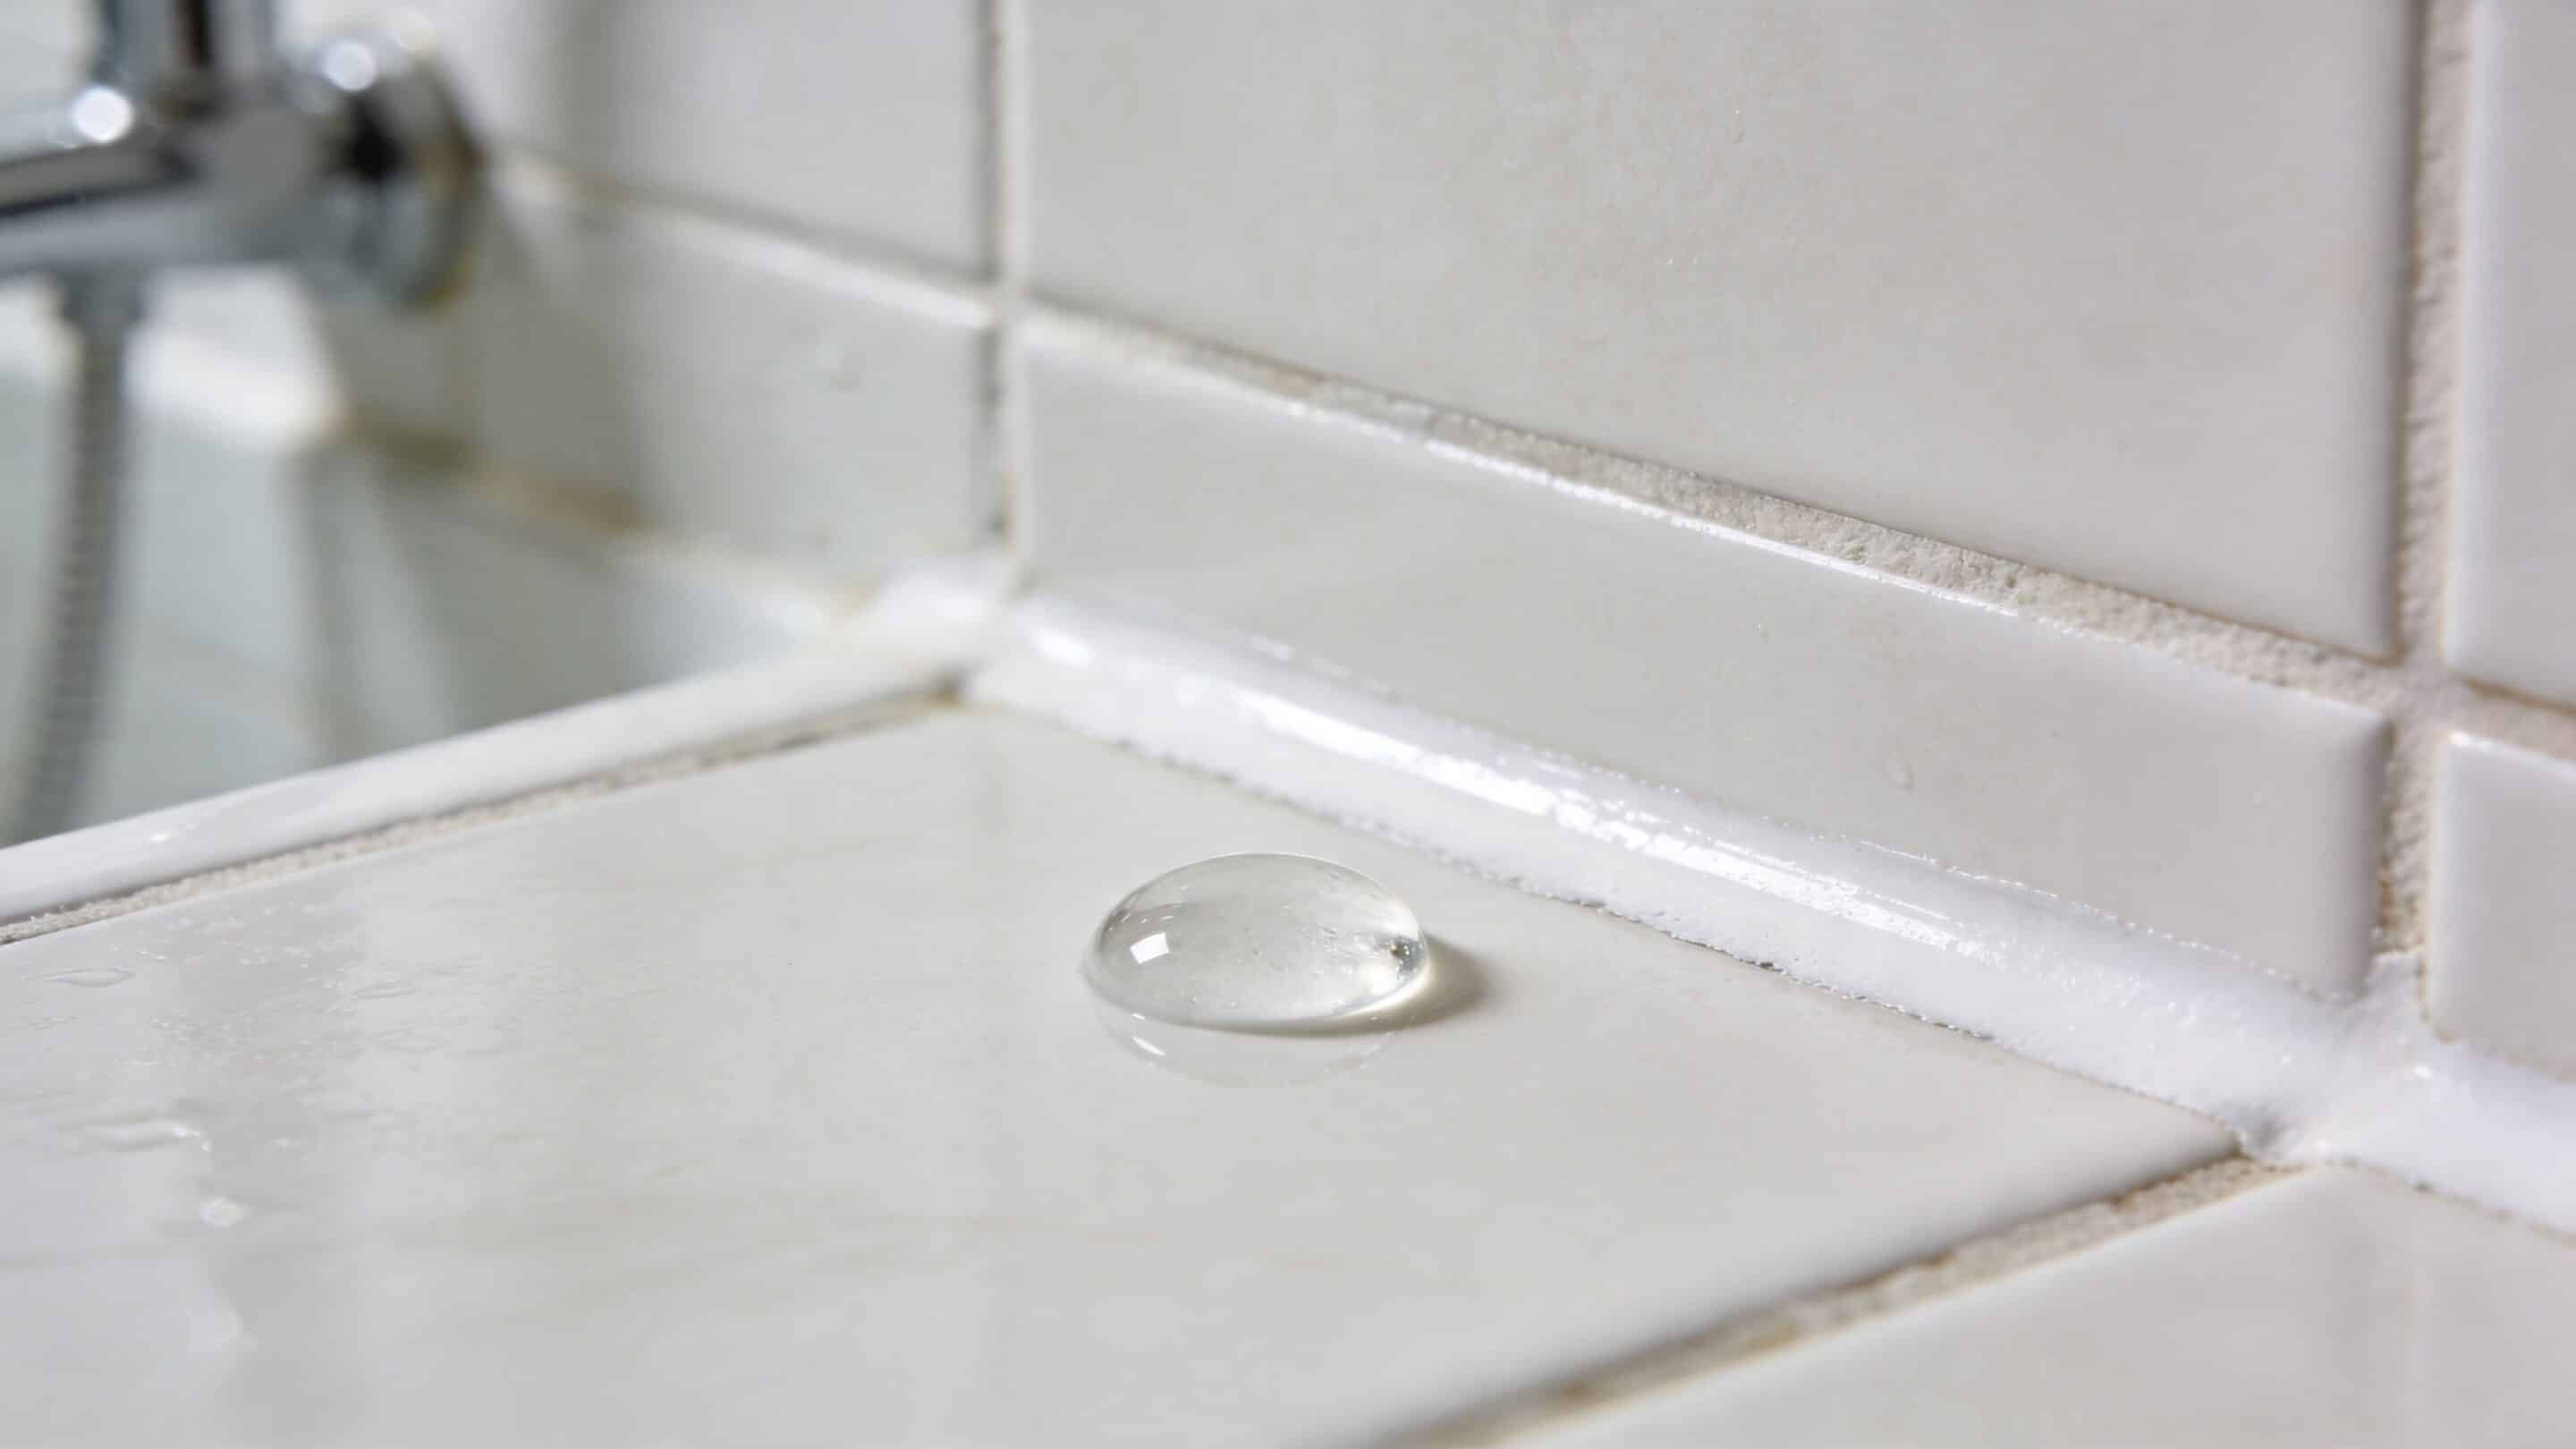
Test it properly
Once curing is complete, do a simple water bead test. Put a few droplets on several grout lines, especially on the floor and lower wall sections. You’re checking whether the water sits on the surface instead of soaking in quickly.
Signs the seal is doing its job:
- Water beads on the grout
- Droplets remain visible instead of darkening the joint immediately
- Results are consistent across multiple areas, not just one patch
If one zone absorbs faster than the rest, that area may need attention. Spot variation happens, especially in older showers with mixed wear.
Maintenance is where Melbourne homes differ
In high-use Australian showers, experts recommend reapplying penetrating shower grout sealer every 6 months to prevent weakening and mould growth, because unsealed cement-based grout can reach 80 to 90% porosity, and regular sealing can extend grout lifespan from 5 years to over 15 years according to this shower grout sealer maintenance guide.
That shorter cycle surprises people who’ve been told sealing is a one-off or rare task. In Melbourne, that advice often doesn’t hold up in a busy bathroom.
The right maintenance interval depends less on the calendar and more on use, ventilation, and how fast water stops beading on the grout.
Keep the new seal alive
A few habits help the sealer last longer:
- Use gentler cleaners: Harsh acidic products can wear at protection and leave the grout looking tired again.
- Reduce standing moisture: A quick wipe or squeegee after use helps.
- Watch the floor lines: They usually fail before upper wall joints.
- Retest rather than guess: If water soaks in, it’s time to act.
A shower grout sealer isn’t permanent. It’s maintenance. The upside is that routine resealing is far easier than dealing with failed grout, recurring mould, or replacement work.
When DIY Goes Wrong Common Sealing Mistakes to Avoid
Most failed sealing jobs don’t fail because the product was terrible. They fail because the prep, timing, or application was off. The good news is that the mistakes are predictable.
The usual trouble spots
Sealing dirty grout is the classic one. If soap film or grime is still in the joints, the sealer can’t penetrate properly. It ends up sitting too close to the surface, and the protection is uneven.
Sealing damp grout is next. People clean on Saturday morning and seal on Saturday afternoon. That shortcut causes a lot of disappointment because trapped moisture blocks absorption.
Using too much sealer is another common problem. More product doesn’t mean more protection. It usually means residue on the tile face, sticky patches, and haze.
Here are the mistakes I see most often:
- Skipping repairs: Sealer won’t fix grout that’s already breaking down. If joints are loose or missing, deal with that first. For showers with severe damage, tile grout removal may be the more sensible starting point.
- Ignoring wipe-off time: Leave excess sitting too long and you’ll be scrubbing the tile surface later.
- Rushing shower use: If the bathroom goes back into service before cure is complete, the result often underperforms.
- Treating all areas the same: Floor grout, repaired spots, and older sections can absorb differently.
The simple fix
Slow the job down. Clean deeper than you think you need to. Let the grout dry fully. Apply with control. Wipe properly. Then leave it alone long enough to cure.
That’s not glamorous advice, but it’s what works.
Know Your Limits When to Call a Professional
Some showers are good DIY candidates. Some aren’t. If the grout is basically sound, only lightly stained, and the bathroom can stay out of action while the sealer cures, you can often manage it yourself.
A professional becomes the smarter option when the grout is heavily contaminated, patchy, crumbling, or affected by deep-set mould. The same applies when the shower has a lot of textured tile, large surface area, or old residue from previous products. In those cases, prep is the whole job.
For tile-and-grout clients in Greater Melbourne, data shows that professional prep makes a significant difference. Post-steam cleaning with high-pressure extractors, grout is optimally prepared, allowing sealers to achieve up to 98% stain resistance, compared with 45% for some single-coat DIY applications, according to this grout sealing process reference.
That gap matters because sealing only lasts as well as the surface underneath it. Deep pre-cleaning removes the contamination that ordinary scrubbing leaves behind. If you want the sealer to bond and last, the grout has to be thoroughly clean, not just visually improved.
If your shower grout still looks dark after repeated cleaning, if water is already getting beyond the shower area, or if you want the job done properly the first time, it makes sense to bring in a specialist.
If your shower grout needs more than a quick scrub, Right Price Carpet Cleaning can help with professional tile and grout cleaning across Greater Melbourne. Their truck-mounted steam cleaning system is built to remove deep soap scum, grime, and embedded contamination so grout is properly prepared before sealing. If you’d rather skip the trial and error and get a longer-lasting result, they’re a practical team to call.
Recent Comments